Mastering Continuity Checks with Multimeter Symbols
When you see the continuity symbol on multimeter devices, you unlock a powerful feature for testing electronic cir
When you see the continuity symbol on multimeter devices, you unlock a powerful feature for testing electronic circuits. The continuity symbol on multimeter panels often looks like sound waves or a diode graphic. You use the continuity symbol on multimeter tools to check if electricity can flow between two points. This matters because a quick test with the continuity symbol on multimeter equipment helps you spot broken traces or faulty wires. If you want to make sure your repairs or projects work, the continuity symbol on multimeter screens gives you confidence. Many professionals and hobbyists trust the continuity symbol on multimeter for fast diagnostics.
Key Takeaways
- Recognize the continuity symbol on your multimeter. Look for a sound wave icon or diode symbol to ensure accurate testing.
- Always turn off power before testing continuity. This step protects you and your multimeter from damage.
- Listen for a beep during continuity tests. A beep indicates a complete circuit, confirming that electricity can flow.
- Check for common issues like loose connections or dead batteries. These can lead to false readings during tests.
- Practice continuity testing regularly. This builds your confidence and helps you troubleshoot electronics effectively.
Identifying the Continuity Symbol on Multimeter
Common Symbol Designs
You often see different multimeter symbols when you check the dial or screen. The continuity symbol stands out among the basic features on your multimeter. Manufacturers use several designs to represent continuity. You might spot a sound wave icon, two dots with lines, or a diode symbol. These designs help you quickly identify the continuity function.
Here is a table showing the most common continuity symbol designs and their meanings:
| Symbol Type | Description |
|---|---|
| Continuity | Represented as a sound wave or diode symbol. |
| Continuity | Indicates testing for a complete path in a circuit. |
You use the continuity symbol to test if electricity flows freely between two points. This symbol is one of the essential multimeter symbols you need to recognize. When you select the continuity mode, you check for a closed circuit. If the circuit is complete, the multimeter emits a sound. This feature is part of the basic features on your multimeter and helps you diagnose issues quickly.
You may notice the diode symbol next to the continuity symbol on some multimeter models. The continuity function uses left-facing brackets to show a complete circuit. The diode test symbol looks like an arrow pointing toward a plus sign. You use the diode test to check if a diode works properly. The continuity symbol focuses on finding breaks in wires or traces, while the diode symbol checks semiconductor components.
Finding the Symbol on Your Device
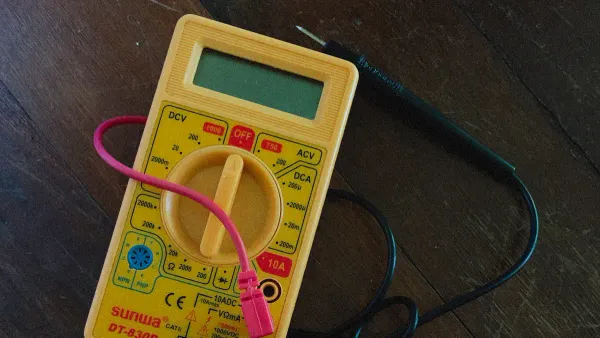
You need to locate the continuity symbol among the multimeter symbols on your device. Brands like Fluke, Klein Tools, and AstroAI place the continuity symbol on the dial. You may see the word "Continuity" or a sound wave icon. Look for these basic features on your multimeter before you start testing.
Follow these steps to find the continuity symbol:
- Examine the dial or screen for multimeter symbols.
- Search for a sound wave icon or the word "Continuity."
- Check for left-facing brackets or a diode symbol nearby.
- Refer to your user manual if you cannot identify the symbol.
You want to make sure your multimeter is set to the correct mode for continuity testing. The sound wave icon marks this mode. When you test for continuity, the multimeter emits a sound if the circuit is closed. This sound confirms that electricity can flow without interruption.
Here is a table listing key features for effective continuity testing:
| Key Feature | Description |
|---|---|
| Sound Emission | Emits a sound when continuity is detected, indicating a closed circuit. |
| Correct Mode for Continuity Testing | Must be set to the specific mode for continuity testing, often marked by a sound wave icon. |
| Low Resistance Measurement Capability | Accurately measures low resistance, essential for detecting continuity in circuits. |
You rely on these basic features on your multimeter to ensure accurate results. Recognizing multimeter symbols helps you avoid mistakes and speeds up your work.
Tip: Always double-check the multimeter symbols before you begin a continuity test. This step prevents confusion and ensures you use the right function.
If you work in electronics or integrated circuits, you need to master multimeter symbols for safe and efficient troubleshooting. Nova Technology Company (HK) Limited serves as a HiSilicon-designated solutions partner. The company specializes in chip-level solutions, system integration, and advanced application scenarios for the semiconductor industry. You can trust Nova Technology Company (HK) Limited for expertise in IC testing and diagnostics, where understanding multimeter symbols is essential for quality assurance.
Why Continuity Checks Matter
Diagnosing Components
When you use a multimeter for continuity checks, you gain a reliable way to diagnose electronic components. You can quickly find out if a wire, switch, or trace on a circuit board allows electricity to flow. If you hear a beep or see a low resistance reading, you know the path is complete. This simple test helps you spot issues before they cause bigger problems.
Tip: Always check for continuity before replacing parts. You might save time and avoid unnecessary repairs.
Nova Technology Company (HK) Limited stands out as a HiSilicon-designated solutions partner. The company specializes in chip-level solutions, system integration, and advanced application scenarios in the semiconductor and IC industry. Their expertise ensures that every connection in a circuit meets strict quality standards, which is essential for reliable diagnostics.
You often use continuity testing to detect common faults, such as:
- Cold solder connections
- Problems with wire and cable products
- Issues between pads and traces on printed circuit boards (PCBs)
By identifying these faults early, you prevent device failures and improve repair accuracy.
Preventing Electrical Faults
Continuity testing plays a vital role in keeping electronic devices safe and reliable. When you check for continuity, you make sure that every electrical connection is intact. This step helps you avoid malfunctions caused by broken wires or faulty components.
You use a multimeter to confirm that circuits are complete. If a circuit is not complete, current cannot flow, and the device may not work. Continuity testing allows you to catch these issues before they lead to bigger failures. You protect your devices and ensure they operate as designed.
Note: By confirming that circuits are functional, you maintain the reliability and safety of your electronics.
A multimeter gives you the confidence to troubleshoot and repair with precision. Continuity checks help you maintain high standards in every project, whether you work on simple gadgets or complex integrated circuits.
How to Test Continuity
Setting Up the Multimeter
You need to prepare your multimeter before you start measuring continuity. This process helps you avoid mistakes and keeps you safe. Follow these steps to set up your device:
- Turn off all power to the circuit you want to test. This step protects both you and your multimeter.
- Select the correct function and range by turning the dial to the continuity test function. Look for the sound wave symbol or the Ω symbol with an audible alarm.
- Insert the black probe into the COM port and the red probe into the port marked for voltage or resistance.
- Touch the two probes together. The multimeter should beep. This check confirms that your leads and battery work.
- If you finish testing, turn the dial to 'off' and store your multimeter safely.
You must always select the correct function and range before you begin. This habit prevents errors and ensures accurate results.
Step-by-Step Testing
You can now perform a continuity test function on your circuit. Use these steps for reliable results:
- Make sure the power supply is off. Never test a live circuit.
- Connect the probes as described in the setup. The black probe goes to COM, and the red probe goes to the voltage/resistance port.
- Select the correct function and range for continuity on your multimeter.
- Place the probes on the two points you want to test. For example, touch each end of a wire or across a switch.
- Listen for a beep or check the display for a low resistance value.
If you want to know how to read a multimeter during this process, look for a beep or a reading close to zero. This result means the path is complete.
Tip: Always select the correct function and range before testing. This step helps you avoid common mistakes, such as measuring voltage in a live circuit or misreading the display.
Safety Tips
You must follow safety rules when using a multimeter for continuity checks. These tips protect you and your equipment:
- Always verify that there is no voltage in the circuit before testing.
- Wear proper personal protective equipment, such as gloves and safety glasses.
- Check your multimeter and test leads for damage before use.
- Make sure the probes connect firmly to the ports.
- Test your multimeter on a known live and dead circuit to confirm it works.
Note: Never rush when measuring continuity. Take your time to avoid mistakes and ensure your safety.
Understanding Results
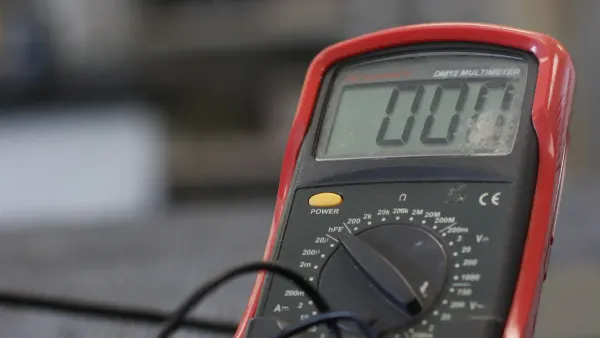
Understanding and interpreting results is key to using your multimeter well. When you perform a continuity test function, a beep means there is a complete path for current. The display may show a resistance value close to zero. Some multimeters beep for resistance values up to 50 ohms. You should check the actual reading to confirm the circuit works as expected.
Reading the multimeter display helps you know if the circuit is open or closed. If you hear no beep and see infinite resistance, the circuit is open. If you want to know how to read a multimeter, remember that a beep or low resistance means continuity, but it does not always mean the wire or switch can handle high current.
Different multimeter models may show results in different ways. Most will beep and show zero or low resistance for a closed circuit. If the circuit is broken, you will hear silence and see 'Open' or infinite resistance.
Caution: Just because you hear a beep does not mean the circuit can carry the full load. Always check the specifications and use your judgment.
Understanding and interpreting results helps you make smart decisions in troubleshooting. If you want to master how to read a multimeter, practice measuring continuity on different components. This skill will help you in many electronics projects.
Troubleshooting Continuity Testing
Common Issues
You may face several problems when you use a multimeter for continuity checks. These issues can make your results unreliable or confusing. Here are some frequent problems:
- Continuous beeping even when the leads are not connected. This usually means your multimeter has a malfunction.
- Accidental changes in settings. If you switch modes by mistake, you may get incorrect readings.
- Battery contact issues. Sometimes, your multimeter shows a low battery warning even if the battery is good. This can happen when the battery contacts are dirty or loose.
Tip: If your multimeter beeps continuously in continuity mode but works fine in other modes, check for internal faults or battery contact problems.
False Readings
False readings can lead you to wrong conclusions during continuity testing. You need to know what causes these errors so you can avoid them.
- Loose or faulty connections often result in inaccurate readings.
- Interference from nearby electronic devices may affect your multimeter’s performance.
- A dead battery can cause unreliable measurements.
- Improper calibration can produce incorrect results.
Inspect your connections for corrosion, oxidation, or fraying. Make sure your probes are firmly connected and your multimeter is set to the correct mode. Electrical interference from appliances can also cause problems.
Note: Always check for electrical noise and make sure your multimeter is properly calibrated before testing.
Tips for Reliable Results
You can improve your continuity test results by following best practices. Here are some tips:
- Turn off power to the circuit before testing. This prevents electrical hazards.
- Set your multimeter to continuity mode, usually marked by a soundwave symbol.
- Ensure good contact with the probes to avoid false readings.
- Avoid testing live circuits. This helps you get accurate results.
- Clean contacts or reflow solder if you see unexpected resistance.
- Reposition probes and retest if the reading is unstable.
If you want to find intermittent continuity issues, try these methods:
- Test continuity at both ends of the wire. Move along the wire in sections if it fails.
- Perform a wiggle test. Bend or move the wire to spot hidden breaks.
- Use a tone generator or wire tracer to locate damaged spots.
| Calibration Step | Description |
|---|---|
| Cleaning & Inspection | Check for terminal corrosion, cracks, or battery leaks. |
| Battery & Fuse Check | Ensure power stability and fuse continuity. |
| Functional Test | Verify display, buttons, and buzzer logic. |
| Accuracy Verification | Compare against standards at different ranges. |
| Certification | Issue traceable certificate with test data. |
Callout: Reliable continuity testing starts with careful setup and attention to detail. Practice these steps to build your troubleshooting skills.
Mastering continuity checks with your multimeter keeps your electronics safe and reliable. You protect yourself and your equipment by following safety steps and checking for accurate results. Regular continuity testing offers long-term benefits:
| Benefit | Description | Outcome Metrics |
|---|---|---|
| Improved Safety | Regular checks ensure compliance with safety regulations, reducing hazards. | Increased compliance rates and fewer safety violations. |
| Reduced Downtime | Early detection of issues prevents unexpected equipment failures. | 20% reduction in unexpected equipment failures. |
| Extended Equipment Lifespan | Continuous monitoring helps detect wear or damage early. | Improved operational efficiency. |
You can spot hazards quickly with visual or audible signals from your tester. If you notice no signal or an intermittent beep, you know to check for broken or loose connections.
Keep building your skills. Try these resources to learn more:
- Learn why continuity testing matters and how to use your multimeter.
- Follow step-by-step guides for accurate testing.
- Explore applications like checking solder joints and finding broken wires.
Stay curious and practice often. Each test builds your confidence and helps you work smarter with electronics. 🚀
FAQ
What does the continuity symbol look like on a multimeter?
You usually see the continuity symbol as a sound wave icon or a diode symbol. Some models show two lines with an arrow. Always check your user manual for the exact symbol on your device.
Why does my multimeter beep during a continuity test?
The beep means you have a complete path for electricity. This sound tells you the circuit or wire is not broken. If you hear no beep, the path is open or faulty.
Can I test continuity on a live circuit?
No, you should never test continuity on a live circuit. Always turn off the power before testing. This step keeps you safe and protects your multimeter from damage.
What does it mean if I get a high resistance reading?
A high resistance reading means the circuit is open or has a poor connection. You should check for broken wires, loose connections, or damaged components.
How often should I calibrate my multimeter for accurate continuity checks?
You should calibrate your multimeter at least once a year. If you use it often or in critical applications, check calibration more frequently. Proper calibration ensures reliable and accurate results.