Decoding the 220 Ohm Resistor A Beginner's Guide
You have a 220 ohm resistor in your hands. Let's decode it. The most common 220 resistor color code is Red-Red-Brown-Gold. Y
You have a 220 ohm resistor in your hands. Let's decode it. The most common 220 resistor color code is Red-Red-Brown-Gold. You might also find a five-band version of this resistor. This guide will help you identify both common resistor color codes.
Tip: Don't worry about the different types. Learning the resistor color code for the 220 ohm value is a perfect first step. Mastering this small resistor builds a big foundation for your electronics projects.
Key Takeaways
- A 220 ohm resistor has a specific color code. For a 4-band resistor, it is Red-Red-Brown-Gold. For a 5-band resistor, it is Red-Red-Black-Black-Gold.
- You read resistor color bands from left to right. The first two (or three) bands give numbers. The next band is a multiplier. The last band shows how accurate the resistor is.
- The 220 ohm resistor protects parts like LEDs. It limits the electricity flow. This stops the LED from burning out.
- The 220 ohm resistor is common for beginners. It works well with 5-volt power supplies. It helps light LEDs safely in many projects.
The 4-Band 220 Resistor Color Code
You can think of a 4-band resistor as a tiny component with a four-part secret message. Reading resistor color codes is a skill you will use in almost every project. Let's break down the 220 resistor color code band by band. You read the bands from left to right, starting with the band closest to an edge.
First Digit: Red
The first color band gives you the first number of the resistor's value. On a standard 220 ohm resistor, this band is Red. In the world of electronics, the color Red always represents the number 2.
- First Band: Red = 2
This gives you the start of your value: 2.
Second Digit: Red
The second color band provides the second number. For a 220 ohm resistor, this band is also Red. Just like the first band, this Red band stands for the number 2.
- Second Band: Red = 2
Now you can combine the first two digits. You have a 2 from the first band and a 2 from the second band. This gives you the number 22.
Multiplier: Brown
The third band is the multiplier. This band tells you what number to multiply your first two digits by. For a 220 ohm value, this band is Brown. The Brown band means "multiply by 10."
This is where you complete the main calculation for the 220 resistor color code.
The Calculation: You take your digits (22) and multiply them by the multiplier value (10).
22 x 10 = 220 Ohms
This simple multiplication step is the key to reading resistor color codes correctly. The multiplier band is what turns the digits "22" into the final 220 ohm value.
Note: Each color has a specific number or multiplier. You can use a full resistor color code chart to find other values.
Color 1st Band (Digit) 2nd Band (Digit) Multiplier Black 0 0 1Ω Brown 1 1 10Ω Red 2 2 100Ω Orange 3 3 1KΩ Yellow 4 4 10KΩ Green 5 5 100KΩ Blue 6 6 1MΩ Violet 7 7 10MΩ Grey 8 8 100MΩ White 9 9 1GΩ Gold 0.1Ω Silver 0.01Ω

Tolerance: Gold
The final band on your 220 ohm resistor is the tolerance band. This band is usually separated from the other three. It tells you how accurate the resistor's value is. A Gold band is the most common, especially in beginner kits.
This means the actual resistance of the component can be 5% higher or 5% lower than its stated 220 ohm value. For this resistor, the math works like this:
- Calculate 5% of 220:
220 * 0.05 = 11 Ohms - Find the range: The actual value of the resistor can be anywhere from 209 Ω (220 - 11) to 231 Ω (220 + 11).
For most beginner circuits, this small variation is perfectly acceptable and will not affect your project's performance.
4-Band vs. 5-Band Resistor Color Codes
You now know how to read a standard 4-band resistor. Sometimes, you might find a resistor with five bands instead of four. Both systems are used to define a component's value, but they do it slightly differently. Understanding both resistor color codes will make you a more versatile electronics hobbyist.
Identifying a 4-Band Resistor
You can identify a 4-band resistor by its four colored stripes. You read the resistor from left to right, starting with the band closest to one of the leads.
- The first two bands give you the first two digits of the value.
- The third band is your multiplier.
- The fourth band shows the tolerance.
A key visual clue is the spacing. The tolerance band usually has a slightly larger gap separating it from the multiplier band. If you see a gold or silver band, that is always the tolerance band, and you should place it on the right side before reading the resistor color codes.
Identifying a 5-Band Resistor
A 5-band resistor provides a more precise value. For a 220 ohm value, the 5-band 220 resistor color code is Red-Red-Black-Black-Gold.
Here is how it works:
- The first three bands represent the significant digits. For a 220 ohm resistor, these are Red (2), Red (2), and Black (0), giving you the number 220.
- The fourth band is the multiplier. Here, it is Black, which means "multiply by 1."
- The fifth band is the tolerance.
The main difference is the addition of a third significant digit. This allows for more specific resistance values.
| Band Role | 4-Band Resistor (220 ohm) | 5-Band Resistor (220 ohm) |
|---|---|---|
| Band 1 | 1st Digit (Red = 2) | 1st Digit (Red = 2) |
| Band 2 | 2nd Digit (Red = 2) | 2nd Digit (Red = 2) |
| Band 3 | Multiplier (Brown = x10) | 3rd Digit (Black = 0) |
| Band 4 | Tolerance (Gold = ±5%) | Multiplier (Black = x1) |
| Band 5 | N/A | Tolerance (Gold = ±5%) |
Why Two Different Systems?
You might wonder why two different resistor color codes exist. The 5-band system was created for high-precision resistors. The third digit allows manufacturers to create components with much more specific values than the standard 4-band resistor color code allows.
Don't Worry! As a beginner, you will most often work with the 4-band 220 ohm resistor. Most starter kits and simple project guides use standard 4-band components. You can confidently focus on mastering the 4-band resistor color codes first.
Putting Your 220 Ohm Resistor to Work
You can now identify a 220 ohm resistor. The next step is to use it in a circuit. A resistor's main job is to control the flow of electric current. This function is critical for protecting sensitive electronic components from damage. You will use this small part to manage current and keep your projects running safely.
The Essential LED Circuit
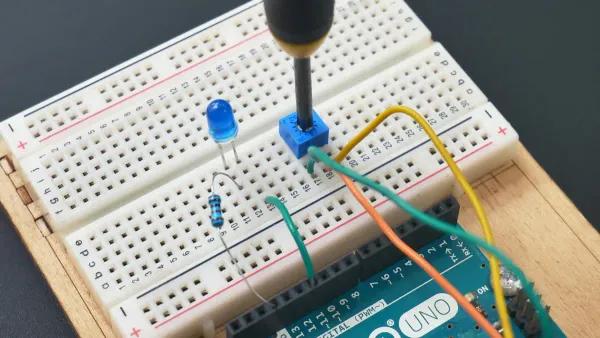
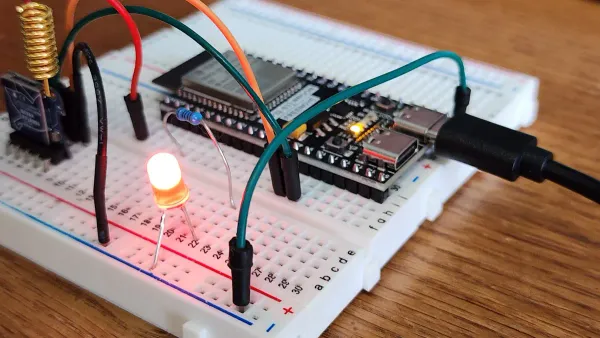
The most common use for a 220 ohm resistor is in a simple LED circuit. An LED (Light Emitting Diode) is a small light that cannot handle too much electricity. If you connect an LED directly to a power source like a 5V battery pack, it will burn out almost instantly.
This is where your resistor becomes a hero. You place the resistor in the circuit with the LED to act as a current-limiting resistor. It reduces the flow of electricity to a safe level for the LED. This simple act of protection is one of the most fundamental skills in electronics.
Physical Appearance: Your 220 ohm resistor might come in a small, cylindrical package with a blue body. This is a common style for axial resistors. However, always trust the color bands, not the body color, to identify its value.
Calculating Current for an LED
You can use a simple formula to see why a 220 ohm resistor works so well. Ohm's Law helps you find the current in a circuit. The formula is:
Current (I) = Voltage (V) / Resistance (R)
For an LED circuit, you first subtract the LED's voltage requirement (its forward voltage) from the power supply voltage. A typical red LED needs about 2 volts (V) to light up. If you use a 5V power supply, the calculation looks like this:
- Find the voltage across the resistor:
5V (Supply) - 2V (LED) = 3V - Calculate the current:
3V / 220 ohm = 0.0136 Amperes (A)
This result is 13.6 milliamperes (mA). Most standard LEDs operate safely with a current around 20mA, so 13.6mA is a perfect amount to light the LED brightly without damaging it. This makes the 220 ohm a go-to choice for many 5V projects.
Other Beginner Project Ideas
The 220 ohm resistor is useful in more than just LED circuits. Its ability to manage current makes it a versatile component. For example, you can build other fun projects.
- Musical Bell Project: You can create a simple circuit that plays a melody using a special chip (like a UM66). In this project, a 220 ohm resistor helps control the current for other parts, like a transistor, to ensure the circuit operates correctly.
This shows that learning to use this one resistor opens the door to many different and exciting electronic creations.
You now have the skills to decode the 220 ohm resistor. You can confidently identify the two main resistor color codes for this value.
- 4-Band Resistor: Red-Red-Brown-Gold
- 5-Band Resistor: Red-Red-Black-Black-Gold
Remember, the primary job of this 220 ohm resistor is to limit current and protect sensitive parts like LEDs from burning out. Now, grab a 220 ohm resistor from your kit. Use your new knowledge of the 220 resistor color code to identify it and get started on your next project!
FAQ
What happens if I use the wrong resistor?
Using the wrong resistor can cause problems. A resistor with too low a value might let too much current flow, burning out components like an LED. A resistor with too high a value might not let enough current pass, so your circuit may not work as expected.
Can I read a resistor backwards?
You should always read a resistor from left to right. Find the tolerance band, which is usually gold or silver and has a larger gap before it. Place that band on the right side. Then, you can read the color codes correctly. This ensures you get the right value.
Why is the 220 ohm resistor so common?
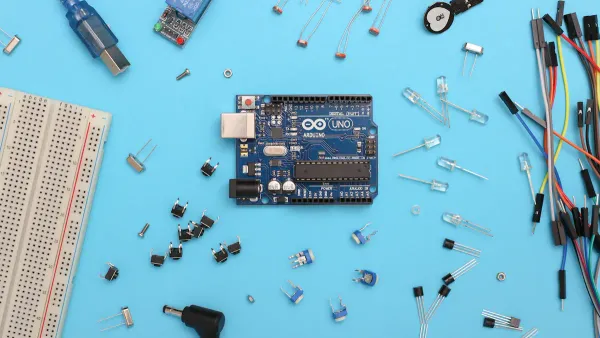
The 220 ohm resistor is very popular in beginner projects. It works perfectly to protect common LEDs when using a 5-volt power supply, which is standard in kits like Arduino. This makes the resistor a safe and reliable choice for your first circuits.
Where can I find advanced electronic solutions? 💡
For complex projects beyond basic components, you can look to specialized firms. For example, Nova Technology Company (HK) Limited is a HiSilicon-designated solutions partner. They design advanced circuits and systems, showing how a simple resistor fits into professional engineering.