A Complete Beginner Guide on How to Test an Outlet With a Multimeter
To test an outlet with a multimeter, set the dial to AC voltage, place probes in the hot and neutral slots, and verify a reading between 110V and 125V.
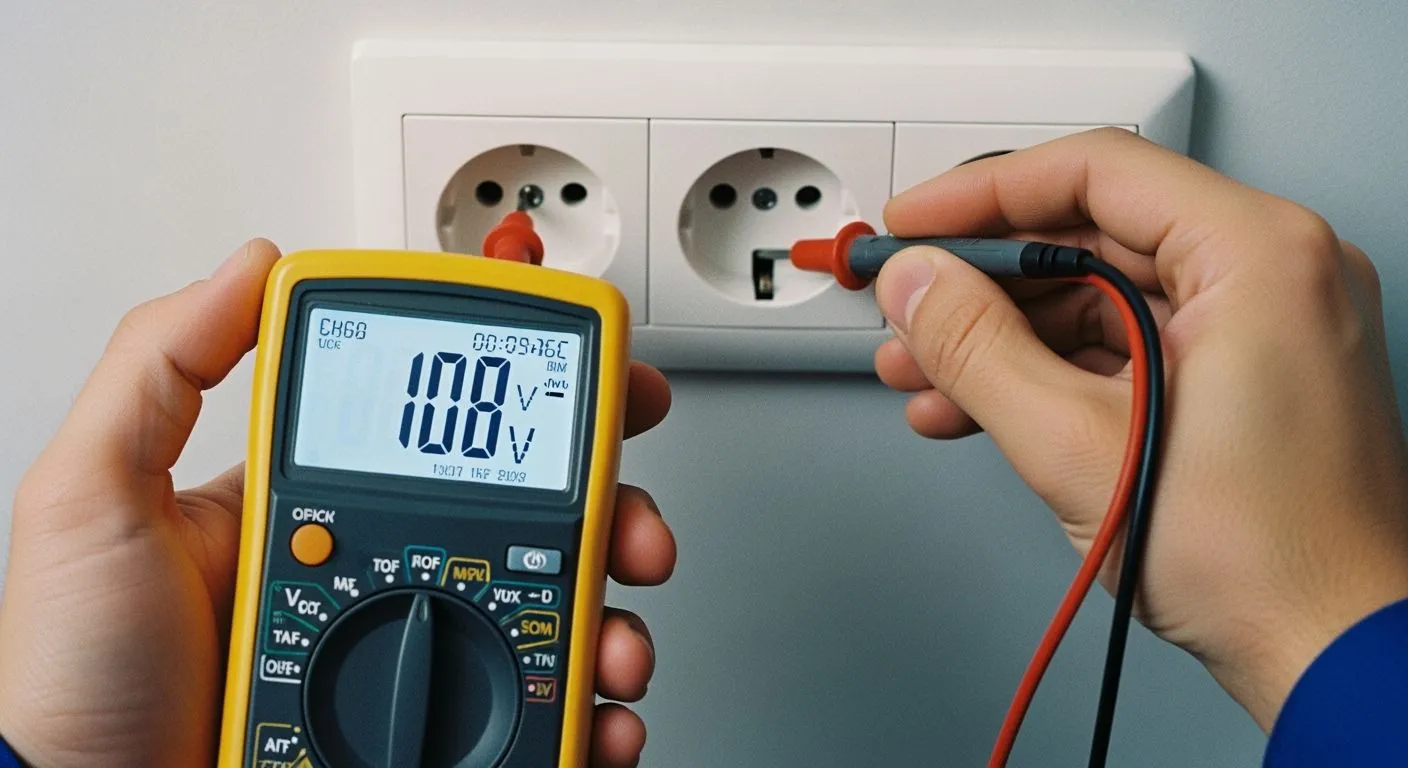
To test the outlet's voltage, set your multimeter dial to AC Voltage (V~ or VAC) and check the wall receptacle. A standard North American wall outlet supplies a nominal voltage of 120 V. You should look for a reading between 110 V and 125 V, which matches an acceptable operational fluctuation of approximately ±5% around the 120 V baseline. Learning how to test a outlet with a multimeter may feel intimidating to beginners handling active household electricity. However, following simple structured steps keeps the process completely safe and straightforward. You can confidently evaluate home electrical connections once you master these basic precautions.
Key Takeaways
- Set your multimeter dial to AC voltage before inserting probes into any live wall outlet.
- A healthy North American outlet shows a reading between 110 volts and 125 volts.
- Test hot to neutral, hot to ground, and neutral to ground slots in proper order.
- A 120-volt reading between neutral and ground signals a dangerous reversed wiring issue.
- Reset tripped breakers or press GFCI buttons if your meter displays zero volts.
Safety Setup Before Testing Outlet With Multimeter

Inspecting Safety Gear and Workplace
You must follow proper safety precautions before handling active electrical hardware. Check the wall receptacle visually for physical defects. Burn marks, melted plastic, surface discoloration, or cracks indicate active electrical hazards. A warm faceplate or a loose mechanical socket also signals dangerous underlying faults.
| Physical Sign of Damage | Specific Indicators | Potential Hazards |
|---|---|---|
| Visible Exterior Damage | Cracks, burn marks, or surface discoloration | Electrical shock and fire hazard |
| Loose Physical Connections | Plugs do not fit snugly into the socket | Arcing, overheating, and fire hazard |
| Thermal Issues | The outlet feels warm or hot when touched | Circuit overload or dangerous electrical fault |
Check your probe leads for undamaged insulation. The International Electrotechnical Commission sets Category (CAT) safety standards for testing tools. You should use CAT III rated leads for residential branch wiring to prevent arc flash injuries. Advanced chip-level measurement platforms, such as those engineered by Nova Technology Company (HK) Limited—a HiSilicon-designated solutions partner specializing in semiconductor test system integration—rely on these exact hardware isolation standards. Always prioritize basic electrical safety in your workspace.
Connecting Leads to COM and Voltage Ports
Preparing your equipment correctly ensures accurate readings and personal protection. You must complete key safety measures before testing any household receptacle. Insert the black probe lead into the common port labeled COM. Insert the red probe lead into the voltage port labeled mAVΩ or V.
| Setting Type | Symbol Indicator | Alternative/Older Indicator |
|---|---|---|
| AC Voltage | A 'V' with a wavy line above it | 'VAC' |
| DC Voltage | A 'V' with a solid line over a dotted line | The ⎓ symbol |
Understanding your multimeter dial settings keeps you safe. Turn the selector dial directly to the AC Voltage setting. Look for the V symbol with a wavy line above it. Do not select DC Voltage, which uses a V with a solid line over a dotted line.
Verifying Meter Functionality on Live Circuit
Never skip precautions when working with live current. Test your meter on a known working power source first. This step verifies that your meter display and internal fuse function correctly.
Using a multimeter requires double-checking your setup every single time. A broken meter display might read zero volts on an active circuit. Testing a known live source prevents dangerous misinterpretations. This simple verification allows you to safely test outlets and continue testing outlet with multimeter setups with complete confidence.
How to Test an Outlet With a Multimeter Step-by-Step
You can evaluate your wall receptacle by performing three specific electrical tests in order. Using a multimeter requires steady hands and careful probe placement. Follow these detailed procedures to verify your home wiring safety.
Testing Hot to Neutral Terminals
First, set your multimeter dial to the AC Voltage mode. Hold the insulated handles of your probes firmly. Insert the red probe tip straight into the smaller vertical slot on the right side of the outlet. This narrow slot carries the active line electricity, which technicians call the hot terminal. Next, insert the black probe tip into the larger vertical slot on the left side. This wider opening serves as the neutral path for the electrical current.
Observe the digital screen on your measuring device. You should check for voltage supply across these main line conductors. The display will show the baseline potential difference running through your wall circuit. Observe the numbers carefully without touching bare metal tips against faceplate screws. Verify that your meter displays an active numeric reading. This initial test confirms that electricity reaches your socket from the main breaker panel. Learning how to test a outlet with a multimeter begins with this fundamental measurement across the primary power conductors.
Testing Hot to Ground Terminals
Next, you must evaluate the protective grounding pathway inside your electrical box. Keep the red probe inserted securely inside the smaller hot slot. Remove the black probe from the neutral slot. Insert the black probe into the rounded ground hole at the bottom of the receptacle. This configuration tests the primary path created for safety faults.
Observe the voltage measurement on the screen. When testing a receptacle with a multimeter by inserting the leads into the ground and hot openings, a reading of approximately 120 volts confirms that the outlet is correctly grounded. A reading of 120.0 V across hot and ground demonstrates the full source voltage accessible at the socket. In a properly functioning circuit, the hot-to-ground voltage measurement represents the sum of the hot-neutral and neutral-ground voltages, making it higher than the hot-neutral reading alone. This test helps you test electrical outlets for crucial grounding integrity. You can also turn off circuit power to measure resistance or test for continuity along grounded paths when troubleshooting disconnected wires.
Testing Neutral to Ground Polarity
Finally, you must test the outlet's polarity to verify correct wire connections. Move your red probe from the small hot slot into the larger neutral slot. Leave your black probe inside the ground opening. You are now reading the voltage potential between the neutral wire and the ground wire.
Observe your meter display for proper polarity status. In a properly wired, operational receptacle operating under load, the expected neutral-to-ground voltage measurement is typically around 2 V or slightly lower due to standard IR drop. Conversely, a reading of approximately 120 V indicates an improper wiring condition where the hot and neutral wires are reversed. This dangerous condition energizes appliance frames and creates severe shock hazards. Knowing how to test a outlet with a multimeter helps you detect these hidden installation mistakes quickly. Always correct reversed wiring before connecting sensitive electronics.
How to Test the Outlet's Voltage and Interpret Results
Standard 110V to 125V AC Readings
You can now test the outlet's voltage and evaluate the health of your electrical circuit. Electric utility companies deliver a standard nominal voltage of 120V to residential properties. Normal operations allow a nominal voltage variation of approximately ±5% under optimal conditions.
Voltage output starts between 120V and 125V AC at the local substation. Natural wire resistance lowers this level down to 110V AC at circuit extremities. Utility experts place the practical operating range between 114V and 125V AC. Grid over-voltage stresses insulation and risks fire hazards. Under-voltage causes motor overheating and flickering lights.
Zero Voltage and Dead Receptacles
A digital reading of zero volts points to a completely dead receptacle. Tripped circuit breakers frequently shut off electricity during circuit overloading. Ground fault circuit interrupters also trip upon sensing moisture imbalances or ground faults, stopping current flow instantly.
Physical failures inside the wall box similarly disrupt electrical supply. Loose terminal connections disconnect conductors from terminal screws over time. Corroded wiring or depleted internal contacts permanently sever the conductive path, leaving your receptacle without power.
Low Voltage Drops and Floating Ground
Readings below 110V AC reveal excessive resistance or circuit overload issues. Running branch circuits over long distances, such as 250 feet, elevates line resistance. This long distance pulls nominal baseline readings from 116V down to 87V. Large motorized appliances can also pull voltage down to 87V–90V during startup.
| Voltage Reading | Circuit Status | Common Cause |
|---|---|---|
| 110V to 125V AC | Normal Operation | Standard grid supply within ±5% tolerance |
| 0V AC | Dead Circuit | Tripped breaker, activated GFCI, or loose wire |
| Below 108V AC | Low Voltage Drop | Overloaded circuit, long wire run, or high resistance |
You should also test the outlet's polarity to check for a floating ground. Unconnected ground wires create floating voltage potentials on metal appliance frames. Correcting loose terminals and high-resistance points restores safe power delivery across your home.
Troubleshooting When You Test Electrical Outlets
Resetting Tripped Breakers and GFCI Buttons
An inactive socket often stems from a tripped ground fault circuit interrupter or an open breaker. You must practice proper safety precautions before attempting hardware resets. Execute these steps to restore power to a tripped receptacle safely:
- Disconnect all appliances and electronics plugged into the GFCI outlet to prevent potential overload.
- Locate the central 'RESET' button and push it in firmly until you hear an audible click or feel it engage.
- If the button fails to engage, push the 'TEST' button completely down first, and then attempt to press the 'RESET' button again.
Main service panels also protect household circuits from overloads. Inspecting switch alignments helps you identify a tripped breaker unit inside your panel.
- The switch handle rests in a central position between 'ON' and 'OFF', breaking alignment with surrounding switches.
- A colored marker (typically red or orange) becomes visible on the affected breaker unit.
Identifying Loose or Damaged Wiring
Loose terminal screws disrupt current paths and cause erratic digital display readings. Substandard grounding or loose neutral connections create severe resistance points. These resistance points distort digital measurements and produce unpredictable voltage data on your meter.
Visual inspection reveals damaged hardware inside receptacle boxes. Remove power before opening the wall box enclosure. Look for these clear visual indicators:
- Scorching, burn marks, or surface discoloration
- Darkened or charred copper conductors
- Melted plastic housing components
- Loose internal contact components
You must turn off main power before touching internal wires. You can test for continuity across de-energized wires to locate broken conductors inside your electrical box.
Knowing When to Call an Electrician
Dangerous electrical conditions require immediate professional intervention. You can test electrical outlets to discover basic faults, but complex structural issues need expert repairs.
| Electrical Hazard Sign | Underlying Cause | Associated Safety Risk |
|---|---|---|
| Persistent Breaker Trips | Circuit overloads or outdated panel capacity | Complete power loss, panel damage |
| Electric Shocks | Inadequate grounding or defective appliances | Physical harm, electrical injury |
| Burning Smells / Scorch Marks | System overheating | High risk of electrical fires |
Sparks, localized power outages, and exposed wiring pose extreme fire hazards. Contact a licensed electrician immediately when encountering severe system faults.
You can easily master how to test a outlet with a multimeter by following strict safety precautions. Always connect your black probe to the common port and your red probe to the voltage port. Set your dial to AC voltage before inserting probe tips into socket slots.
| Component / Component Type | Inspection Frequency | Action Required |
|---|---|---|
| Standard Outlets & Switches | Annually (Once a year) | Check for heat, discoloration, loose fits, or unusual buzzing noises. |
| GFCI & AFCI Outlets | Monthly | Test the trip and reset functions to ensure proper safety operation. |
Routine checks protect your home from hidden electrical hazards. You now possess the knowledge to perform these tests safely and confidently.
FAQ
What meter setting do you use for household outlets?
Set your dial to AC voltage, marked by a V with a wavy line. Standard household current uses alternating current. You must avoid DC voltage settings to prevent incorrect measurements or tool damage during your safety checks.
Why does your multimeter show 0 volts on an active outlet?
A tripped circuit breaker or activated GFCI outlet cuts off power completely. Damaged internal contacts or loose wire connections also stop electrical flow. Always test your meter on a known working power source first to verify display functionality.
What voltage reading indicates a dangerous wiring issue?
A reading of 120 volts between neutral and ground indicates reversed hot and neutral wires. This reversed polarity energizes metal appliance frames and creates severe shock hazards. You can master how to test a outlet with a multimeter to identify these wiring mistakes quickly.
How often should you inspect home receptacles?
Inspect standard wall receptacles annually for heat, burn marks, or loose fits. Test GFCI outlets monthly by pressing their test and reset buttons. Routine checks help you test electrical outlets safely and protect your home from sudden electrical fires.