Getting Started with NE555P Timer Circuit Design
Build reliable ne555p timer circuits for timing, LED flashing, and pulse generation. Find tips on design, calculations, and troubleshooting for beginners.
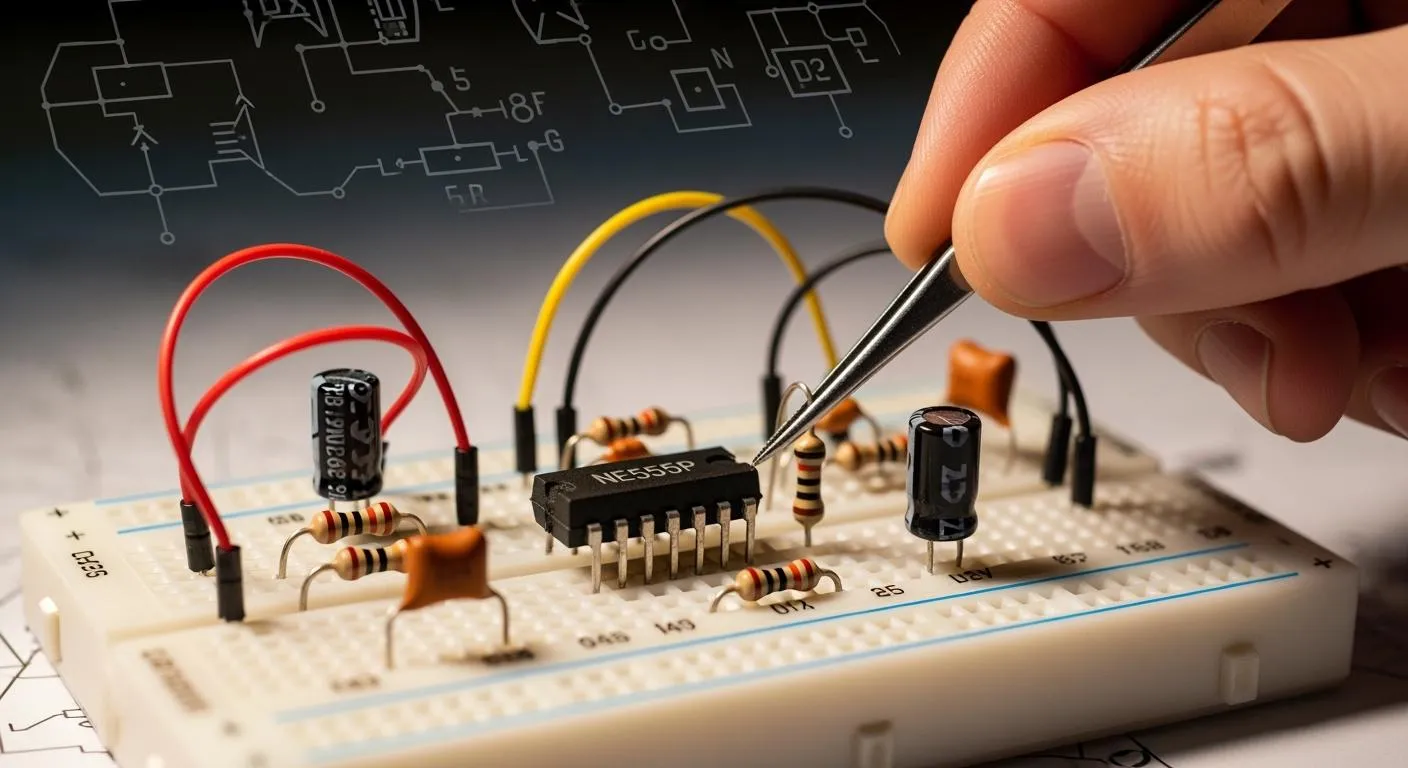
You often see the NE555P timer in electronics projects because it offers accuracy and dependable performance. You can use this chip to build delay timers, pulse generators, tone generators, and LED flashers. Many hobbyists rely on it for controlling alarms, creating pulse width modulation for motors and LEDs, and generating square waves for clocks or audio tones. The ne555p timer circuit works well for beginners, so you do not need advanced knowledge to start.
Key Takeaways
- The NE555P timer is versatile and ideal for beginners. Use it for projects like delay timers, pulse generators, and LED flashers.
- Understand the three modes of operation: monostable for single pulses, astable for continuous waves, and bistable for toggle functions.
- Choose the right resistors and capacitors to ensure accurate timing. Use components with low tolerance for better performance.
- Experiment with different circuit designs to learn how the NE555P timer controls timing and output effectively.
- Always check connections and component values to troubleshoot issues. Use a multimeter to measure voltages if the circuit does not work.
NE555P Timer Circuit Basics

What Is the NE555P Timer?
You can use the NE555P timer in many electronic projects because it offers precision and flexibility. Engineers first designed the original 555 timer in 1971, and it quickly became a best-selling chip. The ne555p timer circuit works as a versatile building block for delay timers, oscillators, and pulse generators. You can rely on its stable output and wide operating voltage range, which makes it suitable for both hobbyists and professionals.
Nova Technology Company (HK) Limited serves as a HiSilicon-designated solutions partner. You benefit from their expertise in chip-level solutions and system integration. Nova Technology Company (HK) Limited supports advanced ne555p timer circuit applications, including industrial automation, consumer electronics, and smart devices.
Here is a quick overview of the NE555P timer’s key features:
| Feature | Description |
|---|---|
| Output Drive Capability | Drives up to 200mA, so you can connect LEDs and speakers directly. |
| Timing Flexibility | Handles timing from microseconds to hours, covering many scenarios. |
| Modes of Operation | Supports multiple modes, giving you options for different circuit designs. |
Pinout and Internal Structure
You need to understand the pinout and internal structure to build a ne555p timer circuit. The chip has eight pins, each with a specific function:
| Pin Number | Name | Function |
|---|---|---|
| 1 | Ground | Connects to circuit ground. |
| 2 | Trigger Point | Starts the timer when voltage drops below 1/3 VCC. |
| 3 | Output | Sends a high signal during timing, then returns to low. |
| 4 | Reset | Resets the timer; usually tied to positive supply. |
| 5 | Control | Lets you adjust trigger and gate voltages for frequency changes. |
| 6 | Reset Lock | Takes output low when voltage rises from below 1/3 VCC to above 2/3 VCC. |
| 7 | Discharge | Provides current output; low impedance to ground when active. |
| 8 | Vcc | Connects to positive supply (4.5V to 16V). |
Inside the NE555P timer, you find three main functional blocks:
| Functional Block | Description |
|---|---|
| Voltage Comparators | Monitor voltage levels and control the RS flip-flop. |
| RS Flip-Flop | Stores the output state, essential for pulse generation. |
| Output Stage | Uses open-drain design; needs external pull-up resistor. |
Common Applications
You can use the ne555p timer circuit in many modern electronics. Here are some typical applications:
| Application Type | Description |
|---|---|
| Monostable Multivibrator | Generates a single pulse or time delay. |
| Bistable Multivibrator | Works as a flip-flop, holding a stable output. |
| Astable Multivibrator | Produces continuous square waves for oscillators. |
| Pulse Generation | Creates pulses for timing tasks. |
| LED and Lamp Flashers | Controls flashing patterns. |
| Alarms | Triggers alarms based on timing. |
| Tone Generation | Makes audio tones for alerts. |
| Logic Clocks | Acts as a clock signal generator. |
| Frequency Division | Divides input frequency for other circuits. |
| Power Supplies and Converters | Manages timing in power control circuits. |
You often see the ne555p timer circuit in RFID readers, lighting systems, and industrial automation. It also helps regulate motor speed and generate waveforms for analog-to-digital converters. You can build reliable and accurate circuits with this chip, making it a favorite for both learning and real-world projects.
NE555P Timer Circuit Modes

You can use the ne555p timer circuit in three main modes: monostable, astable, and bistable. Each mode lets you create different timing and switching functions. You will find step-by-step instructions and practical examples for each mode below.
Monostable Mode
Monostable mode turns the ne555p timer circuit into a one-shot pulse generator. You trigger the circuit, and it produces a single output pulse. This mode works well for creating time delays or generating a single signal.
- Operating Principle:
- The circuit stays in a stable state with the output low.
- When you apply a negative pulse to the trigger pin, the internal flip-flop changes state.
- The output pin goes high and stays high while the capacitor charges through the resistor.
- The pulse width depends on the resistor and capacitor values.
- Once the capacitor voltage reaches a threshold, the flip-flop resets, and the output returns to low.
Tip: You can adjust the pulse duration by changing the resistor or capacitor. This flexibility helps you match the timing to your project needs.
Typical Component List:
- NE555P timer IC
- Resistor (choose value based on desired pulse width)
- Capacitor (choose value based on desired pulse width)
- Push-button (for triggering)
- Power supply (4.5V–16V)
- Output device (LED, buzzer, relay)
Example Circuit:
[Power Supply]---[Pin 8: Vcc]
[Ground]---------[Pin 1: GND]
[Trigger Button]--[Pin 2: Trigger]
[Resistor]-------[Pin 7: Discharge]
[Capacitor]------[Pin 6: Threshold]
[Output Device]--[Pin 3: Output]
[Pin 4: Reset]---[Vcc] (usually tied high)
[Pin 5: Control]--[Optional capacitor to ground]
You can use this setup to create a simple timer for alarms or automatic lights.
Astable Mode
Astable mode lets the ne555p timer circuit generate continuous pulses. You can use this mode for oscillators, LED flashers, or tone generators. The circuit switches between high and low states without any external trigger.
- How It Works:
- The circuit has no stable state. It keeps oscillating between high and low.
- The output pin alternates, creating a square wave.
- The frequency and duty cycle depend on the resistor and capacitor values.
| Parameter | Formula |
|---|---|
| High Output Time | $t_{HIGH}=0.693 \times (R_1+R_2) \times C$ |
| Low Output Time | $t_{LOW}=0.693 \times R_2 \times C$ |
| Total Period | $T=t_{HIGH}+t_{LOW}$ |
| Frequency | $f=\frac{1.44}{(R_1+2R_2)C}$ |
| Duty Cycle | $\frac{t_{HIGH}}{T} \times 100%$ |
Note: You can change the frequency and duty cycle by adjusting the resistor and capacitor values. This makes the ne555p timer circuit ideal for projects that need precise timing.
Component List:
- NE555P timer IC
- Two resistors (R1 and R2)
- Capacitor (C)
- Power supply (4.5V–16V)
- Output device (LED, speaker, relay)
Example Circuit:
[Power Supply]---[Pin 8: Vcc]
[Ground]---------[Pin 1: GND]
[R1]-------------[Pin 7: Discharge]
[R2]-------------[Pin 6: Threshold]
[Capacitor]------[Pin 2: Trigger]
[Output Device]--[Pin 3: Output]
[Pin 4: Reset]---[Vcc] (usually tied high)
[Pin 5: Control]--[Optional capacitor to ground]
You can use this circuit to flash LEDs or generate clock signals for digital devices.
Bistable Mode
Bistable mode turns the ne555p timer circuit into a flip-flop. You can switch the output between high and low using two separate triggers. This mode works well for toggle switches and manual reset functions.
- How It Works:
- The circuit has two stable states: output high and output low.
- You use one trigger to set the output high and another to reset it low.
- The output stays in its current state until you apply a trigger.
Application Table:
| Application Type | Description |
|---|---|
| Toggle Operations | You can build flip-flop circuits for switching devices. |
| Manual Reset Functions | The circuit holds its state until you trigger a reset. |
| Reliable Performance | You get predictable operation for many electronic applications. |
Tip: You can use bistable mode for push-button switches, memory storage, or simple logic circuits.
Component List:
- NE555P timer IC
- Two push-buttons (for set and reset)
- Power supply (4.5V–16V)
- Output device (LED, relay)
Example Circuit:
[Power Supply]---[Pin 8: Vcc]
[Ground]---------[Pin 1: GND]
[Set Button]-----[Pin 2: Trigger]
[Reset Button]---[Pin 4: Reset]
[Output Device]--[Pin 3: Output]
[Pin 5: Control]--[Optional capacitor to ground]
[Pin 6: Threshold]--[Connected to ground]
[Pin 7: Discharge]--[Connected to ground]
You can use this setup to control devices with a simple push-button interface.
Remember, the ne555p timer circuit gives you flexibility for many timing and switching tasks. You can experiment with different modes to match your project requirements.
Circuit Design and Calculations
Choosing Components
You need to select the right resistors and capacitors for your ne555p timer circuit. The accuracy of your timing depends on these choices. Use metallized polyester capacitors for general timing. Choose metallized polypropylene capacitors for precision timing. Pick components with ±1–2% tolerance grades for better accuracy. Capacitors with low dielectric absorption improve timing reliability. Select resistors and capacitors with predictable temperature coefficients to keep performance stable. Place the timing capacitor close to the IC to reduce stray capacitance.
| Criteria | Explanation |
|---|---|
| Type of Capacitor | Metallized polyester for general timing; metallized polypropylene for precision timing. |
| Tolerance | ±1–2% tolerance grades for better accuracy. |
| Dielectric Absorption | Low dielectric absorption for reliable timing accuracy. |
| Temperature Coefficient | Predictable temperature coefficients for stable performance. |
| Physical Placement | Position timing capacitor close to IC for improved accuracy. |
Component tolerances affect circuit performance. If you use a capacitor with 20% tolerance, the frequency can deviate by up to 20%. This can disrupt your timer’s operation.
Calculating Timing Parameters
You calculate timing parameters using simple formulas. For monostable mode, the pulse width depends on the resistor and capacitor values. In astable mode, the frequency and duty cycle rely on two resistors and a capacitor.
| Parameter | Formula | Description |
|---|---|---|
| Pulse Width (Monostable) | t = 1.1 * R1 * C1 | Output stays HIGH for this time. |
| Frequency (Astable) | f = 1.44 / ((R1 + 2*R2) * C) | Oscillation frequency in astable mode. |
| Duty Cycle (Astable) | Duty Cycle = (R2 / (R1 + 2*R2)) * 100% | Ratio of HIGH time to total period. |
Avoid common mistakes. The standard circuit limits duty cycle to a minimum of 50%. High frequencies can cause timing errors. Use precision resistors and capacitors to reduce variation.
Driving Loads
You can drive LEDs and relays directly with the NE555P timer. The maximum output current is 200 mA for both sinking and sourcing. This lets you connect devices like LEDs and relays without extra components.
| Load Type | Maximum Current |
|---|---|
| LEDs | Up to 200 mA |
| Relays | Up to 200 mA |
Always check the load’s current rating. If your device needs more than 200 mA, use a transistor or MOSFET as a buffer.
Example Circuits
You can build a simple blinking LED circuit using the NE555P timer. Follow these steps:
- Gather components: 9V battery, NE555P timer IC, 1 kΩ resistor, 1000 µF capacitor, red LED.
- Connect Pin 1 (Ground) to battery negative.
- Connect Pin 8 (VCC) to battery positive.
- Attach LED to Pin 3 (Output).
- Set up resistor and capacitor for astable mode.
- Power the circuit and watch the LED blink.
You can also use the NE555P timer to generate pulse signals, control alarms, or adjust LED brightness. The ne555p timer circuit works well for signal generation and timing tasks.
Safety tip: Component aging and load impedance can affect stability. Use filtering and power supply regulation to improve reliability.
You can start with a simple LED flashing circuit using the NE555P timer. Adjust the resistor and capacitor to set the blinking speed. Check connections and component values to avoid common mistakes. Try measuring voltages if your circuit does not work as expected.
Experiment with different setups to learn how the NE555P controls timing and output.
Explore these resources for deeper understanding:
- 555 Timer Tutorial: How It Works and Useful Example Circuits
- NE555N Timer Guide: Pinout, Modes, Formulas & Projects
- IC 555 Timer Uses and Applications
FAQ
How do you power the NE555P timer circuit?
You connect the NE555P timer circuit to a DC power supply. The voltage range is 4.5V to 16V. Most projects use a 9V battery or a regulated adapter. Always check the voltage rating before you start.
Can you use the NE555P timer circuit to flash multiple LEDs?
You can flash several LEDs with the NE555P timer circuit. Make sure the total current does not exceed 200 mA. If you need more power, use a transistor to drive the LEDs safely.
What happens if you use the wrong capacitor value?
If you use the wrong capacitor, the timing changes. The pulse width or frequency may not match your needs. Always check the capacitor value before you build the ne555p timer circuit.
How do you troubleshoot a NE555P timer circuit that does not work?
Check all connections first. Make sure the power supply is correct. Test the resistor and capacitor values. Replace the NE555P timer IC if you suspect damage. Use a multimeter to measure voltages at each pin.
Can you use the NE555P timer circuit for audio tone generation?
You can use the NE555P timer circuit to make audio tones. Connect a speaker to the output pin. Adjust the resistor and capacitor to change the frequency. This setup works well for buzzers and alarms.