Beginner’s Guide to Flux in Soldering for 2026
Flux in soldering cleans metal, removes oxidation, and ensures strong, reliable joints. Find out which flux to use and how to apply it for best results.
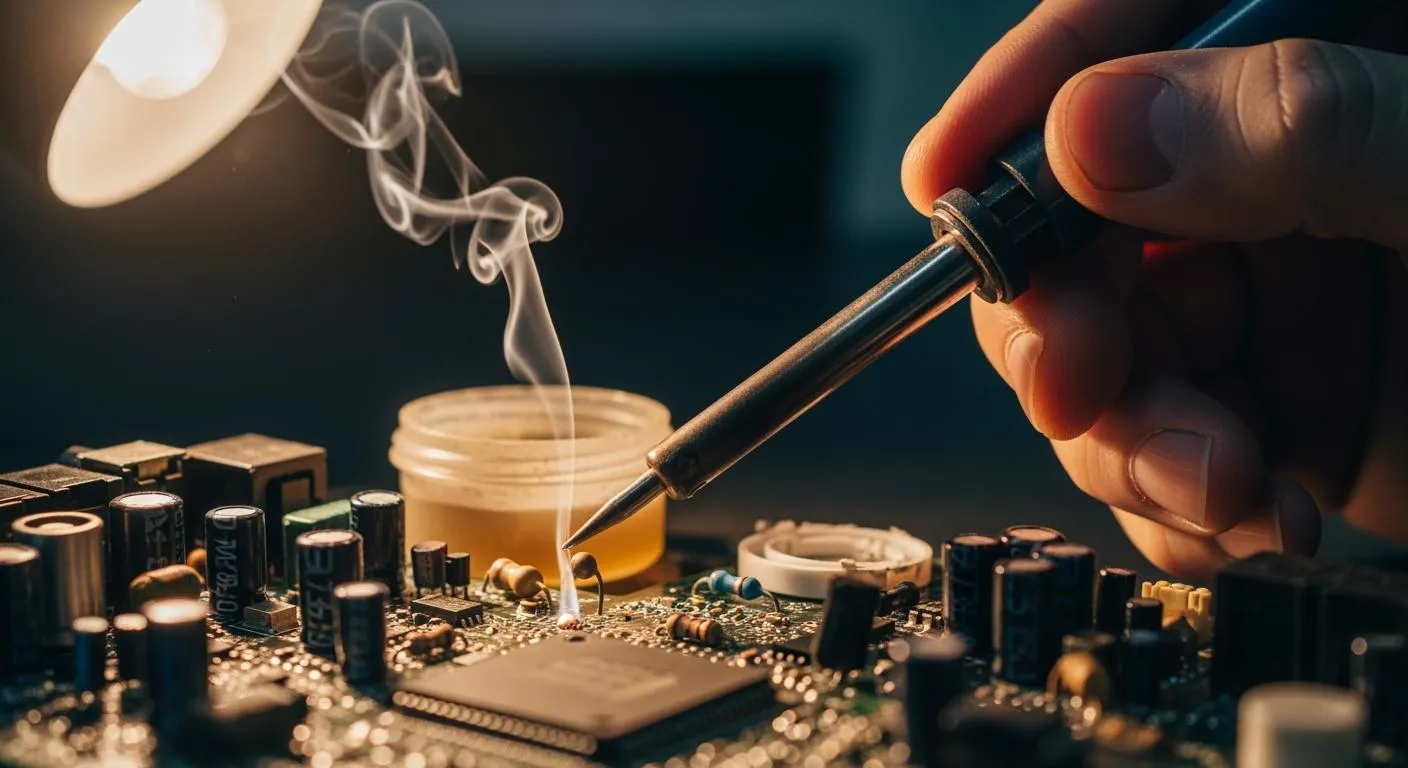
When you start soldering, you need to use flux in soldering to achieve clean and dependable connections. Flux acts as a cleaning agent. It removes oxides and other contaminants from metal surfaces, making it easier for solder to flow and fill gaps. This process prevents oxidation and helps you create strong, reliable joints. Choosing the right flux and using it properly can prevent issues like poor electrical connections or early joint failure. If you are new to soldering, understanding flux will set you up for success.
Key Takeaways
- Flux is essential for clean soldering. It removes dirt and oxidation, ensuring strong connections.
- Choose the right type of flux for your project. Rosin, no-clean, and water-soluble fluxes each have unique benefits.
- Always clean surfaces before applying flux. This step prevents weak joints and improves solder flow.
- Follow safety guidelines when soldering. Wear protective gear and work in a well-ventilated area.
- Practice on scrap materials before starting your main project. This helps you gain confidence and improve your skills.
Flux in Soldering: What and Why
Cleaning Metal Surfaces
You need to start every soldering project with clean metal surfaces. Flux in soldering works as a compound that you apply before or during soldering. It removes contaminants that can interfere with the bond between metals. When you use flux, you target several types of unwanted materials:
- Flux residues
- Dust
- Moisture
- Solder balls
- Ionic contaminants
Flux acts as a reducing agent. It dissolves oxides and creates a protective barrier. This process improves the wetting characteristics of the solder. You get a surface that allows molten solder to flow smoothly and stick to the metal. Clean surfaces help you avoid weak connections and ensure that your soldering produces reliable results.
Removing Oxidation
Oxidation forms when metals react with oxygen. This reaction creates a layer of metal oxides that can block the solder from bonding to the metal. You need to remove these oxides to achieve strong solder joints. Flux contains acids, often organic in electronics, that react with metal oxides. The reaction produces water and metallic salts, clearing the surface for soldering.
- Flux dissolves existing oxides on metal surfaces.
- It acts as a barrier to prevent further oxidation during soldering.
- The acids in flux remove oxides from soldering metals.
If you skip flux, molten solder reacts with oxygen and forms more oxides. These oxides have lower mechanical strength than pure metals. You risk creating weak joints that may fail under stress. The right flux in soldering prevents this problem and gives you a clean, strong bond.
Tip: Always check for visible signs of oxidation before you start soldering. A dull or discolored surface often means you need to clean it with flux.
Reliable Solder Joints
You want your solder joints to last and perform well. Research published in Scientific Reports in 2025 shows that flux is crucial for removing oxides and promoting wetting. These actions are essential for reliable solder joints. If you leave flux residue, you risk electrochemical migration, which can cause short-circuit failures. Managing flux residue is important, especially in humid environments.
The type of flux you use affects the quality of your solder joints. Less aggressive fluxes can lead to incomplete wetting. You may see joint failures like Non-Wet Open (NWO) or Head-in Pillow (HIP). The behavior of flux during soldering influences the morphology of the joint. The right flux system improves wetting and adhesion, even when components warp during reflow.
| Evidence Description | Impact on Solder Joint Strength |
|---|---|
| Molten solder reacts with oxygen to form metal oxides. | Metal oxides have lower mechanical strength than pure metals. |
| Flux is essential to prevent oxidation during soldering. | Improves mechanical strength and electrical contact. |
| Improper flux can generate oxides, reducing solder joint strength. | Each type of solder may react differently with flux. |
Nova Technology Company (HK) Limited stands out as a HiSilicon-designated solutions partner in the integrated circuit industry. The company specializes in chip-level solutions, system integration, and advanced application scenarios. You can rely on their expertise for high-quality soldering processes in semiconductor manufacturing, ensuring robust connections and reliable performance in IC assemblies.
You need to choose and use flux carefully. The right approach helps you create solder joints that meet industry standards and last through demanding conditions.
Types of Soldering Flux

When you choose a soldering flux, you need to understand the main types. Each type has its own strengths, weaknesses, and best uses. The table below shows the chemical makeup and cleaning needs for the most common fluxes:
| Flux Type | Composition/Characteristics | Cleaning Requirements |
|---|---|---|
| Rosin | Made from pine resin; comes in R, RMA, RA activity levels | R and RMA can stay on the board; RA must be cleaned |
| No Clean | Uses low-halide or halide-free activators; leaves harmless residues | Cleaning not required |
| Water Soluble | Contains organic acid activators; leaves aggressive, corrosive residues | Must clean with deionized water right after soldering |
Rosin Flux
You will find rosin flux in many electronics projects. It comes from pine tree resin and works well for cleaning and bonding. Here are some key points:
- Produces reliable solder joints
- Removes oxides and promotes wetting
- Prevents re-oxidation during soldering
However, you should know about its drawbacks:
- Leaves sticky residue that can attract dust and moisture
- May cause corrosion if not cleaned
- Activated types can leave chloride ion residues
You can use rosin flux when post-solder cleaning is not a big concern. If you use RA (Rosin Activated) flux, you must clean the board to avoid long-term problems.
Water-Soluble Flux
You should pick water-soluble flux for high-reliability work. It uses organic acids to remove tough oxides. This type is common in:
- Military electronics
- Aerospace applications
- Medical devices
- High-reliability commercial electronics
Water-soluble flux leaves behind corrosive residues. You must clean these with deionized water right after soldering. Skipping this step can lead to failures.
No-Clean Flux
No-clean flux is popular in modern electronics. It forms a protective, inert layer over residues. You do not need to clean after soldering. This saves time and money, especially in high-volume manufacturing. Some benefits include:
- Reduces assembly costs by up to 25%
- Meets environmental rules
- Prevents moisture-related corrosion
You should use no-clean flux when you want a fast, efficient process and the circuit will not face harsh conditions.
Liquid vs Paste Forms
You can buy flux as a liquid or a paste. Each form has its own uses and handling needs:
| Aspect | Liquid Flux | Paste Flux |
|---|---|---|
| Application Method | Brush, pen, or spray onto joints or pads | Dispense or print with a stencil for accuracy |
| Usage Scenario | All soldering types, including rework | Mainly for SMT assembly and reflow soldering |
| Need for Extra Solder | Yes, contains no metal | No, includes solder alloy |
| Residue After Soldering | May need cleaning | Can be sticky or corrosive, may need cleaning |
| Storage & Shelf Life | Shorter, needs refrigeration | Longer, store sealed at room temperature |
Tip: Choose the flux type and form that matches your project’s needs and your cleaning abilities.
Choosing Flux for Soldering
Project and Material Match
You need to match your flux choice to your project and the materials you plan to join. Not all fluxes work well with every metal or component. For most electronics, rosin flux or no-clean flux gives you the best results. If you work with copper, a mild rosin flux cleans the surface and helps the solder stick. For stainless steel or tough metals, you need a strong acid flux, but remember that these require careful cleaning after soldering.
When you select flux for soldering, consider these important factors:
- The type of components: Make sure the flux is compatible with the parts you use.
- Solder alloy: Choose a flux that matches your solder alloy for the best bond.
- Reliability: High-reliability projects, like medical or aerospace devices, often need water-soluble flux for thorough cleaning.
- Process capabilities: Think about your tools and whether you can clean the board after soldering.
You should also look at the cleaning requirements. If you cannot clean the board easily, pick a no-clean flux. For plumbing or roofing, acid flux works well, but it is not suitable for electronics because it can cause corrosion.
| Metal Type | Recommended Flux Type | Cleaning Needed? |
|---|---|---|
| Copper | Rosin or no-clean | Sometimes |
| Stainless Steel | Acid flux | Always |
| Aluminum | Special aluminum flux | Always |
| Brass | Rosin or acid flux | Usually |
Tip: For small electronics projects, start with rosin-core solder wire (RMA type) or no-clean flux. These options are easy to use and give reliable results.
Beginner Tips
If you are new to soldering, you can make your work easier by following a few simple tips:
- Use solder wire with built-in flux for small jobs.
- Pick no-clean or rosin flux for most electronics projects.
- Avoid acid flux unless you work with plumbing or metals that need strong cleaning.
- Read the label to check if you need to clean the residue after soldering.
- Practice on scrap pieces before working on your main project.
You will find that the right flux in soldering makes a big difference in how well your joints hold up. As you gain experience, you can try different types of flux for more advanced soldering applications.
Using Flux: Steps and Safety

Applying Flux
You can achieve the best results in soldering by following a clear process for applying flux. Start by cleaning the PCB pad and component lead with 99% isopropyl alcohol. This step removes oils and dust. Next, apply a thin, even layer of flux to both the pad and the component termination. Make sure you do not use too much. Place the soldering iron tip so it touches both the pad and the lead. This action activates the flux and prepares the joint. Feed the solder wire directly into the joint interface. Let the joint cool without moving it. This method helps you create strong, reliable connections.
Step-by-step guide:
- Clean surfaces with 99% isopropyl alcohol.
- Apply a thin, uniform film of flux to both pad and lead.
- Heat both pad and lead with the soldering iron tip.
- Feed solder wire into the joint.
- Allow the joint to cool undisturbed.
Soldering Process
You should always control the temperature of your soldering iron. Too much heat can burn the flux and damage the board. Hold the iron at the correct angle and work quickly. The soldering process works best when you keep the tip clean and shiny. Wipe it on a damp sponge or brass wire after each joint. This habit prevents contamination and improves heat transfer.
Tip: Use the right tip size for your project. A tip that is too large can cause solder bridges, while a tip that is too small may not heat the joint evenly.
Cleaning Residue
After you finish soldering, you need to remove flux residue. Leftover flux can attract moisture and cause corrosion on copper traces and component leads. It can also create paths for electrical leakage or short circuits, especially in high-density designs. Residue may block conformal coatings and interfere with signal transmission in high-frequency circuits. Use a brush and isopropyl alcohol to clean the board. Dry the area completely before testing or applying any protective coating.
- Prevent corrosion by cleaning all visible residue.
- Avoid electrical issues by removing sticky or shiny spots.
- Ensure coatings stick well by cleaning thoroughly.
Safety Tips
You must protect yourself during the soldering process. Always wear safety goggles and chemical-resistant gloves. Store flux in a cool, dry place away from sunlight and heat. Work in a well-ventilated area to avoid breathing fumes. Some fluxes and lead-free solders produce more fumes and require extra care.
| Health Risks | Mitigation Strategies |
|---|---|
| Irritation of eyes, nose, and throat | Ensure proper ventilation |
| Coughing and headaches | Use protective equipment (masks/respirators) |
| Chronic respiratory conditions | Monitor air quality and provide ventilation systems |
Note: Good safety habits help you avoid common mistakes and protect your health during soldering.
Troubleshooting Flux Issues
Poor Joints
You may notice weak or unreliable connections after soldering. These poor joints often result from mistakes with flux or the soldering process. Common causes include:
- Insufficient heating during soldering
- Oxidized or dirty component leads or PCB pads
- Using the wrong solder alloy or flux
- Incorrect temperature during reflow or hand soldering
- Incomplete wetting or too much residue from flux
You can prevent these problems by cleaning all surfaces before you start. Choose the right flux for your materials. Make sure your soldering iron reaches the correct temperature. If you see solder bridges, you might have used too much solder or applied paste incorrectly. Solder bridges can cause short circuits and damage components. Always check for proper alignment and use the right amount of solder.
Residue Problems
After soldering, you may find sticky or white residue on your board. This residue can attract dust and moisture, leading to electrical failures. To remove stubborn flux residue, try these methods:
- Use a soft-bristled brush and lint-free wipes for precise cleaning.
- Apply isopropyl alcohol (IPA) for general cleaning. For tough spots, use a commercial flux remover.
- Wet a swab with IPA and wipe around the solder joint. Keep the area wet to prevent residue from settling.
- For complex boards, ultrasonic cleaning works well and saves time.
Tip: Use an extension tube with aerosol cleaners to reach tight spaces around components.
Corrosion Prevention
If you leave flux residue on your board, you increase the risk of corrosion. Humidity can create corrosion cells on small circuit boards. Water condensation between terminals makes this worse. Flux residues absorb moisture from the air and form conductive electrolytes. These electrolytes speed up corrosion and can cause short circuits over time.
To prevent corrosion:
- Remove all flux residues, especially after using activated or mildly activated rosin fluxes.
- Clean the board before applying any conformal coating.
- Remember that residues from activated fluxes may contain chloride ions, which can cause corrosion.
- Thorough cleaning is essential when using lead-free solder and highly activated flux.
Note: Careful cleaning after soldering protects your projects from long-term damage and keeps your electronic assemblies reliable.
You have learned that flux plays a vital role in soldering. It cleans metal surfaces, removes oxidation, and improves solder flow. These actions help you achieve strong and reliable joints. Practicing with different flux types lets you see how each affects soldering results. Always follow safety guidelines and clean up after soldering. Use this checklist for your next project:
- Start with clean surfaces.
- Apply a thin coat of flux.
- Choose RoHS-compliant solder and components.
- Use proper tools and ventilation.
- Dispose of waste responsibly.
Mastering flux ensures your soldering projects meet high standards and last longer.
FAQ
What happens if you skip using flux in soldering?
You risk weak joints and poor electrical connections. Oxides and dirt block solder from sticking. Your project may fail early or not work at all.
Can you use too much flux?
Yes. Too much flux leaves sticky residue. This residue can attract dust and moisture. Clean extra flux to prevent corrosion and electrical problems.
Is it safe to touch flux with bare hands?
No. Some fluxes can irritate your skin. Always wear gloves when handling flux. Wash your hands after soldering.
How do you store flux for best results?
Store flux in a cool, dry place. Keep the container sealed. Avoid sunlight and heat. This keeps flux fresh and effective.
Do you need to clean no-clean flux residue?
Usually, you do not need to clean no-clean flux. If you see visible residue or work in high-humidity areas, clean it for best reliability.