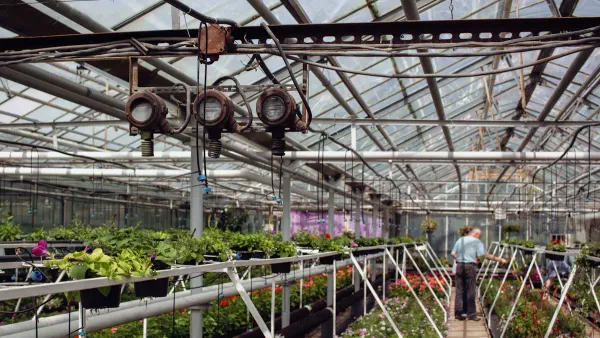
Exploring Smart Gardening with Arduino Soil Moisture Sensors
You can make your gardening smarter with a soil moisture sensor with arduino. This simple device helps you check water level
You can make your gardening smarter with a soil moisture sensor with arduino. This simple device helps you check water levels in soil and lets you automate watering for healthier plants. You use electronic components and integrated circuits to measure moisture, which saves water and supports sustainability.
Tip: The moisture soil sensor arduino setup works well for beginners. You get easy monitoring and less guesswork for your garden.
Key Takeaways
- Using a soil moisture sensor with Arduino automates watering, ensuring plants receive water only when needed. This prevents overwatering and promotes healthier growth.
- Implementing this technology can reduce water usage by up to 30%, making your gardening practices more sustainable and eco-friendly.
- Capacitive sensors are recommended for their accuracy and durability, providing reliable moisture readings without the risk of corrosion.
- Real-time monitoring allows you to check soil moisture levels from anywhere, making garden management easier and more efficient.
- Regular maintenance and calibration of your sensor ensure accurate readings and prolong the life of your smart gardening system.
Benefits of Soil Moisture Sensor with Arduino
Efficient Water Management
You can manage water in your garden more efficiently when you use a soil moisture sensor with Arduino. The sensor checks the moisture level in the soil and sends the data to the Arduino board. The Arduino processes this information using its integrated circuits and electronic components. When the soil gets too dry, the Arduino can turn on a water pump or open a valve. This system gives your plants water only when they need it.
Note: A project using Arduino and soil moisture sensors created an automatic watering system. This system reduced water waste by giving plants the right amount of water at the right time.
You can see several benefits from this approach:
- Prevents overwatering, which helps you avoid root rot and plant diseases.
- Triggers irrigation systems based on real-time moisture level readings.
- Reduces manual watering, saving you time and effort.
- Field trials showed a 30% reduction in water usage compared to traditional watering methods.
Sustainability in Gardening
Smart gardening with a soil moisture sensor supports sustainability. You use less water because the system waters plants only when the soil needs it. This method helps conserve water, which is important for the environment. The Arduino and its electronic parts work together to monitor and control the watering process.
- Enhances efficiency and sustainability by watering based on soil demand.
- Capacitive soil moisture sensors offer good accuracy and last a long time, making them great for home gardens.
- FDR and TDR sensors can help in larger gardens or farms by providing continuous and precise monitoring.
Tip: Using a moisture soil sensor arduino setup can help you save up to 30% or more water, making your garden eco-friendly.
Healthier Plants
When you use a soil moisture sensor, your plants get the right amount of water. The Arduino reads the sensor data and activates watering only when the moisture level drops below a set point. This keeps the soil at the best moisture level for plant growth.
- Optimizes plant growth by providing the correct amount of water.
- Automated control based on real-time monitoring improves how you use water and nutrients.
- Targeted watering through drip systems leads to healthier plants and higher yields.
- Studies show that using these systems can increase crop yields by 15% to 25% and improve water use efficiency by up to 60%.
You give your plants a better chance to thrive by using technology. The electronic components and integrated circuits in the Arduino system make it easy to keep your garden healthy and productive.
How Moisture Soil Sensor Arduino Works
Detect Water Content in Soil
You use a moisture soil sensor arduino setup to detect water content in soil. The sensor probes go into the soil and measure how easily electricity flows between them. Wet soil lets electricity pass more easily, so the resistance drops. Dry soil blocks electricity, so resistance rises. The LM393 comparator module reads this change and sends both analog and digital signals to your Arduino board. The Arduino uses its integrated circuits to process these signals and show you the moisture level.
Tip: You can check the moisture level at any time and decide when to water your plants. This method helps you avoid overwatering and keeps your garden healthy.
Here is a table showing how different sensors work:
| Working Principle | Description |
|---|---|
| TDR Sensors | Send electromagnetic waves into the soil. More moisture slows the waves. |
| FDR Sensors | Measure changes in frequency. More moisture causes bigger changes. |
| Resistive Sensors | Measure resistance. Wet soil lowers resistance, dry soil raises it. |
Capacitive vs. Resistive Sensors
You can choose between capacitive and resistive soil moisture sensors for your garden. Resistive sensors use metal probes to measure resistance. Wet soil lowers resistance, dry soil raises it. Capacitive sensors measure changes in capacitance, which gives you a more accurate reading of moisture level. Capacitive sensors use non-metal probes, so they last longer and resist corrosion.
| Feature | Resistive Sensor | Capacitive Sensor |
|---|---|---|
| Accuracy | Moderate | High |
| Durability | Lower (corrodes) | Higher (non-metal) |
You get better results with capacitive sensors for home gardening. They give you high accuracy and last longer, so you do not need to replace them often. The electronic components and integrated circuits in the Arduino help you read and use data from both types of sensors.
Real-Time Monitoring
You can monitor soil moisture levels in real time using a soil moisture sensor with Arduino. The Arduino collects data from the sensor and shows you the moisture level instantly. You can build an automated watering system that turns on when the soil gets dry. You can also use the Arduino IoT Cloud to check moisture levels from anywhere.
- You learn to use soil moisture sensors with microcontrollers.
- You build a soil moisture meter and automate watering.
- You monitor moisture level remotely and keep your garden healthy.
| Feature | Benefit |
|---|---|
| Real-time monitoring | Accurate data for smart watering decisions. |
| Automated irrigation | Plants get water only when needed, saving resources. |
| Remote monitoring | Check garden conditions from anywhere, making management easier. |
| IoT integration | Collect and analyze data for better gardening results. |
| Improved plant health | Keep soil at the best moisture level for strong growth and higher yields. |
Setting Up Soil Moisture Sensor with Arduino
Components Needed
You need several electronic components and integrated circuits to build a moisture soil sensor arduino project. These parts help you measure the moisture level and automate your garden’s watering system.
Essential items for your setup:
- Arduino UNO R3 or similar microcontroller board
- Breadboard with 830 contacts
- Capacitive soil moisture sensor (recommended for durability)
- Wires and connectors
- Resistors (usually 10kΩ) and capacitors
- Soldering kit (soldering iron and solder wire)
- Protective coating like waterproof sealant or epoxy
- Free PCB design tool and Arduino IDE software
Tip: Choose a capacitive sensor for your soil moisture sensor with arduino. It lasts longer and gives more accurate readings than resistive sensors.
You can also use PCB materials such as copper-clad board and ferric chloride if you want to design your own sensor circuit. Each component plays a role in detecting the moisture level and sending data to the Arduino’s integrated circuits.
Wiring and Connection
You must connect the soil moisture sensor to the Arduino board using wires and connectors. The sensor has three main pins: VCC, GND, and signal (A0 for analog, D0 for digital).
Follow these steps for reliable wiring:
- Connect the VCC pin of the sensor to pin 7 on the Arduino.
- Attach the GND pin of the sensor to the GND on the Arduino.
- For analog output, connect the sensor’s A0 pin to the A0 pin on the Arduino.
- For digital output, use the D0 pin and connect it to pin 8 on the Arduino.
Note: Analog sensors are easier for beginners and cost less. Digital sensors offer higher precision and can measure extra parameters like temperature and pH.
You should place the sensor fully in contact with the soil. Avoid air gaps, as they can cause inaccurate readings. Mound soil above the sensor if needed to prevent water from flowing directly to it. Pick a spot in your garden that represents the average moisture level. Avoid areas with roots or low water capacity.
| Sensor Type | Cost | Durability | Measurement Capabilities | Best Use |
|---|---|---|---|---|
| Analog | Low | Moderate | Moisture only | Beginners, small gardens |
| Digital | High | High | Moisture, temp, pH | Advanced, research |
Tip: Minimize soil disturbance during installation. This helps keep your readings accurate and protects the sensor’s electronic components.
Coding Basics
You need to write code to make the Arduino read the moisture level and control watering. The Arduino IDE software lets you upload code to the board.
Basic coding steps:
- Define the wet and dry values for your soil moisture sensor:
#define soilWet 500 #define soilDry 750 - Set up the sensor pins:
#define sensorPower 7 #define sensorPin A0 - In the
setup()function, initialize the sensor and start serial communication:void setup() { pinMode(sensorPower, OUTPUT); Serial.begin(9600); } - In the
loop()function, read the moisture level and print the status:void loop() { int moisture = readSensor(); if (moisture < soilWet) { Serial.println("Soil is wet"); } else if (moisture > soilDry) { Serial.println("Soil is dry"); } else { Serial.println("Soil moisture is optimal"); } delay(1000); } - Use a function to power the sensor, read the value, and turn it off:
int readSensor() {
  digitalWrite(sensorPower, HIGH);
  delay(10);
  int value = analogRead(sensorPin);
  digitalWrite(sensorPower, LOW);
  return value;
}
Tip: Regularly calibrate your sensor for accurate readings. Prepare dry and wet soil, record the ADC values, and update your code with these numbers.
Calibration steps:
| Step | Action |
|---|---|
| 1 | Prepare dry conditions using air or dry soil. |
| 2 | Insert the sensor and record the dry ADC value. |
| 3 | Prepare wet conditions with water or saturated soil. |
| 4 | Immerse the sensor and record the wet ADC value. |
| 5 | Recalibrate every 3 months and inspect annually. |
| 6 | Clean the sensor to prevent rust and maintain accuracy. |
Troubleshooting tips:
- Make sure the sensor touches the soil completely.
- Avoid placing the sensor where water flows easily to it.
- Pick a spot that represents the average moisture level in your garden.
- Watch for temperature changes, as they can affect readings.
- Disturb the soil as little as possible during installation.
Note: The Arduino’s integrated circuits process the sensor data and control the watering system. This makes your smart garden reliable and efficient.
Using Soil Moisture Sensor for Smart Gardening
Automating Watering
You can automate watering in your smart garden by connecting a moisture soil sensor arduino to a water pump. The sensor checks the moisture level in the soil. When the soil gets dry, the Arduino activates the pump. This system waters your plants only when they need it, which helps you save water and keeps your plants healthy.
- The Arduino system turns on the pump when the soil is dry.
- Sensors measure moisture and adjust watering, reducing water waste.
- Many gardeners automate watering for balcony vegetable gardens, focusing on soil dryness instead of a fixed schedule.
- Projects often include three steps: setting up drip irrigation, using moisture sensors, and automating watering based on sensor data.
Electronic components and integrated circuits in the Arduino control the pump and read sensor data. This setup makes your garden care easier and more reliable.
Interpreting Sensor Data
You need to interpret data from your soil moisture sensor with arduino to make good decisions for your plants. Start by calibrating your sensor. Find the values for dry and wet soil. Place the sensor at root level for accurate readings. Use capacitive sensors to avoid corrosion. Take several readings at different times to get an average moisture level. Make sure your power supply is stable. Think about temperature and soil type when you look at the data.
- Calibrate your sensor for dry and wet soil.
- Put the sensor at root level.
- Use capacitive sensors for less corrosion.
- Take multiple readings for an average moisture level.
- Check your power supply.
- Consider temperature and soil composition.
You can connect your soil moisture sensor to IoT technology. This lets you monitor moisture level and water quality in real time. You get better data for irrigation and avoid overwatering. Capacitive sensors work well for smart garden applications. They give accurate moisture readings and are less affected by soil ions.
| Application Type | Advantages |
|---|---|
| Home Gardening and Indoor Monitoring | Works with Arduino for automated irrigation. |
| Outdoor Farmlands and Greenhouses | Cost-effective, low-power, and resistant to corrosion for continuous monitoring. |
Maintenance Tips
You must maintain your soil moisture sensor to keep it working well. Cover electronic components and connections with hot-glue. Use heat-shrink tubing over the glue for extra protection. You can also coat parts with nail polish, urethane, or epoxy. Use glue-lined and non-glue-lined heat-shrink tubing to cover the sensor.
- Cover electronics with hot-glue.
- Add heat-shrink tubing for protection.
- Use nail polish, urethane, or epoxy to coat components.
- Protect the sensor with glue-lined tubing.
Resistive sensors can suffer from electrolysis, which causes them to degrade. Calibration issues and exposed electronics can affect accuracy and make sensors less suitable for outdoor use. Choose capacitive sensors for better durability. Regular maintenance helps your moisture soil sensor arduino last longer and keeps your smart garden running smoothly.
Using a soil moisture sensor with Arduino helps you grow healthier plants and save water. You can set up your project easily:
- Connect the sensor to the Arduino board.
- Insert the sensor into the soil.
- Link the Arduino to your computer.
Electronic components and integrated circuits work together to automate watering. Over the next five years, smart gardening will see exciting changes:
| Trend | Description |
|---|---|
| Automated Irrigation | Data-driven watering improves efficiency and saves water. |
| Remote Monitoring | Wireless sensors let you check your garden from anywhere. |
Start your own smart garden and help create a more sustainable future!
FAQ
How do you start interfacing soil moisture sensor with Arduino?
You connect the sensor probes to the Arduino board using wires. The electronic components and integrated circuits inside the Arduino read the signals from the sensor. You follow a tutorial to set up the system and begin monitoring soil moisture for your project.
What is the best way to calibrate and test a soil moisture sensor?
You perform testing soil moisture sensor by placing the sensor probes in dry and wet soil. The Arduino uses its integrated circuits to measure values. You record these readings and adjust your arduino soil moisture sensor code for accurate results.
Can you automate watering with Arduino and a soil moisture sensor?
You build a project that uses electronic components to control a water pump. The Arduino reads data from the sensor probes and activates the pump when the soil gets dry. Integrated circuits help automate the watering process for your garden.
Where do you find a reliable tutorial for setting up a soil moisture sensor?
You search online for a tutorial that explains wiring, coding, and calibration. The guide shows how to connect electronic components and integrated circuits. You learn to use arduino soil moisture sensor code to monitor and control soil moisture.
Why do sensor probes matter in smart gardening?
Sensor probes detect moisture levels in the soil. The electronic components send signals to the Arduino’s integrated circuits. Accurate readings from the probes help you manage watering and keep your plants healthy.