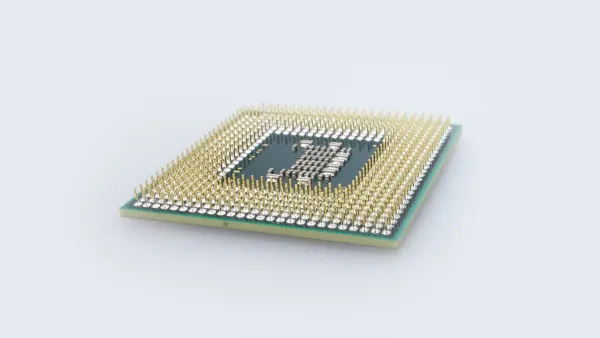
Your Pre-Tapeout Design Review Checklist for HiSilicon Chips
This design review checklist is your essential tool for a successful HiSilicon tape-out. You need a structured process to pr

This design review checklist is your essential tool for a successful HiSilicon tape-out. You need a structured process to prevent costly silicon respins. A disciplined design verification approach ensures your design meets project timelines.
Industry studies show a challenging reality: over 50% of complex System-on-Chip design projects require re-spins. Your design verification must be flawless.
This checklist guides your design through critical physical, timing, power, and functional verification. It helps you achieve a confident design sign-off. Following this process builds confidence in your final design.
Key Takeaways
- A good checklist helps you avoid mistakes before making a chip. This saves money and time.
- You must check your chip's physical design. This includes checking the layout, rules, and electrical parts.
- You need to check how fast your chip works and how much power it uses. This makes sure it runs correctly.
- You must test all features of your chip. This confirms it does what it should and uses the right tools.
THE CORE DESIGN REVIEW CHECKLIST: PHYSICAL & ELECTRICAL SIGNOFF

This part of the design review checklist details the foundational checks for your design. It is a critical quality control checkpoint before manufacturing. Rigorous physical verification prevents performance issues and device failure. You must complete this verification to ensure your layout is electrically sound and adheres to HiSilicon's manufacturing rules for a successful sign-off.
LVS (LAYOUT VERSUS SCHEMATIC)
Layout Versus Schematic (LVS) verification confirms your physical layout accurately matches the final schematic netlist. Your LVS tool flags several common errors that create mismatches in the design.
- Shorts and Opens: These errors indicate incorrect or missing connections between nets.
- Parameter Mismatches: Your tool will find discrepancies in device parameters, such as the width, length, or M factor of transistors between the layout and schematic.
- Missing or Extra Devices: The LVS check ensures every component in the schematic exists in the layout, and no extra devices were added.
DRC (DESIGN RULE CHECK)
You use Design Rule Checks (DRC) to verify that your layout complies with HiSilicon's specific geometric and density rules. Automated DRC tools use the Process Design Kit (PDK) to check your design against manufacturing limitations. This verification step is essential for yield and reliability.
Running Design Rule Checks ensures your design aligns with the manufacturer's capabilities. This alignment helps you achieve a correct design on the first attempt and minimizes iterations with the foundry.
ERC (ELECTRICAL RULE CHECK)
Electrical Rule Checks (ERC) identify critical electrical issues that LVS or DRC tools might miss. This check focuses on the electrical connectivity of your design. Electrical Rule Checks are vital for preventing functional failures. Common issues found include:
| Error Type | Description |
|---|---|
| Floating Nodes | Identifies component inputs not connected to any part of the circuit. |
| Short Circuits | Detects improper connections between two distinct nets, like power and ground. |
| Power/Ground Issues | Flags improper connections to the power and ground networks. |
ANTENNA & ESD CHECKS
This check addresses the "antenna effect," also known as plasma-induced gate oxide damage. This happens when charge accumulates on long metal interconnects during the chip fabrication process. This collected charge can become large enough to break down the thin gate oxide layer of a transistor, causing permanent damage to the design. Your final verification must confirm that the design includes protective measures to prevent this reliability risk. This final check on the checklist is crucial for long-term device health.
TIMING, POWER, & SIGNAL INTEGRITY SIGNOFF
Your design must meet performance targets under all operating conditions. This section of the design review checklist covers the critical analysis needed for a successful timing and power sign-off. A unified verification environment is crucial. It allows you to model the power delivery network alongside signals for accurate results. This integrated approach helps your design converge through every stage.
STA (STATIC TIMING ANALYSIS)
You use Static Timing Analysis (STA) to verify your design meets its timing constraints without running full dynamic simulations. This verification checks for setup and hold violations across millions of paths. Your STA tool identifies paths that are too slow (setup) or too fast (hold).
Common methods to fix setup violations in your design include:
- Upsize Cells: Using larger driver cells can speed up a path.
- Insert Buffers: Adding buffers can reduce delay on long wires.
- Use Lower Vt Cells: Swapping standard cells for low-threshold-voltage (LVT) cells decreases delay but increases leakage power.
Remember that fixes for setup and hold violations are often opposites. For example, adding a buffer might fix a setup violation, while removing one could fix a hold violation in the design. This makes timing analysis a careful balancing act.
POWER ANALYSIS (IR DROP & EM)
You must analyze your design for power integrity. This analysis prevents operational failures. Excessive IR drop, a voltage drop across the power grid, can cause serious issues. These problems include functional failures where a flip-flop might not switch correctly. It can also introduce delays that lead to timing violations in the design.
Electromigration (EM) is another major reliability concern. It is the gradual deterioration of metal interconnects. This process can narrow wires, increase resistance, and worsen IR drop. Your EM verification flow should use physics-based models to predict the long-term reliability of your design and prevent early chip failure.
SI (SIGNAL INTEGRITY) ANALYSIS
Signal Integrity (SI) analysis is a critical requirement for your high-speed design. Even a minor glitch or delay can disrupt the entire system. SI verification ensures signals travel from a driver to a receiver without unacceptable distortion. The primary causes of SI issues are electromagnetic field coupling, which creates crosstalk between adjacent traces.
To mitigate issues like ringing and overshoot, you can add a series termination resistor. This helps dampen oscillations on the signal line. Proper timing analysis, power, and SI verification are essential. They ensure your design is functional, reliable, and ready for tape-out. Achieving mastery in signal integrity timing analysis delivers a power-efficient and robust design.
FUNCTIONAL VERIFICATION & FINAL SIGNOFF
You are now at the final gate of the design review checklist. This stage confirms your chip works exactly as specified. A complete functional verification process is your best strategy to prevent design flaws from reaching manufacturing. It allows you to identify and resolve bugs early, saving significant time and resources. Your goal is a confident final sign-off, ensuring the design is mature and ready for tapeout.
FUNCTIONAL & CODE COVERAGE CLOSURE
You must confirm your design meets all functional requirements. Functional verification is the process that guarantees your product performs as intended. You use coverage metrics to measure the quality of your verification. Key metrics include:
- Code Coverage: This measures if your tests execute every line, branch, and condition in the RTL code.
- Functional Coverage: This user-defined metric confirms you have tested all specified features and corner-case scenarios of the design.
Achieving 100% coverage is the primary goal of your functional verification effort. This closure step ensures you have a robust verification of the design and have resolved all critical bugs.
LOW POWER VERIFICATION
Modern chips require complex low-power features. You must verify these features to prevent failures. The Unified Power Format (UPF) is the standard for this task. You use UPF to specify your design's power intent, including power domains, isolation rules, and power state transitions. This allows verification tools to check that power control mechanisms in your design function correctly. A successful low-power verification ensures your design is both functional and power-efficient.
TOOL & PDK VERSION VERIFICATION
This is a critical administrative check. You must confirm that every final verification run used the exact tool and Process Design Kit (PDK) versions approved by HiSilicon. Using a mismatched version can invalidate your results. A quick check of log files and reports confirms compliance. This simple step prevents costly miscommunication with the foundry and ensures your design data is valid.
FINAL DESIGN & GDSII DATA INTEGRITY
Your last action is to secure the final manufacturing data. You will generate a GDSII file, which is the blueprint for your design. Before sending this file, you must run integrity checks like checksums. This confirms the data has not been corrupted. This final verification step ensures the foundry receives the exact design you approved, protecting the integrity of the entire project.
You have reviewed the complete design review checklist. This checklist is your most reliable path to a successful tape-out. Your design verification ensures a quality design. A complete verification process builds confidence in your final design. This disciplined verification gives you a robust design ready for sign-off.
Following this process for your design is the cornerstone of first-pass silicon success. You minimize risks and deliver a superior design. Your design will meet all project goals.
FAQ
Why is LVS so important for HiSilicon tapeout?
You use Layout Versus Schematic (LVS) to guarantee your physical layout perfectly matches the approved circuit schematic. This check prevents fundamental errors like shorts, opens, or incorrect components. A clean LVS report is a non-negotiable requirement for a successful tapeout with any foundry, including HiSilicon.
How do you balance setup and hold time fixes?
You must approach timing closure as a careful balancing act. Fixes for setup and hold violations often have opposite effects. For example, adding a buffer can fix a setup violation but may create a hold violation. Your goal is to find an optimal solution for all timing paths.
What happens if you use the wrong PDK version?
Using an incorrect Process Design Kit (PDK) version invalidates your verification results. Your design may fail manufacturing because it was not checked against HiSilicon's final rules. You must always confirm you are using the foundry-approved PDK and tool versions to avoid a costly silicon respin.
Pro Tip 💡: Always double-check your run logs and scripts for version information before final signoff. This simple step saves entire projects.
What is the main goal of this checklist?
This checklist provides a structured path to a successful tapeout. Its primary goals are to:
- Minimize the risk of costly design errors.
- Ensure your chip meets all functional, timing, and power requirements.
- Build confidence for a first-pass silicon success.