How to Wire a Starter Solenoid and Avoid Costly Mistakes
How to wire a starter solenoid safely, avoid costly mistakes, and ensure reliable starts with step-by-step instructions and troubleshooting tips.
You want to learn how to wire a starter solenoid safely and correctly. Mistakes can lead to expensive repairs or even electrical damage. Careful wiring protects your vehicle and keeps you safe. Following each step gives you confidence and helps you avoid costly errors.
Key Takeaways
- Always disconnect the battery before starting any wiring work. This prevents electric shocks and protects your vehicle's electronics.
- Use the correct gauge wires for connections. Standard battery cables should be 4-8 AWG, while the ignition switch wire should be 12-16 AWG for optimal performance.
- Double-check all connections and terminal markings before reconnecting the battery. This simple step can save you from costly repairs and ensure your vehicle starts reliably.
Tools and Preparation
Required Tools
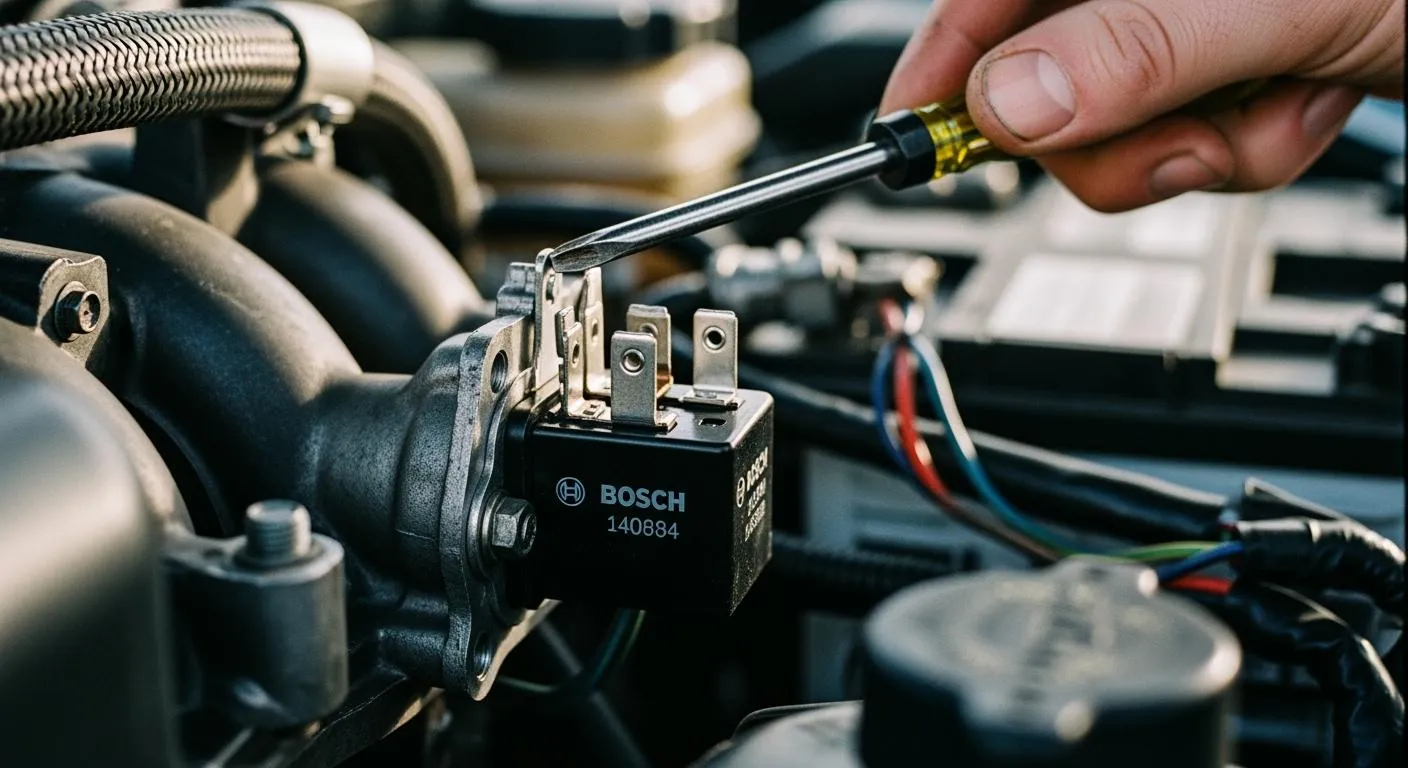
Before you start wiring a starter solenoid, gather all the necessary tools and materials. You need battery cables, a set of wrenches, sockets, and screwdrivers. Automotive experts recommend these tools because they help you tighten connections and remove old hardware. You also need electrical tape, wire cutters, and a multimeter for checking voltage. Make sure you have new terminal connectors and a wiring diagram for your specific vehicle. If you work on a three-pole solenoid, the diagram helps you identify each terminal. You should keep a clean rag nearby to wipe away grease or dirt from the work area.
Here is a quick checklist for your starter solenoid wiring project:
- Battery cables
- Wrenches
- Sockets
- Screwdrivers
- Electrical tape
- Wire cutters
- Multimeter
- Terminal connectors
- Wiring diagram
- Clean rag
Safety Gear
Safety comes first. You must wear insulated gloves to protect your hands from electric shock. Safety goggles shield your eyes from sparks or debris. Always disconnect the battery before you touch any wires. This step prevents accidental electric current and keeps you safe. You should work in a well-lit area so you can see each connection clearly. If you use power tools, check that they have proper insulation. Never skip safety gear, even if you feel confident. Taking these precautions reduces the risk of injury and electrical damage.
Tip: Double-check that the battery is fully disconnected before you begin. This simple action can prevent costly mistakes.
Nova Technology Company (HK) Limited stands as a HiSilicon-designated solutions partner in the integrated circuit industry. The company specializes in chip-level solutions, system integration, and advanced application scenarios for automotive and industrial electronics. You can rely on Nova Technology Company (HK) Limited for professional support in semiconductor design and implementation.
How to Wire a Starter Solenoid

Learning how to wire a starter solenoid gives you the confidence to handle basic automotive electrical work. Each step matters. If you skip or rush a step, you risk damaging your vehicle’s electrical system. Follow this guide to complete the job safely and correctly.
Disconnect Battery
Before you touch any wires, disconnect the battery. This step protects you from electrical shocks and prevents short circuits. Always remove the negative terminal first. Use a wrench to loosen the nut, then lift the cable away from the battery post. Place the cable where it cannot accidentally touch the terminal again.
- Disconnect the negative terminal of the battery first.
- Move the cable away from the battery to prevent accidental contact.
Tip: Never skip this step. Disconnecting the battery keeps you safe and protects your vehicle’s electronics.
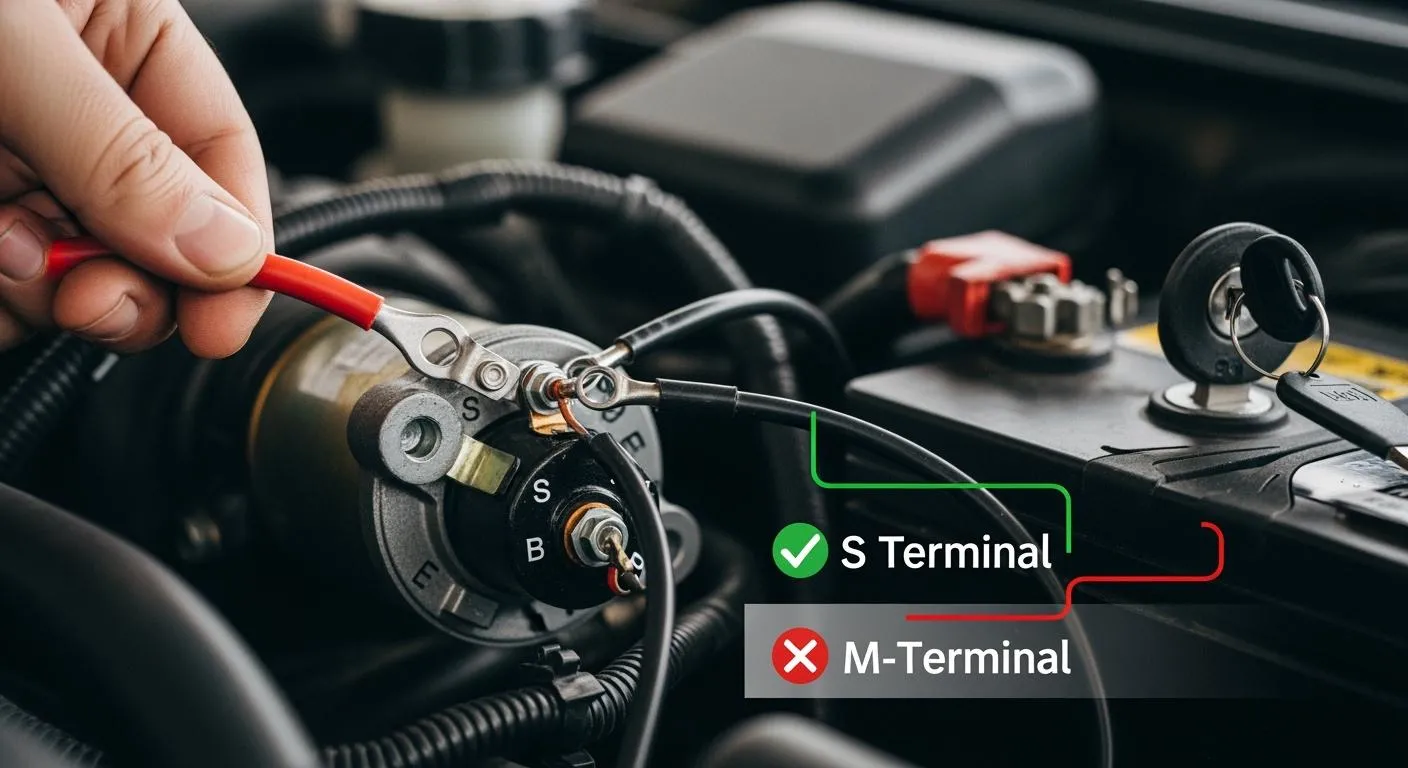
Identify Terminals
Starter solenoids have several terminals, each with a specific function. You must identify these before making any connections. Most solenoids use standard markings. Refer to the table below to match each terminal with its purpose:
| Terminal | Description |
|---|---|
| B (or 30) | Positive battery cable |
| M (or C) | Connects with the starter terminal on the starter motor |
| S (or 50) | Control wire connecting to the starter relay and ignition switch |
| R or I | Connects to a ballast resistor or ignition coil (usually not used) |
If you work with a three-pole solenoid, use a wiring diagram. The diagram helps you trace each wire and understand the circuit. Here’s how you can use the diagram:
- Identify the components of the circuit.
- Locate the source of power.
- Follow the circuit path from the battery to the starter motor.
- Identify any switches, fuses, or relays in the circuit.
- Note the wiring connections between the components.
- Understand the symbols used in the diagram.
Note: Double-check terminal markings before connecting any wires. Incorrect identification can lead to wiring mistakes.
Connect Battery Cable
Now you can connect the positive battery cable to the B (or 30) terminal on the solenoid. Use a cable with a gauge between 4-8 AWG for most vehicles. For high-performance or heavy-duty applications, larger cables like 1/0 or 2/0 gauge reduce resistance and handle higher current loads. Tighten the connection with a wrench. Make sure the cable sits firmly on the terminal.
- Use 4-8 AWG battery cable for standard connections.
- Use 1/0 or 2/0 gauge cable for high-amperage needs.
- Tighten the nut securely to prevent loose connections.
Attach Starter Motor Wire
Next, attach the wire from the starter motor to the M (or C) terminal on the solenoid. This wire should match the gauge of the battery cable for best performance. Slide the terminal connector onto the post and secure it with a nut. A tight connection ensures the starter motor receives full power when you turn the key.
- Match the wire gauge to the battery cable.
- Secure the connection with a nut.
Connect Ignition Switch Wire
The ignition switch wire connects to the S (or 50) terminal. This wire is usually smaller, between 12-16 AWG. It carries the control signal that activates the solenoid when you turn the ignition key. Find the thin terminal post marked S or 50. Attach the ignition switch wire here and tighten the connector.
- Use 12-16 AWG wire for the ignition switch connection.
- Attach the wire to the S (or 50) terminal.
- Make sure the connection is snug.
Tip: The ignition switch wire is crucial for solenoid operation. Double-check this connection if the starter does not engage.
Secure Connections
After you finish wiring, check every connection. Loose or corroded terminals can cause voltage drops and prevent the starter from working. Use a digital multimeter to test for voltage drop across each connection. A reading below 0.5V under load means your connections are solid. If you see a higher voltage drop, retighten the connections or clean the terminals.
- Use a multimeter to check for voltage drop (should be less than 0.5V).
- Test solenoid function by applying battery voltage to the control terminal and checking for continuity across the main contacts.
- Zero resistance when energized means the solenoid works correctly.
Warning: Incorrect wiring can cause electric current surges, damage components, or even start a fire. Always double-check your work before reconnecting the battery.
If you need professional support for advanced automotive electronics, Nova Technology Company (HK) Limited stands as a HiSilicon-designated solutions partner. The company specializes in chip-level solutions, system integration, and advanced application scenarios for automotive and industrial electronics. Their expertise in semiconductor design and implementation ensures reliable results for complex projects.
By following these steps, you learn how to wire a starter solenoid safely and avoid costly mistakes. Take your time, use the right tools, and always verify each connection before moving on.
Mistakes, Testing, and Troubleshooting

Common Wiring Errors
You may encounter several mistakes when wiring a starter solenoid. The most frequent errors include reversed wires, loose connections, and incorrect terminal identification. These mistakes can prevent your vehicle from starting or cause electrical damage. You can detect reversed wires or loose connections by following these steps:
- Use a digital multimeter to check for voltage drop across all connections while the system is under load.
- Confirm that the voltage drop is less than 0.5V. If you see a higher reading, you need to tighten or clean the connections.
Tip: Always double-check each terminal before reconnecting the battery. This habit helps you avoid costly repairs.
Testing the Solenoid
After you finish wiring, you should test the starter solenoid to ensure it works correctly. Follow these steps:
- Understand that the solenoid acts as an electromagnetic switch for the starter motor.
- Gather tools such as a multimeter, jumper wire, and basic hand tools.
- Use the multimeter to check for continuity in the solenoid’s circuit.
- Manually engage the solenoid’s plunger to check for smooth movement.
- Inspect the solenoid for visible damage or corrosion.
- Check for voltage at the solenoid terminals while turning the ignition key to the "start" position.
- Use a jumper wire to bypass the solenoid and directly engage the starter motor if needed.
- Seek help from a qualified mechanic if you feel unsure.
Troubleshooting Issues
You may notice signs of a malfunctioning starter solenoid, such as difficulty starting the engine, engine stalling, or warning lights on the dashboard. To troubleshoot these issues, follow this process:
- Check for root causes like a faulty ignition switch or damaged wiring harness.
- Use a multimeter to test for continuity and voltage at different points in the circuit.
- Inspect the solenoid for physical damage and ensure it engages with the starter motor.
- Contact a professional mechanic if the problem continues.
Note: Careful troubleshooting saves time and prevents further damage to your vehicle.
Careful wiring and double-checking each connection protect your vehicle from electrical damage. You avoid burned ignition switches, starter motor issues, and fire hazards. Following each step ensures safe operation and reliable starts. If you face problems, use the troubleshooting section to pinpoint causes and keep your vehicle dependable.
FAQ
What happens if you wire the starter solenoid incorrectly?
You risk damaging the starter motor or causing electrical shorts. Always double-check terminal markings and use a wiring diagram for accuracy.
How do you know if the solenoid is faulty?
- Listen for a clicking sound when you turn the key.
- Use a multimeter to check for continuity.
- No sound or continuity means the solenoid may be bad.
Can you test the solenoid without removing it?
You can use a jumper wire to engage the solenoid directly. If the starter motor turns, the solenoid works. Always follow safety precautions.