Tips for Accurate Multimeter Resistor Testing
You want reliable results when you perform a multimeter resistor test. Good technique helps you avoid mistakes in your elect
You want reliable results when you perform a multimeter resistor test. Good technique helps you avoid mistakes in your electronics projects. Accurate measurements make your circuits work as intended.
Tip: Careful handling of components and tools leads to better readings.
You can achieve precise testing with simple steps, even if you are a beginner.
Key Takeaways
- Accurate resistor testing is crucial for circuit performance. It ensures your electronic projects function as intended.
- Always disconnect resistors from circuits before testing. This prevents interference from other components and gives true readings.
- Select the correct multimeter range for your resistor. Using the lowest range that covers the resistor's value improves measurement accuracy.
- Check probe continuity before testing. Good connections ensure reliable readings and help avoid errors.
- Regularly calibrate your multimeter. Calibration maintains accuracy and reliability in your measurements over time.
Why Multimeter Resistor Test Accuracy Matters
Circuit Performance
Accurate resistor measurements help your electronic circuits work as designed. When you test resistors with a multimeter, you confirm that each component matches its intended value. Even small mistakes can change how signals move through your circuit.
Note: Precision matters most in circuits that process signals or control power.
You may notice problems if resistor values drift from their targets. Here are some ways accuracy impacts performance:
- Signal Accuracy and Precision: If you use resistors in audio or sensor circuits, small errors can distort signals or cause unreliable readings.
- Power Consumption and Efficiency: Incorrect resistor values can change current flow. This may waste energy, cause overheating, or damage parts.
A simple table shows how resistor errors affect your circuit:
| Resistor Error | Possible Impact |
|---|---|
| Too High | Weak signals, low power |
| Too Low | Overheating, wasted energy |
Troubleshooting Errors
You rely on your multimeter to find faults in electronic components. Inaccurate resistor tests can lead you in the wrong direction. You may replace good parts or miss the real problem.
Common troubleshooting mistakes include:
- Measuring resistors while they are still in the circuit. This can give you false readings, like two 100Ω resistors in parallel showing 50Ω.
- Choosing the wrong range on your multimeter. This may damage your meter or give you incorrect results.
- Using a multimeter with a weak battery. Low power can make your readings unreliable.
- Ignoring lead resistance, especially when testing low-value resistors. This can add extra resistance and skew your results.
- Seeing an open circuit (OL) when nothing is connected. This often means you need to check your range setting.
Tip: Always disconnect resistors before testing and check your multimeter’s battery for best results.
You avoid wasted time and confusion when you test resistors accurately. Careful measurements help you fix problems faster and keep your circuits running smoothly.
Multimeter Setup for Resistor Testing

Setting up your multimeter correctly is the first step to getting accurate resistor measurements. You need to follow a few simple steps to make sure your readings are reliable.
Select Multimeter Range
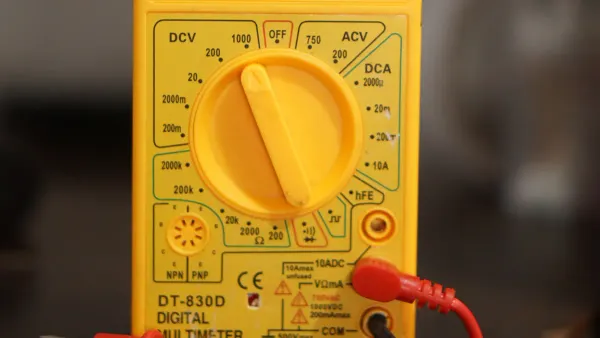
Start by turning your multimeter to Resistance mode (Ω). Look at the display. If you see OLΩ, this means there is no connection yet. Choose a range that matches the expected value of your resistor. For example, if you test a 15K ohm resistor, set the range to 20K. This gives you a clear and precise reading. If you pick a range that is too high, your measurement will lose detail. Always use the lowest range that still shows the full value. This helps you avoid errors and makes your results more accurate.
Tip: The right range makes your readings easier to understand and helps you spot problems in your circuit.
Zero the Multimeter
Zeroing your multimeter removes errors caused by the test leads and internal offsets. Make sure all power is off in your circuit. Remove the resistor from the board or open the switch. Set the dial to Ω. Touch the probe tips together. The display should show close to zero ohms. If you see extra resistance, use the REL (relative) mode to subtract it. This step is important, especially when you test low-value resistors. You want your reading to show only the resistor’s value, not the wires.
Check Probe Continuity
Check probe continuity before you start testing. Connect one probe to each end of the resistor. If the circuit is complete, the multimeter will beep and show a value near zero. If you see OL or 1, the path is open. Good probe continuity means your test leads work well and your readings are trustworthy.
Note: Always check your probes before testing. Bad probes can give you false results and make troubleshooting harder.
A careful setup helps you get the most accurate results when testing resistors in electronic circuits and integrated circuits.
Preparing the Resistor
Disconnect from Circuit
You need to disconnect the resistor from the circuit before you test it with a multimeter. This step helps you get a true reading of the resistor’s value. If you measure resistance while the resistor stays in the circuit, other components can affect your results. Voltage and current in the circuit may change the reading on your meter.
Tip: Always turn off power before you remove any component.
Here are important reasons to disconnect the resistor:
- Accurate resistance measurement becomes possible when you test the resistor alone. Other parts in the circuit can change the value you see.
- You stay safe by avoiding electric shock. Testing in a live circuit can be dangerous, especially in high-voltage systems.
- You protect your circuit from damage. Some components may break if you apply voltage during resistance testing.
You make your work easier and safer when you test resistors outside the circuit. This habit helps you avoid mistakes and keeps your electronic projects running smoothly.
Inspect and Handle
Before you test a resistor, you should inspect it closely. Look for signs that show the resistor is damaged or not suitable for accurate testing. Damaged resistors can give you false readings and cause problems in your circuit.
Check for these signs:
- The body looks busted or burned from too much current.
- You see cracks or chips in the body.
- The color of the resistor has changed, often from overheating.
- The resistor acts open or short, which means it does not work as expected.
- The value may have changed because of excessive heat.
- The resistor appears broken or bent.
Handle resistors gently. Use clean hands or tools to avoid adding dirt or oil. Place the resistor on a clean surface before testing. Careful inspection and handling help you get accurate results and keep your electronic components in good condition.
Note: Replace any resistor that shows damage. Damaged parts can cause errors in your measurements and affect the performance of your integrated circuits.
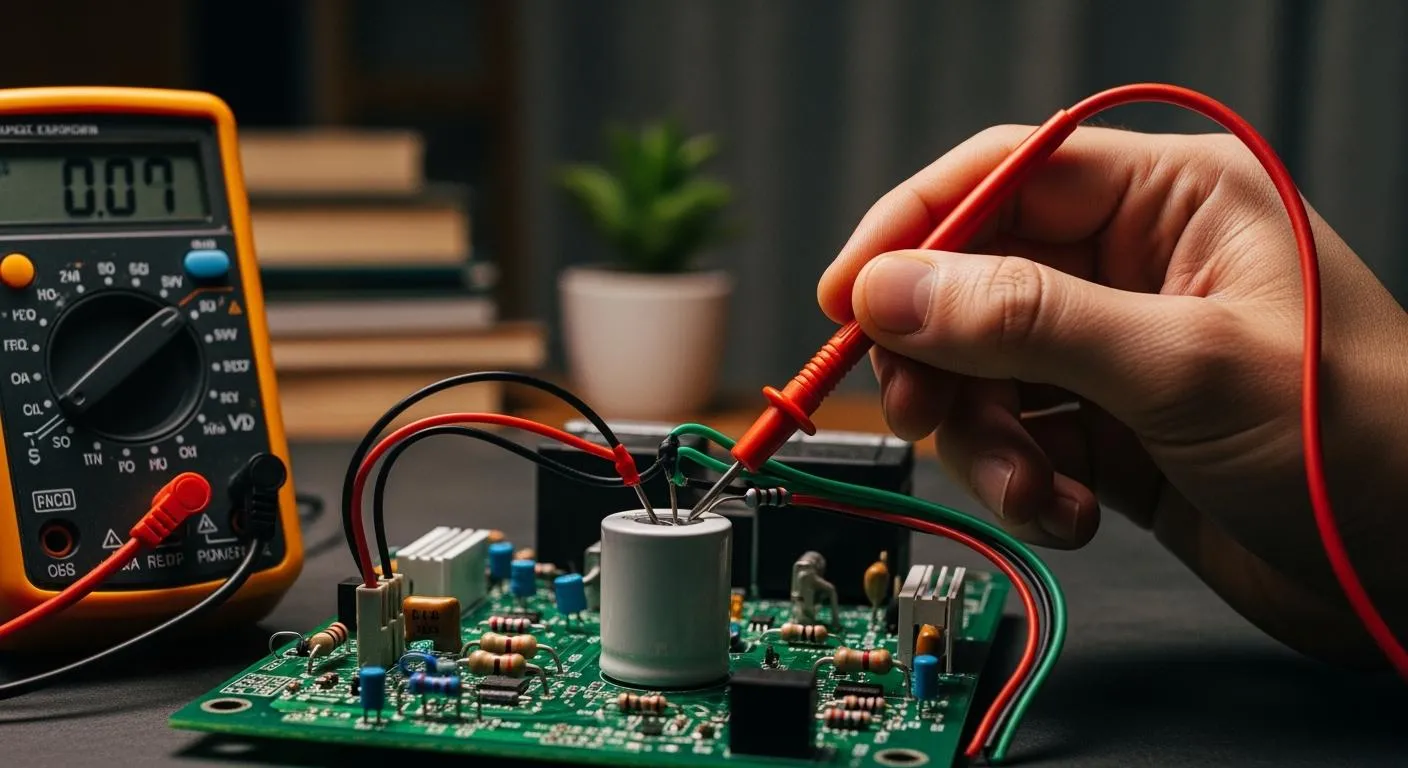
Step-by-Step Multimeter Resistor Test
Accurate results from a multimeter resistor test depend on following each step carefully. You can avoid common mistakes and get reliable readings by using the right technique. This guide helps you measure resistance in electronic components and integrated circuits.
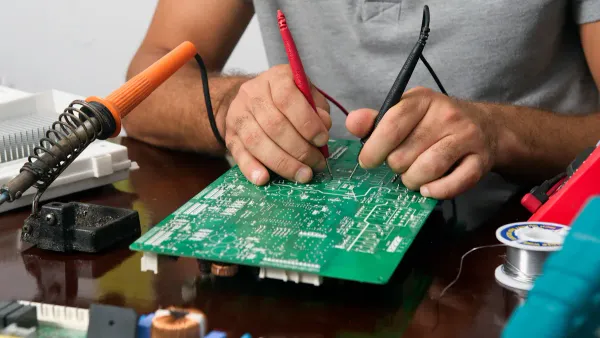
Connect Probes Properly
You need to connect the probes to the resistor with care. Start by holding the resistor securely. Use matched probes with similar frequency responses and impedances. This prevents errors during your multimeter resistor test. Make sure the connectors are clean and firmly attached to the probe tips. Good contact ensures you get the true resistance value.
Keep your testing area away from electronic equipment. This reduces environmental noise and interference. Always check that the signal ground is connected and free from interference. When you test resistance on a printed circuit board, remember that parallel resistance can affect your results. For the most accurate multimeter resistor test, remove the resistor from the circuit before measuring resistance.
Tip: Use fine-tipped probes for surface-mount resistors. This helps you reach small leads and get a stable reading.
Allow Reading to Stabilize
After you connect the probes, watch the multimeter display. The numbers may change for a few seconds. Wait until the reading stops moving. A stable reading means you have a good connection and the resistor is not affected by outside factors.
If you see the display jump or show “OL,” check your probe contact and range setting. Sometimes, a faulty resistor or poor connection causes unstable readings. You want the resistance value to settle before you record it. This step is important for every multimeter resistor test, especially when you work with integrated circuits.
Note: Stable readings help you avoid errors and make your measurements more reliable.
Test Resistance Value
You can now test resistance and record the value. Follow these steps for the most accurate multimeter resistor test:
- Locate the resistor you want to test. Check for colored bands that show its resistance value.
- Remove the resistor from the circuit. This prevents interference from other components.
- Hold the resistor and prepare your multimeter probes.
- Set the multimeter to resistance (Ω) mode. If your meter is not auto-ranging, choose a middle range like 20kΩ.
- Touch one probe to each lead of the resistor. Make sure you have firm contact.
- Read the numerical value on the multimeter display. For example, a 470Ω resistor should show a value near 470 ohms. Consider the tolerance marked on the resistor.
- If the reading is very different or shows “OL,” the resistor may be faulty.
- For surface-mount resistors, turn off the device and disconnect it from power before testing. Use fine-tipped probes for accurate contact.
- If you must test resistance in-circuit, make sure the resistor is in good condition. Desolder it for the most reliable measurement.
You should always turn off power to the circuit before you begin. Insert the leads into the multimeter and connect them to the resistor. Capture a stable measurement and record both low and high values if needed. Set a reference value for future tests. When you finish, turn off the multimeter to save battery life.
Tip: Recording the resistance value helps you compare it to the resistor’s color code and tolerance. This step is important for troubleshooting electronic components and integrated circuits.
A careful multimeter resistor test helps you find faulty parts and confirm that your components work as expected. You improve your electronics projects by measuring resistance with precision.
Interpreting Test Resistance Results
Compare to Color Code
When you finish a resistance measurement with your multimeter, you need to check if the value matches the resistor’s color code. Resistors use colored bands to show their value and tolerance. You read these bands from left to right. Each band stands for a digit or a multiplier. The first two bands give you the main digits, the third band is the multiplier, and the fourth band shows the tolerance.
To verify your resistance measurement, follow these steps:
- Identify the colors on the resistor’s bands.
- Use a resistor color code chart to match each color to its digit.
- Combine the digits to make a number. Multiply this number by the value from the third band.
- Check the fourth band to see the tolerance range.
If your multimeter shows a value close to the calculated resistance, your resistor works as expected. If the reading is far off, you may have a damaged resistor or a problem with your resistance measurement. Always compare your results to the color code, especially when you test electronic components in integrated circuits.
Tip: Keep a color code chart nearby. It helps you check resistance measurement results quickly.
Consider Tolerance and Temperature
You need to think about tolerance and temperature when you interpret resistance measurement results. Tolerance tells you how much the resistor’s value can change from the number shown by the color code. For example, a 5% tolerance means the real value can be 5% higher or lower than the marked value.
Temperature changes can affect resistance measurement. When resistors heat up, their resistance may go up or down. Soldering and mechanical stress can also change the value. These changes can be permanent or temporary. If you test a resistor after soldering, you may see a different resistance measurement than before.
- Temperature can change resistance because of the resistor’s material.
- Soldering heat and stress can cause lasting changes.
- Strain effects, like piezoresistivity, can change resistance, especially in surface-mount resistors.
You may notice that tight tolerances in datasheets do not always match what you measure after assembly. Always allow for some difference in your resistance measurement, especially when you work with integrated circuits.
Note: Test resistors at room temperature for the most accurate resistance measurement. Avoid testing right after soldering.
Common Multimeter Resistor Test Mistakes
Testing resistors with a multimeter can seem easy, but small mistakes can lead to big problems in your electronic projects. You need to know the most common errors so you can avoid them and get accurate results.
In-Circuit Testing Errors
Many people try to measure resistance while the resistor is still connected to the circuit. This often gives you a wrong value because other parts in the circuit create parallel paths for current. These paths change the resistance you see on your multimeter.
- Measuring a resistor in-circuit can show a lower value than the real one.
- Parallel components, like other resistors or semiconductors, affect your reading.
- Non-linear parts, such as diodes or transistors, do not follow Ohm’s law and can confuse your measurement.
Tip: Always remove the resistor from the circuit before testing. This step helps you avoid interference from other components and gives you a true reading.
Poor Probe Contact
You might not think about your test leads, but poor contact can cause big errors. Dirty or oxidized probe tips add extra resistance. Worn leads can also make your readings jump around.
- Touching the metal parts of the leads with your fingers adds body resistance, especially when testing high-value resistors.
- Loose or dirty connections can make the multimeter show a higher resistance than the real value.
- Contact resistance changes each time you test, so your results may not match.
Note: Keep your test leads clean and avoid touching the metal tips. This helps you get a stable and accurate reading.
Skipping Multimeter Calibration
You need to calibrate your multimeter regularly. If you skip this step, your measurements may drift over time. A calibrated multimeter gives you reliable and repeatable results, which is important for diagnosing problems in electronic components and integrated circuits.
- Calibration checks that your multimeter measures within the correct range.
- Regular calibration helps you trust your data and make good decisions.
- Uncalibrated meters can lead to wrong repairs or missed faults.
Tip: Schedule calibration for your multimeter to keep your electronics work accurate and dependable.
Troubleshooting Inaccurate Multimeter Readings
Double-Check Connections
You may notice that your multimeter gives you resistance values that do not match the expected results. Start by checking your connections. Make sure the probes touch the resistor leads firmly. Clean the tips if you see dirt or corrosion. If you want to improve accuracy, you can use a lab power supply with adjustable current. Set your multimeter to voltage mode and connect it directly to the resistor leads.
By setting the power supply to 1 amp, you can read millivolts as milliohms of resistance. This method helps you minimize the impact of lead resistance, especially when you test low-value resistors.
Always isolate the resistor from the circuit if possible. When you measure resistors in-circuit, you also measure the effects of other connected components. Parallel paths in the circuit make it hard to get precise resistance values. Remove the resistor before testing to avoid errors.
Fluctuating or Unexpected Values
Sometimes, your multimeter shows numbers that jump around or seem wrong. Several common causes can lead to these problems. Look at the table below to see what might be happening:
| Cause | Explanation |
|---|---|
| Low or dead battery | The internal voltage reference becomes unstable, causing erratic readings. |
| Broken test leads | Damaged leads can create poor connections and fluctuating resistance values. |
| Poor connections | Loose or corroded connections can cause unstable readings. |
You can also check for these issues:
- Loose or faulty connections in the circuit can cause fluctuations.
- Electrical interference from nearby appliances may affect your readings.
- Poor calibration of your multimeter can lead to unreliable results.
- Changes in moisture or atmospheric conditions may impact resistance measurements.
If you see unexpected values, replace the battery in your multimeter. Inspect your test leads for damage. Make sure all connections are tight and clean. Calibrate your multimeter regularly to keep your measurements accurate. Test resistors in a dry environment to avoid problems with moisture. These steps help you get stable and reliable readings when you work with electronic components and integrated circuits.
Advanced Multimeter Resistor Test Methods
Testing resistors in electronic components and integrated circuits sometimes requires advanced techniques. You can use these methods to get more accurate results, especially when you need to measure very low resistance values or work with high-precision devices.
2-Wire Connection Measurement Method
You often use the 2-wire connection measurement method for quick and simple resistor tests. This method connects two wires from your multimeter directly to the resistor. You measure the total resistance, which includes the resistor and the resistance of the wires themselves.
- You can set up the test fast and easily.
- This method works well for resistors with higher values, where wire resistance does not affect the result much.
- You may notice errors when you measure low-value resistors because the wires add extra resistance.
For example, if you test a resistor in an integrated circuit and the value is close to zero, the reading may be higher than the true resistance. The wires and connections add resistance that your multimeter cannot ignore. You should use this method when you want a quick check and do not need high precision.
Tip: Use the 2-wire connection measurement method for general testing, but switch to advanced methods for low-resistance components.
4-Wire Connection Measurement Method
You can use the 4-wire connection measurement method when you need high accuracy. This method uses four wires: two wires send current through the resistor, and two separate wires measure the voltage directly across the resistor. Your multimeter calculates the resistance using only the voltage across the resistor, ignoring the resistance of the wires.
- You get precise measurements, especially for resistors in the milli-ohm or micro-ohm range.
- This method helps you test resistors in integrated circuits where accuracy matters most.
- You avoid errors caused by wire resistance, which is important for high-precision work.
You should choose the 4-wire connection measurement method when you need to measure very low resistance values or when you work with high-precision resistors. For example, you may use this method to test a precision resistor with a tolerance of 0.1% in a voltage divider circuit. This helps you maintain reliable measurements even when temperature changes.
Note: The 4-wire connection measurement method is the best choice for advanced testing in electronic components and integrated circuits.
Bench Multimeter Use
You can use a bench multimeter for the highest level of accuracy in resistor testing. Bench multimeters are larger and designed for demanding applications in labs and production environments. These devices offer better precision than handheld models.
- Bench multimeters measure resistance with up to 8.5 digits of resolution.
- You get stable performance because these devices use AC power.
- You can test resistors in integrated circuits with very high accuracy.
Bench multimeters often include features for 4-wire measurements and calibration with high-precision standards. You may use models like the Solartron 7081 or Datron 1271/1281 for cost-efficient, high-precision work. Some advanced models, such as the 9975 DCC, provide even higher accuracy for specialized tasks.
| Equipment | Precision Level | Cost Estimate |
|---|---|---|
| Solartron 7081 | High | Cost-efficient |
| Datron 1271/1281 | High | Higher cost |
| 9975 DCC | Very High | ~$2,500 used |
You should use a bench multimeter when you need to test resistors in critical electronic components or integrated circuits. These devices help you achieve reliable results for research, development, and quality control.
Tip: Choose a bench multimeter for advanced testing and calibration in electronics labs.
Best Practices for Consistent Results
Minimize Interference
You want your multimeter to give you reliable readings every time. Interference can make your results unstable or incorrect. You can follow simple steps to reduce outside influences and improve accuracy.
- Remove the resistor from the circuit before testing. This step helps you avoid interference from parallel components and gives you accurate resistance measurements.
- Keep your testing area free from strong magnetic fields and electrical noise. Devices like motors or radios can affect your multimeter readings.
- Avoid touching the test leads or the conductive parts of the resistor during measurement. Your body can add extra resistance, especially when you measure high-value resistors.
- Connect the test leads firmly to both ends of the resistor. Loose connections can cause unstable readings and lower accuracy.
- If you notice unstable results, check for external influences. Identify the cause and take corrective actions, such as moving away from noisy equipment or cleaning the probe tips.
Tip: Stable readings mean you have minimized interference. You get more accurate resistance measurements for your electronic components and integrated circuits.
Maintain Tools
Your tools play a big role in the accuracy of your tests. You need to keep your multimeter and accessories in good condition to achieve consistent results.
- Clean your test leads often. Dirt or corrosion can change resistance and affect your measurements.
- Store your multimeter in a dry, safe place. Moisture can damage the internal parts and lower accuracy.
- Calibrate your multimeter regularly. Calibration helps you trust your readings and ensures accurate resistance measurements over time.
- Replace worn or damaged test leads. Good leads help you connect to electronic components and integrated circuits without adding extra resistance.
- Check the battery in your multimeter. A weak battery can cause unstable or false readings.
Note: Well-maintained tools help you achieve the best accuracy. You can rely on your multimeter for precise measurements in all your electronics projects.
You can achieve accurate resistor testing with your multimeter by following these steps:
- Prepare your tools and disconnect resistors from circuits.
- Set up your multimeter correctly and check probe contact.
- Compare readings to color codes and consider tolerance.
Practicing these methods helps you find problems in electronic components and integrated circuits. You build confidence with each test. If you want higher precision, explore advanced techniques like 4-wire measurements and bench multimeters.
FAQ
How do you know if a resistor is faulty?
You can check for physical damage like burns or cracks. Use your multimeter to measure resistance. If the value is far from the color code or shows “OL,” the resistor is likely faulty.
Can you test resistors without removing them from a circuit?
You should remove resistors before testing. Other components in the circuit can change the reading. Testing in-circuit often gives you incorrect resistance values.
Why does your multimeter show “OL” when testing a resistor?
“OL” means the resistance is too high for the selected range or the resistor is open. Try changing the range or check if the resistor is damaged.
What is the difference between 2-wire and 4-wire measurement?
A 2-wire method measures both the resistor and lead resistance. A 4-wire method uses separate wires for current and voltage, giving you more accurate results, especially for low-value resistors.
How often should you calibrate your multimeter?
You should calibrate your multimeter once a year. Regular calibration helps you get accurate readings when testing electronic components and integrated circuits.