A Practical Guide to USB A 2.0 Pinout
The USB A 2.0 pinout shows you how the four pins inside a USB connector carry power and data. You can use a table or a simpl

The USB A 2.0 pinout shows you how the four pins inside a USB connector carry power and data. You can use a table or a simple diagram to see each pin’s purpose and color. When you understand the pinout, you can design custom USB cables, solve device connection issues, and prevent power problems. This knowledge helps you make sure data moves smoothly between electronic components, like microcontrollers or storage devices. You will also avoid mistakes when wiring or testing USB connections.
Key Takeaways
- Understand the four USB A 2.0 pins: VBUS (5V), D- (Data -), D+ (Data +), and Ground. Knowing these helps you connect devices safely.
- Always check wire color codes when wiring USB cables. Matching colors to the correct pins prevents damage and ensures proper data transfer.
- Use a multimeter to verify connections before powering up your project. This step helps avoid mistakes that can harm your electronic components.
- Follow best practices for soldering USB wires. Proper techniques keep connections strong and reduce the risk of data errors or shorts.
- Be aware of USB power limits. Do not exceed 500 mA to prevent overheating and potential damage to your devices.
USB A 2.0 Pinout
Pin Functions
When you look at a USB A 2.0 pinout, you see four main pins inside the type-a connector. Each pin has a special job. You need to know these pin functions to connect electronic components and integrated circuits safely. The pins help move data and supply power between devices.
Here is a table that shows the pin functions and their standard wire colors:
| Pin Number | Cable Color | Function |
|---|---|---|
| 1 | Red | VBUS (5 volts) |
| 2 | White | D- (Data -) |
| 3 | Green | D+ (Data +) |
| 4 | Black | Ground |
- Pin 1 (Red): This pin gives 5 volts of power. You use it to supply energy to devices like microcontrollers or sensors.
- Pin 2 (White): This pin carries the D- signal. It helps send and receive data between your computer and your device.
- Pin 3 (Green): This pin carries the D+ signal. It works with D- to make sure data transfer happens smoothly.
- Pin 4 (Black): This pin connects to ground. It completes the circuit and keeps your devices safe.
Tip: The D+ and D- pins use a differential pair. This means they send opposite signals to reduce errors during data transfer. This method helps your usb pinout work well, even if there is electrical noise.
You must connect each pin correctly. If you mix up the pinout, your devices may not talk to each other. Wrong wiring can even damage your electronic components. For example, if you connect two power pins together, you might cause a short circuit. This can break your microcontroller or storage device.
Wire Color Codes
You often see four colors in a usb cable. These colors help you match each wire to the right pin in the usb pinout. Knowing the color codes makes wiring and troubleshooting much easier.
Here is a table with the standard wire color codes:
| Color | Function |
|---|---|
| Red | Positive power (5V DC) |
| Black | Ground wire |
| White | Data - (D-) |
| Green | Data + (D+) |
When you build or repair a usb cable, always check the color codes. If you connect the wrong wires, you risk damaging your devices. For example:
- Devices may not communicate if you swap the data wires.
- A wrong connection between power and ground can cause a short circuit.
- Using a cable with two type-a connectors can connect two hosts. This is not safe and can fry your devices.
You use the usb pinout to make sure data and power flow correctly. This is important for projects with integrated circuits, like Arduino boards or Raspberry Pi computers. When you follow the color codes and pin functions, you protect your electronics and keep data transfer reliable.
Note: USB 2.0 improved data transfer speeds compared to USB 1.1. USB 1.1 could only reach 12 Mbps, but USB 2.0 can go up to 480 Mbps. Both use the same four-pin usb pinout, so you can use the same wiring for both.
You now know how each pin and wire color works in the usb a 2.0 pinout. This knowledge helps you build, repair, and troubleshoot usb connections in your electronic projects.
USB Pinout Diagram
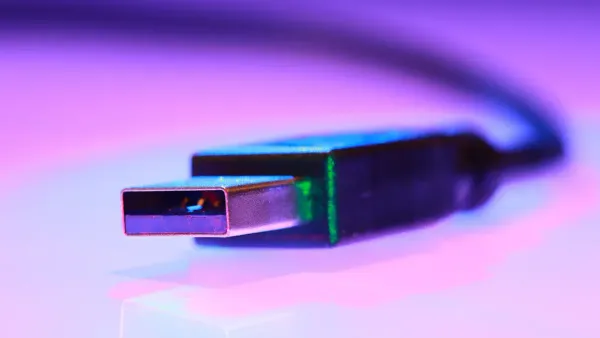
Table Overview
You can use a usb pinout diagram to see how each pin in a usb cable connects to your devices. This table shows the four main pins in a usb a 2.0 pinout. Each pin has a job for either data transfer or power. The table also lists the standard wire colors you find inside most usb cables.
| Pin Number | Name | Function | Wire Color |
|---|---|---|---|
| 1 | VBUS | Power (5V) | Red |
| 2 | D- | Data - | White |
| 3 | D+ | Data + | Green |
| 4 | GND | Ground | Black |
You use this usb pinout table when you build or repair cables for electronic components like microcontrollers or storage devices. The table helps you match each wire to the correct pinout, making sure data and power flow safely.
Pin Identification
You can spot the pins inside a type-a connector by looking at the flat side of the usb plug. The pins line up from left to right. Here is a simple usb pinout diagram to help you:
 _______________________
|  1  |  2  |  3  |  4  |
| Red |White|Green|Black|
| VCC | D-  | D+  | GND |
 -----------------------
- Pin 1 (Red): Power (5V)
- Pin 2 (White): Data -
- Pin 3 (Green): Data +
- Pin 4 (Black): Ground
You use this usb pinout diagram to check your wiring before you connect any electronic components. Diagrams like this help you avoid mistakes that could damage your integrated circuits. When you work with usb pinout, you need to make sure the data lines (D+ and D-) connect correctly. This keeps usb data transmission stable and supports fast data transfer.
Diagrams also help you troubleshoot usb pinout problems. Engineers use diagrams to check if the data and power pins follow usb standards. If you see a problem in your usb pinout, you can fix it before it harms your device. Diagrams make it easier to spot errors in data transfer or power delivery. You can use these visual tools to keep your usb projects safe and reliable.
Using a usb pinout diagram improves your accuracy in wiring and troubleshooting. You can quickly see if your usb pinout matches the standard. This helps you fix problems with data or power in your electronic projects.
USB Pinout in Practice
Identifying Pins
You need to identify each pin in a usb connector before you start any wiring or troubleshooting. The usb pinout shows you where the power and data lines sit inside the connector. You can use tools to help you find the correct pins. These tools give you detailed information about your usb connections and help you avoid mistakes with electronic components.
Here is a table with some recommended tools for identifying usb pins:
| Tool Name | Description |
|---|---|
| Usb Viewer | Part of the Windows SDK debugging tools, useful for identifying USB versions. |
| USB Device Tree Viewer | Informative and user-friendly tool that provides detailed information about USB connections. |
| USBDeview | Free tool that gives extensive information on USB ports, including their exact version. |
You can use these tools to check the usb pinout on your computer. They show you which pins handle data transfer and which ones supply power. When you work with microcontrollers or integrated circuits, you need to match the usb pinout to the correct pins on your board. This step keeps your data and power connections safe.
Tip: Always double-check the usb pinout before you connect any wires. This helps you prevent damage to your electronic components.
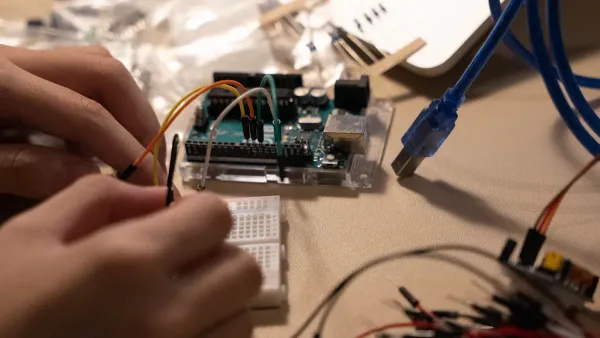
Wiring Tips
You need to follow best practices when you wire a usb connector. Good wiring keeps your data transfer stable and protects your devices from power problems. Here are some steps you should follow when soldering usb wires to a connector:
- Use a fine tip on your soldering iron. This helps you work with small pins in the usb pinout.
- Apply flux on the connector pins and pads. Flux makes the solder flow better and keeps the connection clean.
- Pre-tin each connector pin. This means you add a small amount of solder to each pin before you attach the wires.
- Align the connector on the board. Leave space on each pad so you can solder each pin without touching others.
- Solder one side flap while pressing the connector in place. This keeps the usb connector steady.
- Solder the other side flap carefully. Make sure the connector does not move.
- Solder each pin to its pad. Avoid creating solder bridges between pins. Solder bridges can cause data errors or power shorts.
You need to match each wire to the correct pin in the usb pinout. The red wire goes to the power pin, the black wire goes to ground, and the white and green wires handle data transfer. When you wire a usb cable for an integrated circuit, you make sure the data lines connect to the right pins on your microcontroller. This keeps your usb data transfer fast and reliable.
Note: Careful wiring helps you avoid problems with data and power. You protect your electronic components and keep your usb projects working well.
USB Troubleshooting
Common Issues
When you work with usb connections in electronic projects, you may face several problems. These issues can stop your devices from working or slow down your data transfer. You need to know what to look for when troubleshooting usb with microcontrollers or integrated circuits.
Here is a table that lists the most frequent problems you might see:
| Issue Type | Description |
|---|---|
| Enumeration Problems | Errors can occur if the device descriptor is incorrect, leading to improper connections. |
| High Speed Negotiation Issues | Issues arise if devices fail to confirm high-speed capabilities, resulting in corrupt packets. |
| Reset, Suspend, and Resume Events | Disruptions during these events can lead to abnormal device behavior and communication failures. |
| Improper USB Packet Data | Corrupt packets can lead to dropped transactions and reduced throughput due to error checking failures. |
| Power/VBUS Related Issues | Overdraw of current can cause devices to disconnect or fail to enumerate correctly. |
You may notice that your usb device does not show up on your computer. Sometimes, the data does not transfer, or the device keeps disconnecting. These problems often happen when the usb pinout is wrong, or when the power supply is not stable. If you use a usb cable with a microcontroller, you might see errors if the data lines are swapped or if the power line cannot provide enough current. Always check the usb pinout and make sure each wire matches the correct pin.
Tip: If your usb device acts strangely, unplug it and check the wiring. Look for loose connections or broken wires.
Testing Connections
You can use several methods to test your usb connections. These tests help you find problems with data transfer or power delivery in your electronic circuits. Here is a table that shows common diagnostic methods:
| Diagnostic Method | Purpose |
|---|---|
| Electrical Testing | Analyzes electrical characteristics to determine functionality. |
| Continuity Test | Validates connection of wires for uninterrupted data transmission. |
| Resistance Test | Measures resistance to identify breaks or damage in wires. |
| Voltage Level Test | Assesses voltage levels to ensure proper power delivery to devices. |
| Physical Tests | Includes unplug/plug, push/pull, rocking, and salt spray tests to evaluate physical integrity. |
You can use a multimeter to check for continuity in the data and power lines. This tool helps you find broken wires inside the usb cable. You can also measure voltage at the power pin to make sure your device gets enough power. If you work with integrated circuits, always test the data lines for correct signals. Physical tests, like gently rocking the connector, help you find loose connections that can interrupt data flow.
Note: Careful testing keeps your usb projects safe. You protect your microcontroller, sensors, and other electronic components from damage by checking each connection before use.
USB Safety Tips
Avoiding Mistakes
When you work with usb wiring for electronic components or integrated circuits, you need to avoid common mistakes. These mistakes can damage your devices or cause data errors. You should always check your usb connections before you power up your project.
Here are some important steps to help you stay safe:
- Use a multimeter to verify each wire’s function before you connect anything. This tool helps you confirm the correct usb pinout for data and power delivery.
- Do not trust wire color alone. Sometimes, manufacturers use different colors. Always check the usb pinout and run a continuity test to make sure each wire matches the correct pin for data or power delivery.
- Protect your solder joints with heat shrink tubing. This step keeps your usb connections strong and prevents shorts that can affect data transfer or power delivery.
- Label each wire when you take apart a usb cable. Labels help you remember where each wire goes, especially when you work with integrated circuits or microcontrollers.
Tip: Careful labeling and testing help you avoid confusion and keep your usb data and power delivery safe.
If you skip these steps, you might connect the wrong wires. This mistake can cause data loss or even damage your microcontroller. Always double-check your usb pinout before you connect to any electronic component.
Power Handling
You must understand how usb power delivery works to keep your devices safe. USB A 2.0 connectors can handle a maximum current of 500 mA (0.5 A). This limit protects your electronic components and integrated circuits from overheating.
- Most usb ports provide 500 mA for power delivery. Some non-standard ports may offer more, but you should not rely on this for your projects.
- If you connect a device that draws more than 500 mA, you risk overheating the usb port. Overheating can damage both the port and your integrated circuits.
- Devices that use too much power can cause short circuits. Short circuits can stop data transfer and harm your usb cable or microcontroller.
- Laptops often have limited power delivery. If you connect several usb devices, you might overload the port. This overload can cause data errors or device malfunctions.
- Many usb devices include basic protection to prevent damage from power mishandling. However, you should always design your circuits to stay within the usb power delivery limits.
Note: Exceeding the usb power delivery limit can lead to performance issues. Your device may underperform or stop working if it cannot get enough power for data transfer.
When you build a project with usb, always check the current requirements for each electronic component. Make sure the total power delivery does not exceed 500 mA per port. If you need more power, use a powered usb hub designed for higher current. This step keeps your data and power delivery stable and protects your integrated circuits.
You learned how the USB A 2.0 pinout helps you connect electronic components and integrated circuits safely. When you work with USB cables, remember these tips:
- Grip the connector head firmly when unplugging to protect the cable.
- Store cables in a loose coil to avoid wire damage.
- Check the connection point and power source if you see charging problems.
- Clean the charging port for a strong connection.
- Use high-quality cables for fast charging.
If you want to learn more about USB standards, these resources can help:
| Resource Title | Description |
|---|---|
| USB in a NutShell | Gives you an introduction to USB standards and device classes. |
| The History of USB Standards from 1.0 to USB4 | Shows how USB speeds and features changed over time. |
| Understanding USB Types and the Flexible USB System | Explains how USB manages data and bandwidth. |
You can practice with real connectors and explore new USB types. This knowledge will help you build and troubleshoot projects with microcontrollers and other electronic devices.
FAQ
What happens if you connect the USB power pins incorrectly?
If you connect the power pins wrong, you can damage your microcontroller or integrated circuit. You might cause a short circuit. Always check the pinout before wiring. Use a multimeter to test connections.
Can you use USB 2.0 cables for microcontroller projects?
Yes, you can use USB 2.0 cables for microcontroller projects. The four-pin layout supports both power and data transfer. Many development boards, like Arduino, use USB 2.0 for programming and communication.
How do you test if a USB cable works with your circuit?
You can use a multimeter to check for continuity on each wire. Plug the cable into your circuit. Test voltage at the power pin. If your device powers up and communicates, the cable works.
Why do wire colors sometimes not match the USB standard?
Some manufacturers use different colors to save costs. Always check each wire with a continuity test. Do not trust color alone when connecting to integrated circuits or microcontrollers.
What is the maximum current you can draw from a USB 2.0 port?
A USB 2.0 port supplies up to 500 mA. Drawing more current can overheat the port or damage your electronic components. For high-power circuits, use a powered USB hub.