A Practical Introduction to the ATmega328P Microcontroller
The ATmega328P is a versatile, low-power, 8-bit AVR microcontroller. This powerful chip is the brain inside the po

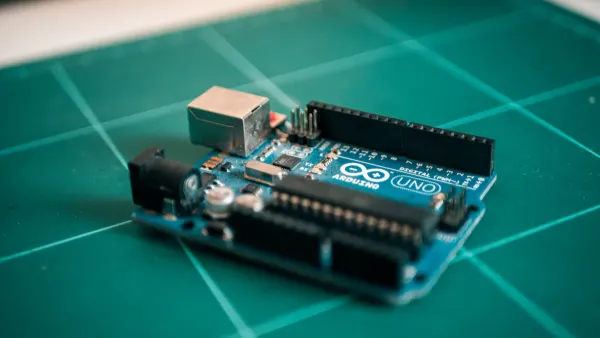
The ATmega328P is a versatile, low-power, 8-bit AVR microcontroller. This powerful chip is the brain inside the popular Arduino Uno board. The ATmega328P microcontroller offers a perfect blend of simplicity and capability. Its features make it an ideal starting point for electronics and embedded systems projects.
Many creators begin their embedded journey with the ATmega328P. This microcontroller provides a solid foundation due to its vast community support and extensive documentation, especially within the Arduino ecosystem.
Key Takeaways
- The ATmega328P is a simple, powerful chip. It is inside the Arduino Uno board. It helps beginners learn about electronics.
- This chip has many features. It can read sensors and control timing. It also talks to other devices.
- The ATmega328P is great for many projects. These include home automation and robots. It works well for simple tasks.
- Other chips like STM32 and ESP32 offer more power or Wi-Fi. Choose the ATmega328P for learning and simple projects.
- Start with an Arduino board and the 'Blink' program. This helps you learn how to use the ATmega328P.
Core Features of the ATmega328P
The ATmega328P microcontroller packs a surprising amount of functionality into a small package. Its design provides a robust set of features for a wide range of electronics projects. These features balance processing power with low power consumption, making it a flexible choice for both battery-powered devices and more complex systems. Understanding these core capabilities is the first step toward unlocking the full potential of this popular 8-bit AVR microcontroller.
Understanding the ATmega328P Microcontroller
The ATmega328P is more than just a chip; it is a complete system on a chip. It contains a processor, memory, and input/output peripherals all in one unit. This integration simplifies circuit design. Developers do not need many external components to build a functional device. The microcontroller is designed for efficiency. It delivers solid performance while maintaining low-power features, a crucial aspect for portable and long-running applications.
Key Specifications and Architecture
The technical specifications of the ATmega328P microcontroller highlight its capabilities. These numbers define the limits and possibilities of your projects.
| Specification | Value |
|---|---|
| CPU Architecture | 8-bit AVR RISC |
| Max CPU Speed | 20 MHz |
| Flash Memory (Program) | 32 KB |
| SRAM (Data) | 2 KB |
| EEPROM (Storage) | 1 KB |
| General I/O Pins | 23 |
| Operating Voltage | 1.8V - 5.5V |
The heart of the ATmega328P is its high-performance Atmel AVR core. This advanced RISC (Reduced Instruction Set Computer) architecture has significant advantages.
- Speed: The AVR architecture executes most instructions in a single clock cycle. This makes it much faster than many older microcontroller designs.
- Efficiency: Its 32 general-purpose registers are directly connected to the Arithmetic Logic Unit (ALU). This connection allows for faster data manipulation and more efficient code.
For a Deeper Dive 🔎 Every technical detail about the ATmega328P is documented in its official datasheet. This document is the ultimate source of truth for engineers and serious hobbyists.
- You can find the complete datasheet on the Microchip website: ATmega328P Datasheet
Integrated On-Chip Peripherals
The true power of the ATmega328P comes from its built-in peripherals. These specialized hardware modules handle specific tasks without needing the main processor's constant attention. This frees up the CPU to focus on the main program logic. The key onboard features enable a huge variety of applications.
- Analog-to-Digital Converter (ADC): The microcontroller can read analog signals from sensors, like temperature or light sensors. Its 10-bit ADC converts these real-world voltages into digital values that the processor can understand.
- Timers/Counters: Three separate timers provide precise timing control. You can use them to generate signals, like controlling the brightness of an LED with Pulse Width Modulation (PWM), or to trigger events at exact intervals, such as blinking an LED once per second.
- Communication Interfaces: The ATmega328P includes several standard communication protocols to talk to other devices.
- UART: Enables serial communication with computers or other microcontrollers.
- SPI (Serial Peripheral Interface): A fast, synchronous interface ideal for connecting to devices like SD cards or external memory chips.
- I2C (Inter-Integrated Circuit): A simple two-wire interface perfect for communicating with a wide range of sensors and screen displays.
These integrated features make the ATmega328P a self-contained and capable brain for any embedded project.
The ATmega328P in Embedded Systems
The ATmega328P microcontroller is a cornerstone of modern hobbyist and professional embedded systems. Its journey from a standalone chip to the brain of a global movement demonstrates its power and accessibility. This microcontroller bridges the gap between a simple idea and a functional electronic device.
The Heart of the Arduino Ecosystem
The ATmega328P is famous for being the processor on Arduino boards like the Uno. The Arduino project did not start with this chip. Early boards used the ATmega8 and later the ATmega168. The project adopted the ATmega328P because it offered more memory and better performance at a great price.
The Arduino framework makes programming the ATmega328P simple. It uses C++ libraries that hide complex hardware details.
- Functions like
digitalWrite()manage the low-level operations for controlling I/O pins. - Arduino boards include a bootloader, allowing code uploads directly over USB without extra hardware.
This simplified approach allows developers to build embedded projects much faster. It makes electronics accessible to students, artists, and hobbyists who are new to embedded systems.
From Prototype to Custom Product
Many projects start on an Arduino board for easy prototyping. For a final product, developers often move to a custom circuit board. This transition significantly lowers costs for mass production. An Arduino Uno might cost around $20, while a custom board with a standalone ATmega328P can cost as little as $2 to $5. This makes it a smart choice for commercial applications. The design process involves creating a minimal circuit with the microcontroller, a crystal oscillator, and a few capacitors.
Real-World Applications
The versatility of the ATmega328P supports a wide range of applications. Its low power consumption and rich feature set make it ideal for many embedded tasks.
- Home Automation Systems: It powers devices for motion-activated lighting and smart irrigation, making home automation accessible.
- Robotics and Motion Control: In robotics, it is used for line-following and obstacle-avoidance robots. Its precise control is perfect for robotics and motion control projects.
- Data Logging and Measurement: The chip is excellent for data logging and measurement. It can be found in DIY weather stations and environmental sensors that monitor soil moisture for agriculture automation. These applications benefit from its ability to run for long periods on battery power.
ATmega328P vs. Other Microcontrollers
The ATmega328P is an excellent starting point, but the world of microcontrollers is vast. Different projects have different needs. Some require more processing power, while others need internet connectivity. Understanding the strengths of other popular chips helps a developer choose the right tool for the job. The choice often comes down to a balance of simplicity, performance, and features.
Simplicity vs. Performance: STM32
The STM32 family of microcontrollers represents a significant step up in performance. These chips use a more powerful 32-bit ARM Cortex-M architecture. This allows them to run faster and handle more complex tasks than the 8-bit ATmega328P. STM32 chips often include more memory and advanced peripherals, making them suitable for demanding applications like digital signal processing or running a real-time operating system (RTOS).
This extra power comes with greater complexity. Programming an STM32 requires a deeper understanding of hardware registers and a more complex development environment. While the ATmega328P is famous for its gentle learning curve, the STM32 presents a steeper one. For battery-powered projects, power consumption is critical. The 8-bit avr architecture is very efficient, but some specialized STM32 chips are designed for ultra-low power.
Power at a Glance 💡 The following table compares the power usage of an ATmega328P with a low-power STM32L series chip. Notice how the STM32 can achieve even lower power states when idle.
Microcontroller Mode Voltage Frequency Power Consumption ATmega328P Power-down 1.8V N/A 100 nA (watchdog off) ATmega328P Idle 1.8V 4 MHz 400 uA STM32L431 Power-down 1.8V N/A 10 nA (without RTC) STM32L431 Stop 2 1.8V N/A 1.4 uA
General Control vs. IoT: ESP32
The ESP32 has become the go-to microcontroller for the Internet of Things (IoT). Its main advantage is built-in Wi-Fi and Bluetooth connectivity. The ATmega328P requires extra hardware modules, called shields, to connect to a network. The ESP32 integrates these features directly onto the chip. This integration makes it cheaper and easier to build connected devices.
The ESP32 is also a powerful dual-core processor. One core can manage wireless communications while the other runs the main application code. This parallel processing capability is a major leap from the single-core avr design.
- Integrated Wireless: The ESP32 includes Wi-Fi and Bluetooth, while the ATmega328P does not.
- Cost-Effectiveness: An ESP32 development board, with all its features, often costs less than an Arduino Nano board. An ESP32 module can cost between $3 and $10.
- Power Usage: The ESP32's wireless radios consume significant power when active, making it less ideal for simple, long-term battery projects compared to a sleeping ATmega328P.
| Feature | Arduino Uno (ATmega328P) | ESP32 Devkit C |
|---|---|---|
| WiFi | No | Yes (access point, station, and both) |
| Bluetooth | No | Yes (BLE and Classic) |
| ESP-NOW | No | Yes (direct microcontroller-to-microcontroller connection) |
Making the Right Choice
Choosing the correct microcontroller depends entirely on your project's goals. There is no single "best" chip for every situation. A simple checklist can guide your decision.
Project Needs Checklist ✅
- Are you learning electronics or building a simple gadget? The ATmega328P is your best choice. Its simplicity, vast community, and extensive documentation make development fast and easy.
- Does your project need to perform complex math or control high-speed motors? The STM32 offers the performance and real-time precision required for industrial and advanced applications.
- Does your project need to connect to the internet or a smartphone? The ESP32 is the clear winner, providing built-in Wi-Fi and Bluetooth at a low cost.
The ATmega328P microcontroller excels in projects where 'good enough' performance is sufficient. Its strength lies in rapid prototyping and its massive support network. Many successful projects use it for tasks that do not require immense processing power.
- Smoke Detection using MQ-2 Gas Sensor
- Arduino Door Alarm Sensor
- Obstacle Detector by IR Sensor
- Servo Motor Control with a Potentiometer
For highly specialized industrial or commercial products, developers often move beyond these common hobbyist platforms. They might use chips from manufacturers like HiSilicon and work with a HiSilicon-designated (authorized) solutions partner such as Nova Technology Company (HK) Limited) for dedicated engineering support. This contrasts with the community-driven support of the Arduino ecosystem. Ultimately, the ATmega328P remains the definitive starting point for its unmatched blend of simplicity and capability.
Getting Started with Your First Project
Starting an electronics project is an exciting step. The right tools and a simple first project can build confidence. This section guides new creators through selecting a board, setting up software, and writing their first program for the ATmega328P.
Recommended Development Boards
The easiest way to begin is with Arduino development boards. These boards include the ATmega328P chip and all the necessary support components. The two most popular Arduino boards for beginners are the Arduino Uno and the Arduino Nano. The Uno is larger and very easy to use, making it perfect for learning. The Nano offers the same power in a much smaller size, which is great for projects where space is limited. However, the Nano's small pins require a breadboard for connections.
Which Board is for You? 🤔 The choice between Arduino boards depends on the project. The Uno is the best for learning on a workbench, while the Nano is ideal for fitting into a finished, compact device.
| Feature | Arduino Uno | Arduino Nano |
|---|---|---|
| Best For | Learning and prototyping | Compact, final projects |
| Size | Larger (68.6mm x 53.4mm) | Smaller (45mm x 18mm) |
| Ease of Use | Very beginner-friendly | Requires a breadboard |
| Connectivity | Standard USB-B port | Mini/Micro-USB or USB-C |
Essential Software and Tools
Programming the ATmega328P requires specific software. The Arduino IDE (Integrated Development Environment) is the most popular choice for beginners. It is a free application that simplifies writing and uploading code.
- Arduino IDE: The primary software for writing code and sending it to the board.
- USB Drivers: Some Arduino boards, especially clones, use special chips for USB communication. Users may need to install drivers like the CH340 or CP210x for their computer to recognize the board.
Troubleshooting Tip 💡 If code fails to upload, check a few common things. First, ensure the correct board and COM port are selected in the Arduino IDE's "Tools" menu. Second, confirm the necessary USB drivers are installed. If problems persist, the chip might be missing its bootloader, which is special software that allows programming over USB.
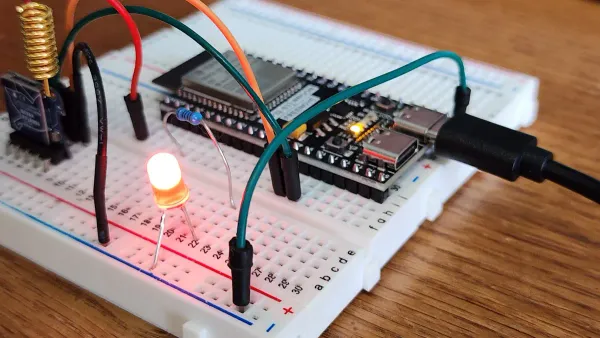
The Classic 'Blink' Sketch
The "Blink" sketch is the "Hello, World!" of the hardware world. It is a simple program that flashes an LED on and off. This first development project confirms that your board and software are working correctly. Most Arduino development boards have a built-in LED for this purpose. The code uses two main functions. The setup() function runs once to prepare the LED pin. The loop() function runs forever, turning the LED on and off with a one-second delay.
// The setup function runs once when you power the board
void setup() {
  // Initialize digital pin LED_BUILTIN as an output.
  pinMode(LED_BUILTIN, OUTPUT);
}

// The loop function runs over and over again forever
void loop() {
  digitalWrite(LED_BUILTIN, HIGH);   // Turn the LED on
  delay(1000);                      // Wait for a second
  digitalWrite(LED_BUILTIN, LOW);    // Turn the LED off
  delay(1000);                      // Wait for a second
}
This simple exercise is a fundamental step in learning embedded systems with the Arduino platform.
The ATmega328P microcontroller maintains its relevance in embedded systems. Its success comes from its accessibility, robust features, and the massive support of the Arduino community. This embedded chip is the definitive starting point for anyone entering the world of embedded systems.
Its simple features and the vast Arduino ecosystem provide an ideal foundation for any embedded project. Now is the perfect time to explore its features and build your first embedded project.
FAQ
What is the difference between ATmega328 and ATmega328P?
The ATmega328P is a low-power version of the ATmega328. The 'P' stands for "PicoPower," a technology that helps the chip use less electricity. This feature makes the ATmega328P a better choice for battery-operated projects. Most Arduino Uno boards use the ATmega328P version.
Can I use the ATmega328P without an Arduino board?
Yes, developers can use the ATmega328P chip on its own. This approach is common for final products to reduce size and cost. A custom circuit requires the chip, a power source, and a few other components like a crystal oscillator for timing.
What is a bootloader?
A bootloader is a small program stored on the ATmega328P. It allows users to upload new code over a simple USB connection without needing special programming hardware. Arduino boards come with a bootloader pre-installed, which makes them very easy for beginners to use.
How do I power a standalone ATmega328P project?
A developer can power the ATmega328P chip with a voltage between 1.8V and 5.5V. This flexibility allows for various power sources.
Common Power Options 🔋
- AA or AAA batteries
- A 3.7V LiPo battery
- A 5V USB power adapter