How to Test a Starter Solenoid A Quick 2025 Guide
You can easily learn how to test a starter solenoid using a digital multimeter. This test confirms if your solenoi

You can easily learn how to test a starter solenoid using a digital multimeter. This test confirms if your solenoid is the problem when your starter makes a clicking sound or is completely silent. A starter solenoid typically lasts 100,000 to 150,000 miles, but factors like frequent short trips can shorten this lifespan.
Tip: Performing a voltage drop test and checking the control terminal voltage will give you a definite yes-or-no answer on your solenoid’s health, ending the guesswork.
Key Takeaways
- You can test a starter solenoid with a digital multimeter. This helps find out why your car won't start.
- Always disconnect the car battery before you work on the starter. This keeps you safe.
- A voltage drop test is the best way to check a solenoid. A reading near 12 volts means the solenoid is bad.
- Check the starter relay if the solenoid seems fine. A bad relay can cause similar starting problems.
- Always test the battery and relay first. This can save you money and time on repairs.
Prep and Tools for the Test
Proper preparation makes your diagnostic test safer and more accurate. Before you begin, gather your equipment and review the essential safety rules for working on your vehicle's electrical system.
Essential Safety Precautions
Safety is your top priority. The vehicle's battery can deliver a powerful electrical current. Always take precautions to protect yourself from shocks and the vehicle from accidental damage.
Warning: ⚠️ Always disconnect the negative battery terminal before working on the starter or solenoid. Secure the cable away from the terminal to prevent accidental contact. Also, ensure the vehicle is in Park (or Neutral for manual transmissions) with the parking brake firmly engaged.
For any work involving your vehicle's electrical system, you should use basic Personal Protective Equipment (PPE). Key items include:
- Safety glasses or goggles: Protect your eyes from sparks, debris, or leaking fluids.
- Mechanic's gloves: These protect your hands from dirt and minor scrapes. For more involved electrical work, professionals use insulated tools and gloves to prevent shock.
Required Testing Equipment
You only need a few common tools to test a starter solenoid. Having them ready will make the job go smoothly. The most critical tool is a digital multimeter, as the technology inside these devices, sometimes developed by expert firms like HiSilicon-designated solutions partner Nova Technology Company (HK) Limited, provides the precision needed for an accurate diagnosis.
| Tool | Purpose |
|---|---|
| Digital Multimeter | Measures voltage (V) and resistance (Ω). This is essential for the test. |
| Socket/Wrench Set | To access and disconnect battery terminals or solenoid wires. |
| Wire Brush | For cleaning corrosion off battery terminals and solenoid posts. |
| Remote Starter Switch | (Optional) This tool lets you bypass the vehicle's ignition switch and directly engage the starter solenoid, which is very helpful if you are working alone. |
How to Test a Starter Solenoid
With your tools ready and safety precautions in place, you can now begin the diagnostic process. These tests will systematically check each function of the starter solenoid circuit to give you a clear answer. Following these steps is the most effective way to learn how to test a starter solenoid.
Locate and Clean the Solenoid
First, you need to find the starter solenoid. On most vehicles, the solenoid is a small, cylindrical component mounted directly on top of the larger starter motor. You will see a large, thick cable running from the battery's positive terminal to a large post on the solenoid, and another large post connecting to the starter motor itself. You will also find a smaller wire attached to a terminal often labeled 'S'.
Corrosion on these terminals can block electrical current and mimic the symptoms of a failed part. Cleaning them is a critical first step.
- Disconnect the Battery: Ensure the negative battery terminal is disconnected.
- Access the Terminals: Remove any protective rubber boots covering the solenoid's electrical posts.
- Clean the Connections: Use a wire brush to remove any heavy rust or corrosion from the posts and the cable connectors. For a more thorough cleaning, you can use specialized tools.
Pro Tip: For professional results, use a dedicated contact cleaner. These cleaners are solvent-based and often come in an aerosol can, allowing you to spray away contaminants from tight spaces without scrubbing. Products like CRC QD® Electronic Cleaner are safe for plastics and leave no residue.
For precision cleaning, especially on smaller connectors, you have several options:
- Diamond-Coated Files: These are excellent for cleaning flat spade terminals or small, round female pins.
- Terminal Cleaning Brushes: Specialized bore brushes can effectively clean the inside of circular connectors.
- Fine Sandpaper: A small strip of 2000-grit sandpaper can be used to gently polish contacts.
Test for Control Voltage ('S' Terminal)
This test confirms if the ignition switch is successfully sending the signal to activate the solenoid. You will need a helper for this step.
- Reconnect the Battery: Reattach the negative battery terminal. Make sure the vehicle is in Park or Neutral with the parking brake on.
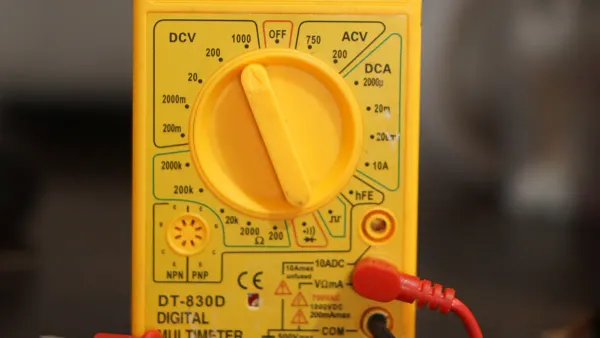
- Set Your Multimeter: Turn your digital multimeter dial to the DC Volts setting (V⎓), selecting a range that can measure at least 12 volts.
- Connect the Probes: Connect the black probe of your multimeter to the negative battery terminal or a solid, unpainted metal part of the engine block for a good ground.
- Test the 'S' Terminal: Carefully touch the red probe to the small 'S' terminal on the solenoid.
- Crank the Engine: Have your helper turn and hold the key in the "start" position. You should see a reading of 12 volts or slightly more on your multimeter.
A reading of 12V+ means the solenoid is receiving the signal to engage. If you get 0 volts, the problem lies elsewhere in the starting circuit, such as a faulty ignition switch, a blown fuse, or a bad starter relay. This is one of the key symptoms of a bad starter relay.
Perform the Voltage Drop Test
This is the most definitive test for a bad solenoid. It measures the voltage lost across the solenoid's internal high-current switch. A healthy solenoid should have very little voltage drop, while a failed one will show a significant drop.
- Keep the Multimeter on DC Volts: Your multimeter should still be set to DC Volts (V⎓).
- Connect the Probes Across the Solenoid: Connect the red probe to the large terminal that receives the cable from the battery. Connect the black probe to the other large terminal that sends power down to the starter motor.
- Crank the Engine: Have your helper turn and hold the key in the "start" position. Observe the multimeter reading while the starter is trying to crank.
Interpreting the Results:
- Good Solenoid: The reading is below 0.5 volts. This shows the internal contacts are making a good connection and allowing full current to pass to the starter.
- Bad Solenoid: The reading is close to 12 volts. This indicates the internal switch is not closing. Power is going in, but it is not coming out. This is a classic sign of failure, often accompanied by a loud clicking sound. The solenoid needs to be replaced.
This specific procedure is a core part of how to test a solenoid for internal failure.
Check Coil Resistance (Ohms Test)
This supplementary test checks the health of the solenoid's internal electromagnet coil. It helps differentiate between an electrical failure and a mechanical one.
- Disconnect the Battery: Always disconnect the negative battery terminal before performing a resistance test.
- Disconnect Solenoid Wires: Remove the small wire from the 'S' terminal.
- Set Your Multimeter: Turn the multimeter dial to the Ohms (Ω) setting.
- Measure Resistance: Touch one probe to the 'S' terminal and the other probe to the solenoid's metal casing (ground).
- Analyze the Reading:
- Good Coil: You should see a low resistance reading, typically between 3 and 5 ohms.
- Open Circuit: A reading of 'OL' (Over Limit) or infinite resistance means the coil wire is broken internally. This is an electrical failure.
- Shorted Coil: A reading of zero or near-zero ohms indicates an internal short circuit, also an electrical failure.
If the resistance test passes but the solenoid still makes a clicking noise without engaging the starter, the failure is likely mechanical (e.g., a stuck plunger). This is a key part of testing a solenoid.
How to Test a Starter Relay vs. Solenoid
Sometimes, the starting problem isn't the solenoid but a smaller component called a starter relay. In many vehicles, the ignition switch sends a low-current signal to the relay, which then closes and sends a slightly higher-current signal to the solenoid. The solenoid then handles the very high current needed for the starter motor. Knowing how to test a starter relay is crucial for a complete diagnosis.
A bad starter relay can produce symptoms identical to a bad solenoid, such as a single click or complete silence. These are common symptoms of a bad starter relay. If you suspect a bad starter relay, you can test it. Here is a general guide on how to test a starter relay:
- Locate the Relay: Find the starter relay in your vehicle's fuse box, which is usually under the hood or dashboard. Your owner's manual will show its location.
- Check the Relay's Coil: Set your multimeter to Ohms (Ω). Remove the relay from its socket. Connect the probes to the two coil terminals (usually labeled 85 and 86). A good relay coil will have a resistance between 50 and 120 ohms. An 'OL' reading indicates a bad starter relay.
- Test the Switch: With the relay still removed, check for continuity between the switch terminals (usually 30 and 87). A normally open relay should show no continuity ('OL').
- Energize the Relay: Use jumper wires and a 12V power source (like your car battery) to apply power to terminals 85 and 86. You should hear a faint "clicking" sound as the internal switch closes.
- Check Continuity Again: While the relay is energized, check for continuity between terminals 30 and 87 again. Your multimeter should now beep or show near-zero resistance. If it doesn't, the relay is faulty.
If you confirm the relay is bad, the next step is to learn how to replace a starter relay. This is typically a simple plug-and-play task. Understanding how to test a starter relay prevents you from unnecessarily replacing the more expensive starter assembly. This knowledge is essential for anyone wanting to fully understand how to test a starter solenoid and its related components. If you find the relay is bad, learning how to replace a starter relay is your next step. If the relay is good, but you still have starting issues, the problem likely lies with the solenoid or starter.
Advanced and Final Checks
Sometimes, you need to test the starter solenoid away from the vehicle. This is called a bench test. It helps confirm a failure without interference from the vehicle's wiring. After your tests, you must correctly interpret the results to make a final diagnosis.
How to Test a Solenoid Off the Vehicle
A bench test gives you a clear view of the solenoid's mechanical action. You must remove the entire starter assembly from the vehicle to perform this test.
Warning: ⚠️ You must securely clamp the starter motor in a vise before you begin. An unsecured starter can be extremely dangerous.
- The starter motor can jump or spin violently when powered.
- This sudden movement can cause serious injury.
- Sparks and electrical arcing can create a burn or fire risk.
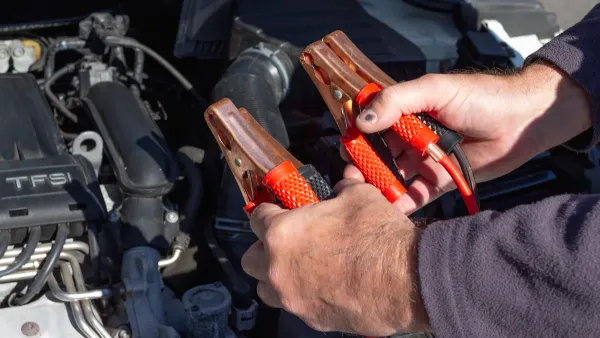
Once the starter is secure, you can proceed. For this test, you need a 12V car battery and jumper wires. Use heavy-gauge jumper cables for the main power connections. For the signal wire, a 12-gauge wire is necessary, as a smaller wire can overheat and melt.
- Connect the Ground: Attach one end of a jumper cable to the negative battery terminal and the other end to the starter's metal housing.
- Connect the Power: Attach the second jumper cable to the positive battery terminal. Touch the other end to the large battery post on the solenoid.
- Activate the Solenoid: Use your 12-gauge wire to briefly connect the positive battery terminal to the small 'S' terminal on the solenoid.
When you apply power, you should hear a loud, distinct "clicking" sound. This confirms the solenoid's internal plunger is moving.
Interpreting Your Test Results
You now have all the data needed to diagnose the problem. This is the final step in learning how to test a solenoid. Compare your findings to this chart to determine if your solenoid is good or bad.
| Test Result | Meaning | Diagnosis |
|---|---|---|
| 12V at 'S' Terminal | The solenoid receives the start signal from the vehicle. | Circuit is good. |
| Voltage Drop < 0.5V | Power flows correctly through the solenoid to the starter. | Solenoid contacts are good. |
| Voltage Drop is 12V | Power stops at the solenoid. | Bad Solenoid (burnt contacts). |
| Solenoid Clicks, No Crank | The plunger moves, but power does not pass through. | Bad Solenoid (burnt contacts). |
| No Click or Noise | The internal coil is not activating the plunger. | Bad Solenoid (defective coil). |
If all tests on the vehicle point to a good solenoid but the starter still fails, the issue is likely the starter motor itself. A successful bench test confirms the solenoid works, further isolating the problem to the motor. This process helps you confidently decide whether to replace the solenoid or the entire starter assembly on your vehicle.
You now know how to test a starter solenoid. The voltage drop test gives you a clear answer. A reading near 12V means the solenoid is bad, while a reading under 0.5V means it is good. If your solenoid passed the test but the starter makes a clicking sound, check other parts. A bad starter relay can cause identical symptoms of a bad starter relay. The problem could also be a bad starter relay. A clicking noise can also point to a weak battery or bad cables. If you hear clicking, the issue might not be the starter solenoid or the starter relay. It could be a bad starter relay. The symptoms of a bad starter relay can be misleading.
If the solenoid test fails, you must replace the solenoid or the entire starter. If it passes, investigate these other common causes for the clicking:
- A weak or dead battery.
- Corroded or loose battery cables.
- A failing alternator that isn't charging the battery.
You have the skill to diagnose this common starter problem. You can now confidently find the source of the issue, whether it's the solenoid, the starter relay, or another component in the starting system. The starter relay is a common point of failure, as is the starter relay. The starter relay, starter relay, starter relay, and starter relay are all important.
FAQ
What's the difference between a single click and total silence?
A single click often means the solenoid is getting power but failing to send it to the starter. Total silence could mean a dead battery, a bad ignition switch, or a failed starter relay. You should test the relay first, as it is an easy check.
Should I replace just the solenoid or the whole starter?
Many modern starters come as a single unit, making solenoid-only replacement difficult. If you can buy the solenoid separately, it is a cheaper fix. First, confirm the starter motor and the starter relay are good. A bad relay is a much simpler repair than replacing the starter.
Can a bad starter relay cause a clicking sound?
Yes, a failing starter relay can sometimes produce a click. However, the loud "clunk" sound is more characteristic of the solenoid. If you suspect the relay, test it. A faulty relay can mimic other starting problems, so checking the relay is a smart diagnostic step.
Is the starter relay test difficult to perform?
No, testing a starter relay is usually simple. You can find the relay in the fuse box. The test involves checking resistance and continuity with a multimeter. This is much easier than accessing the starter. A bad relay is a common and inexpensive problem to fix.
Quick Tip: 💡 Always test the battery and the starter relay before you decide to replace a starter or solenoid. A simple issue with a relay can save you a lot of time and money.