Mastering Light An Introduction to How Flash Works
You have likely seen harsh photos from a built-in flash. The poor lighting often ruins the photography. What if you could c
You have likely seen harsh photos from a built-in flash. The poor lighting often ruins the photography.
What if you could control lighting and create beautiful portraits with your photography anytime, anywhere?
A flash is a powerful tool for creative lighting control. Understanding your flash is key to better flash photography. It is not just about adding light, but shaping your lighting. Learning how a works flash unlocks new possibilities in your photography. This is the first step in mastering flash photography and your overall lighting.
Key Takeaways
- A flash creates two exposures in one photo: one for the background and one for the subject. Your shutter speed controls the background light, and your aperture controls the subject's light.
- Taking your flash off the camera helps you control light direction. This makes your photos look more professional and adds depth.
- You can use TTL mode for automatic flash settings, which is good for beginners. Manual mode gives you full control over the flash power.
- High-Speed Sync (HSS) lets you use flash with fast shutter speeds. This helps you blur backgrounds in bright light, but it uses more flash power.
- Bouncing your flash off a white wall or ceiling makes the light softer. This creates more pleasing photos than direct flash.
How a Flash Works The Dual Exposure Principle
Understanding how a flash works is simpler than you think. Every time you use your flash, you are actually creating two exposures in one single photo. Think of it as two separate layers of lighting that combine to make your final image.
- The Ambient Light Exposure: This layer captures the background and the overall environment. Your shutter speed is the main tool that controls this exposure. A slower shutter speed lets in more ambient light, making your background brighter. A faster shutter speed lets in less light, making the background darker.
- The Flash Exposure: This layer lights up your subject. Your aperture setting is the primary control for the brightness of the flash on your subject. The brief, powerful burst of light from the flash illuminates your subject, and the aperture determines how much of that light reaches the camera's sensor.
You can imagine your camera first taking a picture of the background. Then, the flash instantly "stamps" a perfectly lit subject on top of that background. This dual control is the secret to creative flash photography.
This process also gives you an incredible superpower: freezing motion. A modern flash releases its light in an incredibly short burst. This flash duration can be as fast as 1/2000th of a second or even quicker. In darker settings, this burst of light becomes your effective shutter speed. The flash illuminates your subject for only a fraction of a second, freezing it perfectly in place, no matter how fast it's moving. This is how a works flash to create tack-sharp action shots.
Types of Flash Units
Not all flash units are created equal. Each type offers different levels of power and control over your lighting.
- Pop-up Flash: This is the small flash built into many cameras. It provides direct, often unflattering light that can create harsh shadows. While convenient, it offers little control. However, you can use it as a simple fill light or even as a wireless trigger for other, more powerful flash units.
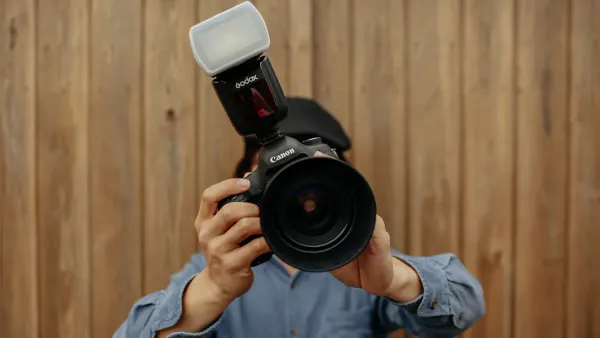
- Speedlight (Hot-Shoe Flash): A speedlight is an external flash that mounts onto your camera's hot shoe. These units are a huge step up. You gain significant control over the light's power and direction. You can tilt and swivel the head to bounce the light off walls or ceilings, which creates softer, more pleasing lighting. Speedlights are portable and versatile, making them perfect for event and portrait photography.
- Studio Strobe: These are the most powerful types of flash. Studio strobes are much larger and require an external power source, like a battery pack or wall outlet. Their power is often measured in watt-seconds, with a typical studio strobe being 8-10 times more powerful than a speedlight. This immense power is ideal for studio photography, where you might need to overpower bright sunlight or use very large light modifiers.
Shaping Light with Modifiers
A bare flash produces hard, direct light. To truly master lighting, you need to shape it. Light modifiers are tools that you attach to your flash to change the quality and spread of the light. Using them is a key part of great flash photography.
The size of your light source relative to your subject determines how soft the light is. A larger light source creates softer, more flattering light with gentle shadows. Modifiers help you turn your small flash into a large, soft light source. For portraits, softboxes and umbrellas are excellent choices for creating beautiful, soft lighting. A large reflective umbrella, for instance, can produce gorgeous light for everything from headshots to full-body portraits.
Here is a simple breakdown of how common modifiers affect your light:
| Modifier | Light Quality | Light Spread | Best For |
|---|---|---|---|
| Softbox | Soft and diffused | Controlled and directional | Creating soft, flattering light for portraits. |
| Umbrella | Very soft and broad | Wide and even; spreads everywhere | Lighting large areas or groups with soft light. |
| Snoot | Hard and concentrated | A very narrow, tight beam | Creating a dramatic spotlight effect or a hair light. |
Learning how a works flash opens up a new world of creative control. By understanding the dual exposure principle and the tools available, you are no longer just taking a picture. You are shaping the lighting to create the exact image you envision. This is the foundation of advanced flash photography and better overall photography.
Mastering Flash Photography Settings
You now understand the dual exposure principle. The next step is to take control of your flash settings. This is where you move from taking simple snapshots to creating intentional, professional-looking images. You will learn to tell your flash exactly what to do. This control is the key to mastering your lighting.
Manual vs TTL Mode
Your external flash has two main modes that control its power: Manual and TTL. Understanding the difference helps you choose the right tool for the job.
-
TTL (Through-The-Lens) Mode: Think of TTL as your flash's "automatic" mode. Your camera and flash work together to get a correct exposure.
- Just before the picture is taken, the flash sends out a small test light called a pre-flash.
- The camera measures the light from this pre-flash as it reflects off your subject through the lens.
- The camera then instantly calculates how much power the main flash needs for a good exposure.
TTL is fantastic for fast-moving situations like events or weddings. You can focus on composition while the camera handles the flash exposure. However, TTL can sometimes be fooled by very bright or dark subjects, which is where Flash Exposure Compensation (FEC) becomes useful. FEC lets you tell the TTL system to make the flash brighter or darker, giving you back creative control.
-
Manual Mode: Manual mode gives you complete control. You set the flash power yourself. The power is shown as a fraction, like
1/1(full power),1/2(half power),1/4(quarter power), and so on.Manual flash is extremely reliable for posed portraits or any situation where your lighting and subject distance do not change. When you use manual flash, you get the exact same amount of light in every single shot. This consistency is crucial for professional photography. It is the preferred mode when using off-camera lighting or modifiers that might confuse a TTL system.
The Role of Aperture and Power
In flash photography, you balance four key elements to create your final image. Understanding how they work together is essential.
- Shutter Speed: This controls the brightness of your background (the ambient light).
- Aperture (f-stop): This controls the brightness of the flash on your subject.
- ISO: This affects the sensitivity of the entire image to both ambient light and flash.
- Flash Power: In manual mode, this directly sets the brightness of the flash on your subject.
Aperture and flash power have a direct relationship. A wider aperture (like f/2.8) lets in more light, so you need less flash power. A narrower aperture (like f/11) lets in less light, so you need more flash power.
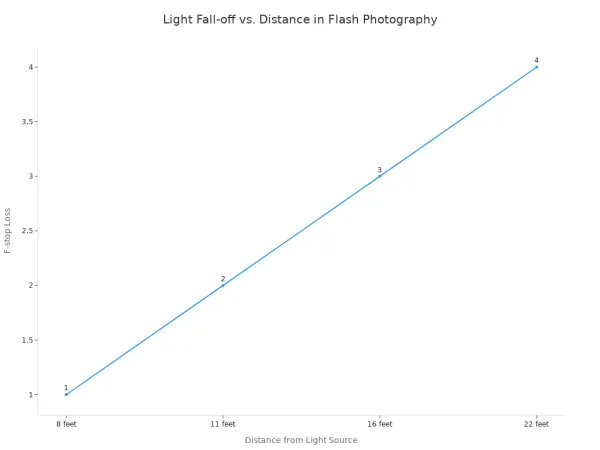
This is also affected by distance. The Inverse Square Law is a physics principle that sounds complex but is simple to understand in photography. It states that light from your flash falls off very quickly as it travels.
This is why your background often looks dark in flash photos. If your subject is 5 feet away and the wall behind them is 10 feet away, the wall is only getting a fraction of the light that your subject is. You can use this knowledge to your advantage to make your subject pop from a dark background.
To make things easier, flashes have a Guide Number (GN). This number helps you calculate the correct exposure in manual mode. The formula is:
Guide Number = Distance x f-number (Aperture)
If your flash has a GN of 40 (in meters) and your subject is 5 meters away, you can find the right aperture: 40 ÷ 5 = f/8. This gives you a great starting point for your flash settings.
Flash Sync Speed and HSS
Have you ever taken a flash photo and seen a black bar across the bottom of the image? This happens when your shutter speed is too fast for your flash. This limit is called the flash sync speed.
Your camera's shutter has two curtains. For a photo to be properly exposed with flash, the entire sensor must be uncovered when the flash fires. The flash sync speed (often around 1/200s or 1/250s) is the fastest speed where the first curtain fully opens before the second curtain starts to close. If you go faster, the second curtain starts to cover the sensor before the flash has finished, creating that black bar.
So what if you need to shoot flash photography with a fast shutter speed? For example, you might want to use a wide aperture like f/1.8 on a sunny day to blur the background. This requires a very fast shutter speed, far above your camera's sync speed. The solution is High-Speed Sync (HSS).
HSS changes how the works flash. Instead of one single burst of light, the flash emits a series of incredibly fast pulses. This turns the flash into a temporary continuous light source. These pulses of lighting last just long enough for the narrow slit between the two shutter curtains to travel across the entire sensor.
This technology is amazing, but it comes at a cost. HSS requires a lot of energy, which dramatically reduces the maximum power of your flash. You can lose over two stops of flash power when you enable HSS. This means your flash will not be as bright and its range will be shorter. Despite this, HSS is an invaluable tool for controlling your lighting in bright daylight and achieving creative effects that would otherwise be impossible.
Creative Flash Techniques for Impact
Understanding the settings is just the beginning. Now you can use creative flash techniques to make your photos stand out. These methods move beyond simple lighting. They allow you to shape light and tell a story with your photography.
How to Shoot Flash Photography Off-Camera
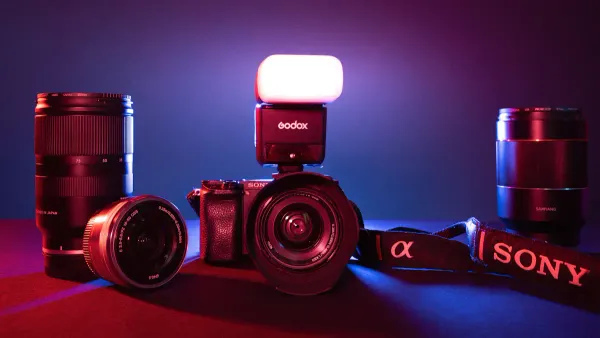
Taking your flash off the camera is the single biggest step toward professional lighting. It lets you control the direction of light. This creates depth and dimension that on-camera flash cannot. You will need a few key pieces of gear to start:
- A wireless radio trigger to fire your flash remotely.
- A light stand to hold your flash.
- A modifier like a softbox or umbrella to soften the light.
Wireless radio triggers are your best choice. They work without a direct line of sight and have a much better range. Once you shoot flash photography off-camera, you can create classic lighting patterns. Placing your light at a 45-degree angle to your subject is a great starting point for loop or Rembrandt lighting.
Creative Tip: Try new ideas once your flash is off-camera. Use colored gels to change the mood. Frame your subject from a 'creeper viewpoint' through objects. You can even use a spray bottle to create a misty rim light effect.
Using Bounce Flash
You can create beautiful, soft lighting without extra gear. The bounce flash technique is simple but powerful. You aim your speedlight's head at a large, neutral-colored surface like a white ceiling or wall. The surface becomes your new, massive light source. This mimics the soft, flattering light from a large window.
Direct flash creates harsh shadows and shiny foreheads. Bounce flash gives a much more natural look. The quality of your lighting depends on the bounce surface.
- White Surface: This is ideal. It reflects clean, neutral light onto your subject.
- Colored Surface: Be careful with colored walls. A beige wall or wood ceiling will add a warm color cast to your photography. This can be a creative choice, but a white surface gives you more control.
Dragging the Shutter
Dragging the shutter is a fun technique for capturing motion. You combine a slow shutter speed with a flash. The slow shutter speed blurs the background and captures ambient light trails. The quick burst of flash freezes your subject, making them sharp. This is a great way to add energy to your flash photography.
You will need to set your camera to manual mode. Start with a shutter speed around 1/10 sec or 1/4 sec. The flash will do the work of freezing your main subject. You also need to choose your sync mode.
- Front-Curtain Sync: The flash fires at the start of the exposure. Motion trails appear behind your subject.
- Rear-Curtain Sync: The flash fires at the end of the exposure. Motion trails appear in front of your subject, showing where they came from.
This method is perfect for capturing the energy of a dance floor or the movement of city traffic at night.
You now see that flash is a powerful tool for shaping your lighting. Your journey into creative flash photography starts now. Take the first step in your photography journey by bouncing your flash for softer lighting.
Practice is key to better photography and mastering your lighting. Experiment with your lighting to develop a unique style for your flash photography.
FAQ
What is the best flash mode for beginners?
TTL mode is your best starting point. It automatically calculates the correct flash power for you. This lets you focus on your composition and framing. You can switch to Manual mode once you feel more comfortable with the settings.
Why are my flash photos still too dark?
You should check a few things. Your subject might be too far from the flash, reducing its power. Your aperture could be too narrow (a high f-number), limiting light. Also, ensure your Flash Exposure Compensation (FEC) is not set to a negative value.
Can I use HSS with any flash?
No, you need both a camera and a flash that support High-Speed Sync (HSS). You must enable the HSS function on your camera or flash menu. Check your gear's manuals to confirm they have this feature before you try to use it.
Do I need an expensive flash to start?
You do not need the most expensive flash. A basic speedlight that offers TTL and Manual modes is a great first step. Look for a model with a tilting and swiveling head. This feature allows you to start practicing bounce flash techniques right away.