Unlock the Secret of How to Test a Capacitor With a Multimeter
Knowing how to test a capacitor is a valuable electronics skill. You can test a capacitor with a digital multimeter in two m
Knowing how to test a capacitor is a valuable electronics skill. You can test a capacitor with a digital multimeter in two main ways. Use its capacitance mode for a direct reading, or use its resistance mode to watch a charging pattern.
Safety First! ⚡ The most important step is always to safely discharge the capacitor. This action prevents electric shock and protects your equipment.
This guide shows you exactly how to test a capacitor with a multimeter using simple, reliable instructions.
Key Takeaways
- Always discharge a capacitor safely before testing it. Use a resistor to drain its stored energy.
- Use your multimeter's capacitance mode for the most accurate reading. Compare this reading to the capacitor's printed value and tolerance.
- If your multimeter lacks a capacitance mode, use the resistance (ohms) mode. A good capacitor's reading will start low and then climb to 'OL' (infinity).
- A quick continuity check helps find shorted capacitors. A brief beep followed by silence means the capacitor is good. A continuous buzz means it is bad.
Discharging a Capacitor Before You Test
Why Discharging is a Critical Safety Step
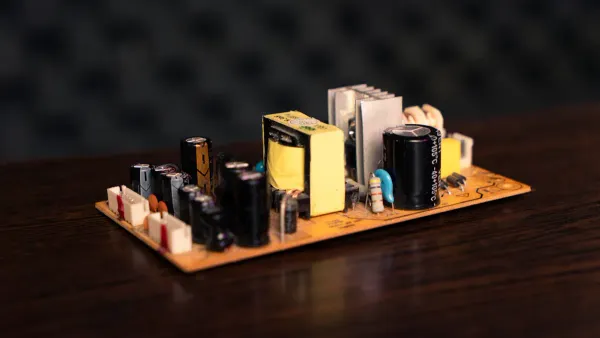
Think of a capacitor as a tiny, rechargeable battery. It stores electrical energy and can hold a dangerous charge long after you unplug a device from the wall. This stored energy creates a serious risk of electric shock. For instance, technicians have suffered severe shocks from capacitors in power supply units, even when the power was off.
Even a small capacitor in a household appliance can deliver a painful jolt. Large capacitors, like those in AC units or power supplies, can store enough energy to cause serious injury. Industry safety standards, such as IEC 60831 and OSHA guidelines, mandate that you de-energize components before working on them. Discharging a capacitor is a critical part of this process.
Warning: Never Use a Screwdriver! ⚠️ You might see people short a capacitor's terminals with a screwdriver. This is extremely dangerous. The sudden energy release creates a loud pop and a bright spark that can damage the capacitor, destroy your tool, and cause you physical harm. Always use a resistor to discharge a capacitor slowly and safely.
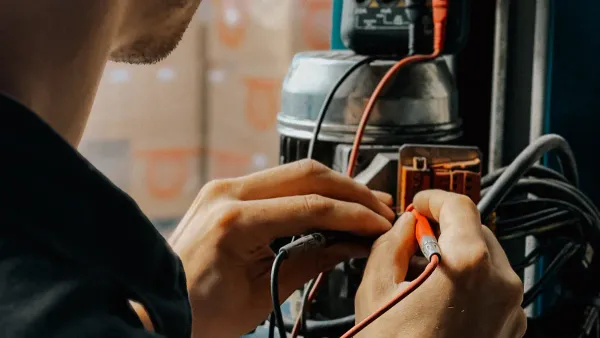
A Step-by-Step Discharging Guide
You can safely drain a capacitor's stored energy using a common resistor. This method releases the energy at a controlled rate.
What You'll Need:
- A resistor (a 20kΩ, 5-watt resistor is a great all-purpose choice)
- Insulated alligator clips or wires (optional, but helpful)
Discharge Instructions:
- Disconnect All Power. Unplug the device from the wall outlet and remove any batteries.
- Locate the Capacitor Terminals. Identify the two metal leads or terminals on the capacitor you plan to test.
- Connect the Resistor. Firmly press the leads of your resistor against the two capacitor terminals. If you have alligator clips, connect the resistor to the clips first, then attach the clips to the capacitor terminals.
- Hold and Wait. Keep the resistor connected for several seconds to a minute. This gives the capacitor enough time to drain its stored voltage through the resistor.
- Verify the Discharge. Use your multimeter in DC voltage mode to check the voltage across the capacitor's terminals. A reading of zero (or very close to zero) volts confirms it is safely discharged and ready for testing.
How to Test a Capacitor With a Multimeter
With your capacitor safely discharged, you are ready to diagnose its health. A modern digital multimeter gives you several capacitor testing methods. The method you choose depends on your multimeter's features and how precise you need to be. This guide covers the three most effective ways for how to test a capacitor with a multimeter.
Method 1: Using the Capacitance (F) Setting
This is the most accurate and direct way to test a capacitor. If your multimeter has a dedicated capacitance setting (marked with the Farad symbol, F, or a capacitor symbol -||-), you should use it.
Your multimeter performs a clever calculation to measure capacitance. It charges the capacitor with a known, precise electrical current. Then, it measures the resulting voltage across the capacitor's terminals. Using these two values, it calculates the exact capacitance and shows it on the screen.
Instructions:
- Set Your Multimeter. Turn the dial to the capacitance (F) setting. You may need to press a "function" or "select" button to switch from other modes.
- Connect the Probes. For polarized capacitors (like electrolytics), connect the red probe to the positive (+) lead and the black probe to the negative (-) lead. For non-polarized capacitors (like ceramics), the orientation does not matter.
- Read the Display. The multimeter will display the capacitance value, usually in microfarads (µF), nanofarads (nF), or picofarads (pF).
Interpreting the Reading: Check the Tolerance A good capacitor's reading should be close to the value printed on its body. However, no capacitor is perfect. You must account for its tolerance, which is the acceptable range of deviation from its rated value.
You can often find the tolerance indicated by a letter code. Common codes include:
- J = ±5% tolerance
- K = ±10% tolerance
- M = ±20% tolerance
For example, a 470µF capacitor with a "K" tolerance is healthy if your reading is between 423µF and 517µF (470 ± 10%).

Method 2: Testing a Capacitor With a Multimeter in Ohms Mode
If your digital multimeter lacks a capacitance setting, you can still perform a reliable functional test using the resistance (Ohms, Ω) mode. This method checks if the capacitor can charge and hold energy.
A healthy capacitor, when tested in ohms mode, behaves in a predictable way. The resistance reading will start low and then climb steadily. This happens because the multimeter's battery sends a small voltage that charges the capacitor. As it fills with charge, it resists the flow of current more and more, causing the resistance reading to rise toward infinity.
Instructions:
- Set Your Multimeter. Turn the dial to a high resistance setting, such as 200kΩ or 2MΩ.
- Connect the Probes. Touch the red probe to the positive terminal and the black probe to the negative terminal.
- Watch the Screen. Observe the resistance reading carefully.
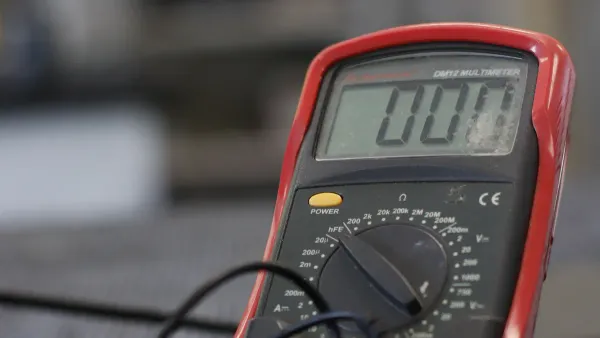
A good capacitor will show a classic charging pattern: the numbers will start low and quickly increase until the display reads "OL" (Open Line) or "I" (Infinity). This shows the capacitor has charged successfully. How to test a capacitor this way confirms its basic function.
Method 3: The Quick Continuity (Buzzer) Check
The continuity test is the fastest way to check for a common failure: a short circuit. It is not a precise test, but it is excellent for a quick "go/no-go" diagnosis when testing a capacitor.
Instructions:
- Set Your Multimeter. Turn the dial to the continuity setting. This mode is usually marked with a sound wave or diode symbol.
- Connect the Probes. Touch the probes to the capacitor's terminals.
- Listen for the Beep. Pay close attention to the sound your multimeter makes.
A good capacitor will produce a very brief beep that stops almost immediately. This short beep occurs as the capacitor charges from the multimeter's voltage. Once charged, it blocks the current, and the buzzing stops. This is a good sign.
| Test Result | What It Means | Capacitor Health |
|---|---|---|
| Brief Beep, then Silence | The capacitor is charging normally. | ✅ Good |
| Continuous, Loud Buzz | Current is flowing freely. The capacitor is shorted. | ❌ Bad |
This quick check is an essential step in testing a capacitor with a multimeter, as it instantly identifies a completely failed component.
Interpreting Your Multimeter Readings
You have performed the tests. Now you need to understand what the results mean. Your capacitor readings will clearly tell you if the component is healthy or if it has failed. Learning to spot these signs is the final step to test a capacitor with confidence.
What a 'Good' Capacitor Reading Looks Like
A good capacitor behaves predictably. When you use the capacitance mode on your digital multimeter, a healthy capacitor shows a value close to what is printed on its case. You must always consider the tolerance (e.g., ±10% or ±20%). A reading that matches the capacitor's printed value within this specified tolerance indicates it is functioning correctly. Even if the value is slightly outside the tolerance, the capacitor may still be usable in non-critical circuits like standard filters.
When testing a capacitor in ohms mode, a good one shows a charging pattern. The resistance will start low and climb toward infinity (OL). This confirms the capacitor can store a charge.
Identifying a 'Bad' Capacitor: Shorted vs. Open
Capacitors usually fail in one of two ways: they become "shorted" or "open." Your digital multimeter can easily detect both conditions.
Shorted Capacitor: A Dead End ⚡ A shorted capacitor has failed internally, creating a direct path for current. It acts like a simple wire.
- The Reading: It will show a very low resistance, typically less than 1 ohm. In continuity mode, it will produce a continuous, loud buzz. A true short shows a stable low resistance, so you should rely on the ohms reading more than the beep.
- The Cause: This failure can happen for several reasons:
- Voltage surges from events like lightning can break down the internal materials.
- Internal heat from electrical current can cause stress and damage over time.
- Natural degradation occurs as the capacitor ages, weakening its internal parts.
Open Capacitor: A Broken Bridge 🌉 An open capacitor has an internal break. It cannot store any charge at all.
- The Reading: When you test it in ohms mode, the reading will not climb. Instead, your multimeter will immediately show 'OL' or infinity.
- The Meaning: This fixed infinite reading is a clear bad indicator. An open capacitor is completely non-functional and requires immediate replacement.
The Role of Capacitors in Everyday Electronics
Now that you know how to test a capacitor, you can better appreciate its job in the electronics you use every day. These small components play a huge role in making your devices work correctly. From your phone charger to your home stereo, capacitors are busy smoothing, timing, and filtering electrical signals.
Smoothing Power in Chargers and TVs
You plug your phone charger into the wall, which supplies alternating current (AC). Your phone, however, needs smooth, direct current (DC) to charge its battery. This is where a smoothing capacitor comes in.
Inside a power adapter, a capacitor works to convert the choppy AC ripple into a stable DC voltage. It acts like a small water dam, storing energy and releasing it smoothly to even out the flow of electricity. This is the most common and simple way to suppress voltage ripple and noise. The rule is simple: a larger capacitance value leads to a smaller ripple, creating a cleaner power source for your sensitive electronics.
Timing and Filtering in Appliances and Audio
Capacitors also act as clever timers and filters in many devices.
-
Timing Functions: In appliances like washing machines or microwaves, capacitors are essential parts of timing circuits. They help control the duration of specific functions, ensuring a wash cycle or a defrost cycle runs for the correct amount of time. You will often find small, non-polarized ceramic capacitors used for these precise timing jobs.
-
Audio Filtering: In a stereo system, capacitors help direct sounds to the right speakers. They function as frequency-dependent resistors. A capacitor offers high resistance to low-frequency sounds but low resistance to high-frequency sounds. This allows it to act as a filter in an audio crossover circuit. It blocks low-frequency bass sounds from reaching a delicate tweeter (the small speaker for high notes), protecting it and ensuring you hear crisp, clear audio.
You now know how to test a capacitor with a multimeter. These capacitor testing methods give you clear answers. Use the capacitance mode on your digital multimeter for an accurate value. Use the resistance mode to confirm the capacitor charges correctly. This guide on how to test a capacitor makes testing a capacitor simple.
Remember the key signs:
- A climbing resistance reading is good.
- A near-zero reading means a short.
- An immediate infinite reading signals an open circuit.
You can now diagnose this key electronic part, saving you time and money on future repairs.
FAQ
What if my capacitor has no polarity markings?
Your capacitor is likely a non-polarized type, such as a ceramic or film capacitor. You can connect the multimeter probes to its leads in any direction. The orientation does not matter for these components, making them easier to test.
Can I test a capacitor while it's in the circuit?
You should not test a capacitor in-circuit. Other components on the board can interfere with the multimeter's readings, giving you false results. Always remove the capacitor from the circuit board first for an accurate and reliable test.
Why did my multimeter beep then go silent in continuity mode?
This is a good sign! ⚡ The brief beep shows the capacitor is charging from the multimeter's small voltage. The silence that follows means it has charged and is now blocking the current. This pattern indicates a healthy, functioning capacitor.
What does 'OL' mean on my multimeter?
'OL' stands for "Open Line" or "Overload." When testing in ohms mode, seeing 'OL' immediately can mean the capacitor is open and broken. If the reading climbs to 'OL', it means the capacitor has successfully charged, which is a good result.