Mastering Automatic Star Alignment with Everyday Electronics
Automatic star alignment with everyday electronics streamlines telescope setup, ensuring accurate tracking and sharper astrophotography for all skill levels.
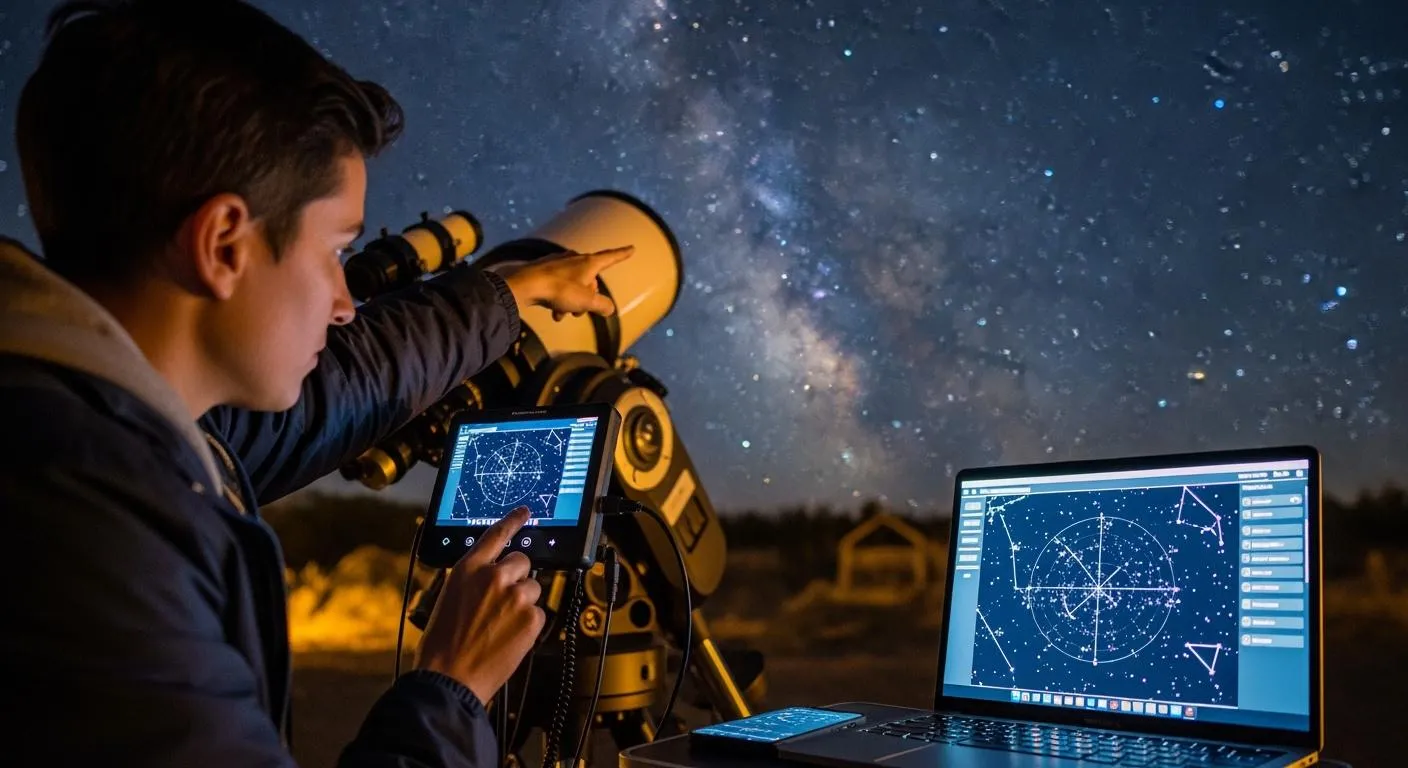
You can achieve precise views of the night sky with tools you already own. Smartphones and smart mounts make automatic star alignment simple for beginners and seasoned stargazers. You only need to follow a few practical steps to enjoy sharp, accurate observations. Try this approach and see how much your stargazing and astrophotography improve.
Key Takeaways
- Automatic star alignment simplifies stargazing. Use your smartphone or smart mount to quickly orient your telescope with just a button press.
- Accurate alignment is crucial for astrophotography. It keeps celestial objects centered and prevents blurry images during long exposures.
- Everyday electronics can enhance your stargazing experience. Tools like plate-solving software and smart alignment systems make setup easier and faster.
- Follow simple steps for polar alignment. Locate Polaris, level your tripod, and adjust your mount's altitude for the best results.
- Regular maintenance and best practices prevent alignment issues. Keep your equipment clean and double-check settings to ensure smooth tracking.
Automatic Star Alignment Basics

What Is Automatic Star Alignment
You can use automatic star alignment to quickly orient your telescope or camera to the night sky. This process uses technology to identify star patterns and match them to a database. You do not need to manually locate stars or input coordinates. Automatic star alignment saves time and reduces errors. Devices like smart mounts and smartphones make this process accessible. You press a button, and the system completes the alignment for you. This method helps you start observing or photographing stars with minimal effort.
Why Alignment Matters
Accurate alignment improves your stargazing and astrophotography results. When you align your equipment correctly, celestial objects stay centered in your field of view. You avoid tracking errors, which is important for long exposure photography. If you do not align your system, stars can appear elongated or blurry in your images. You can see the impact of different alignment methods in the table below:
| Alignment Method | Impact on Astrophotography |
|---|---|
| Polar Alignment | Ensures celestial objects remain centered, reducing tracking errors and improving image quality |
| Drift Alignment | Allows for precise tracking during long exposures, minimizing star trailing effects |
| Software-assisted Alignment | Enhances precision and tracking accuracy, leading to better quality images during long exposures |
- Accurate star alignment keeps celestial objects centered in the field of view.
- It minimizes tracking errors, which is crucial for long exposure astrophotography.
- Without proper alignment, stars can become elongated in images, degrading quality.
Everyday Electronics in Alignment
You can use everyday electronics to simplify automatic star alignment. Plate-solving software like SharpCap, NINA, and ASIAir help you achieve precise alignment. Smartphones and smart mounts also play a key role.
The Celestron StarSense AutoGuider aligns your telescope to the night sky in about three minutes with the press of a button—no user input needed! The patented StarSense technology by Celestron can "see" star patterns and match them to its internal database to automatically orient the telescope.
You do not need specialized equipment to benefit from automatic star alignment. Many modern devices offer user-friendly interfaces and step-by-step guides. You can start with your smartphone or a smart mount and achieve reliable alignment for both visual observation and astrophotography.
Alignment Methods and Technologies
AutoStar and Auto 2 Star Methods
You can use the AutoStar and Auto 2 Star methods to make telescope setup easier. AutoStar is a computerized system that helps you align your telescope by guiding you to select bright stars. You choose one or two stars from a list, center them in your eyepiece, and the system calculates the telescope’s position. Auto 2 Star works in a similar way but uses two stars for greater accuracy. These methods reduce the time you spend searching for stars and help you get started quickly.
AutoStar and Auto 2 Star give you flexibility. You can use them in different locations and with various telescopes. You do not need advanced knowledge of the night sky. The system provides step-by-step instructions, so you can follow along even if you are new to astronomy. Many users find these methods reliable for both visual observation and basic astrophotography.
StarSense and Other Smart Systems
Smart alignment systems like StarSense take automation to the next level. You do not need to select or center stars yourself. The system uses a built-in camera and computer to scan the sky and match star patterns to a database. This process creates a precise model of the sky and aligns your telescope automatically.
Here is a look at the technology inside StarSense and similar systems:
| Technology Component | Description |
|---|---|
| Camera | A small digital camera with a 1.2 megapixel CMOS sensor and 20mm f/2 doublet objective lens. |
| CPU | A dual-core 32-bit CPU running an embedded operating system. |
| Alignment Process | Uses multi-point mount modeling and compares images against a database of over 40,000 celestial objects to align the telescope. |
You can see how these features make alignment fast and accurate. StarSense can complete the process in just a few minutes. You press a button, and the system does the rest. This technology works well for both beginners and advanced users.
If you compare costs, you will notice some differences between systems:
| Product | Price |
|---|---|
| Celestron StarSense Auto Alignment System for Celestron Telescopes 94005 | $399.95 |
| Celestron StarSense Auto Alignment System for Sky-Watcher Mounts 94006 | $659.00 |
You may pay more for advanced features, but you gain speed and accuracy. These systems help you spend more time observing and less time setting up.
Manual vs. Automatic Alignment
You can choose between manual and automatic alignment based on your needs. Manual alignment requires you to move the telescope and center stars by hand. This method takes more time and practice. Automatic alignment uses technology to handle most of the work for you.
The table below shows the difference in setup time:
| Method | Setup Time (Points) | Description |
|---|---|---|
| Manual | Longer (1-6 points) | Requires manual slewing and centering of each star, which is time-consuming. |
| Automatic | Shorter (60+ points) | Can complete the alignment in 20 to 30 minutes by automatically slewing to points and imaging. |
Automatic alignment saves you time and reduces errors. You can start observing faster and enjoy more accurate results. Manual alignment gives you more control, but it can be challenging for beginners.
Tip: If you want to focus on observing or taking photos, automatic alignment is the best choice. If you enjoy learning the sky and working hands-on, manual alignment can be rewarding.
Nova Technology Company (HK) Limited stands out as a HiSilicon-designated solutions partner. The company specializes in chip-level solutions and system integration for the semiconductor and IC industry. You can find their expertise in applications such as smart electronics, IoT devices, and advanced imaging systems.
Polar Alignment and Astrophotography

Polar Alignment Steps
You can achieve accurate polar alignment by following a few essential steps. This process helps you align your telescope mount with the Earth's axis, which is crucial for successful astrophotography. Here is a simple way to perform polar alignment:
- Find Polaris. Point your mount toward the North Celestial Pole by locating Polaris, the North Star.
- Level the tripod. Make sure your tripod stands level to avoid errors in polar alignment.
- Adjust the altitude. Set your mount’s altitude to match your latitude.
These steps form the foundation of the polar alignment feature found in most modern astrophotography equipment. You can repeat them each time you set up your gear to ensure the best results.
Role in Astrophotography
Polar alignment plays a key role in astrophotography. When you align your mount with the polar axis, you allow your camera or telescope to track stars smoothly. This accuracy lets you use longer exposure times without star trailing. You can capture faint deep-sky objects with sharp detail. The polar alignment feature directly affects image clarity and optical resolution. If you skip this step, you may see blurred or elongated stars in your photos. You want to achieve the best polar alignment possible for high-quality astrophotography.
Tip: Always check your polar alignment before starting a long imaging session. Even a small error can impact your results.
Enhancing Results with Electronics
You can use electronics to improve your polar alignment feature and make the process faster. Many astrophotography equipment options now include high-precision electronic polar alignment tools. Here is how these tools work:
- Point your mount roughly toward the polar region.
- Use software to plate-solve the current frame and identify your mount’s orientation.
- Rotate the right ascension (RA) axis 60–90 degrees.
- Plate-solve again. The software calculates the offset between your polar axis and the true pole.
- Follow on-screen arrows to adjust the mount’s altitude and azimuth until the error drops below your target.
Tools like SharpCap Pro and NINA offer high accuracy for polar alignment, often reaching 30 arcseconds or better. ZWO ASIAir uses a mobile app for easy polar alignment, which is great for portable setups. Dedicated hardware such as QHY PoleMaster and iOptron iPolar can complete polar alignment in just a few minutes. These electronics help you get the most out of your polar alignment feature and improve your astrophotography results.
Troubleshooting Alignment Issues
Common Problems and Fixes
You may encounter several issues when using automatic alignment for your telescope or camera. These problems can affect your tracking accuracy and the quality of your night sky observations. Here are some frequent alignment issues and practical solutions:
- Motor faults can cause your mount to lose tracking during the night. Check power connections and listen for unusual noises.
- Misalignment often happens if you do not level your tripod or if you skip steps in the alignment process. Always double-check your setup before starting.
- Incorrect time or location settings can lead to poor tracking. Make sure you enter the correct time, date, and coordinates.
- Star misidentification can occur, especially on your first night out. Use your smartphone or star charts to confirm you are pointing at the right star.
- If your alignment seems far off, restart the procedure. Sometimes, starting fresh is the fastest fix.
Shaft alignment lasers offer a precise way to check your setup. These tools help you measure the alignment between moving parts, which keeps your tracking smooth throughout the night. Adaptive laser shaft alignment systems can adjust to different mounts and user experience levels, making them a valuable addition to your toolkit.
Avoiding Mistakes
You can prevent many alignment and tracking errors by following best practices. Common mistakes include:
- Entering military time incorrectly, especially if you forget to adjust for AM or PM.
- Double key entries, which can confuse the system and throw off alignment.
- Selecting the wrong time zone, which is especially common if you travel outside North America.
- Misidentifying alignment stars, which can happen if you rush or do not use a guide.
- Skipping the tripod leveling step, which affects tracking accuracy during the night.
Tip: If your alignment procedure seems off, do not hesitate to start over. A fresh attempt often solves the problem and improves your night sky experience.
Maintenance Tips
Regular maintenance keeps your alignment and tracking systems working well, especially during long night sessions. Follow these steps to extend the life of your electronics:
- Keep the environment clean. Dust and debris can interfere with alignment sensors and tracking motors.
- Monitor temperature and humidity. Stable conditions protect sensitive electronics during the night.
- Train yourself and others who use the equipment. Knowledge helps you spot alignment or tracking issues early.
- Use quality replacement parts. Always choose manufacturer-recommended components for repairs.
- Back up your software settings weekly. This step prevents data loss if your system crashes during a night of observing.
You should also use laser alignment tools and intelligent alignment software. These tools provide real-time feedback and help you maintain precise tracking throughout the night. Practicing shaft alignment procedures regularly will improve your system’s reliability and performance.
You can master automatic star alignment with tools you use every day. Digital cameras automate star identification and improve polar alignment accuracy. A Raspberry Pi or OpenMV lets you build a portable, cost-effective DIY camera. WiFi features allow you to control your setup from your smartphone.
- Try these methods for sharper stargazing and astrophotography.
- Explore advanced features and resources to deepen your skills.
Start your journey with everyday electronics and enjoy clearer views of the night sky.
FAQ
What is the best way to align a telescope mount for long-exposure astrophotography?
You should use a polar alignment assistant or all-star polar alignment. These tools help you align your telescope mount with the celestial pole. This process improves tracking accuracy and lets you capture sharp images during long-exposure astrophotography.
How does a polar finder scope help with imaging the night sky?
A polar finder scope helps you align your telescope mount by showing you where Polaris is. You can use it to target the correct spot in the sky. This step ensures your imaging session captures clear images of celestial objects.
Why is Polaris important for polar alignment and imaging?
Polaris marks the North Celestial Pole. When you align your telescope mount with Polaris, you improve tracking accuracy. This alignment helps you capture better images and target celestial objects for long-exposure astrophotography.
Can I use ZWO ASIAIR for polar alignment and imaging?
Yes, you can use ZWO ASIAIR as a polar alignment assistant. It guides you through the process and helps you align your telescope mount quickly. You can then capture images of the night sky and target celestial objects with ease.
What are some astrophotography tips for capturing the best image quality?
You should align your telescope mount carefully and use a polar alignment assistant. Set the correct exposure for your imaging session. Always target bright celestial objects first. Use the best astrophotography telescopes for sharper images and improved tracking accuracy.