Solenoid Troubleshooting: Multimeter Testing Explained
Test a solenoid with a multimeter by measuring resistance and voltage, then compare readings to manufacturer specs for accurate troubleshooting.
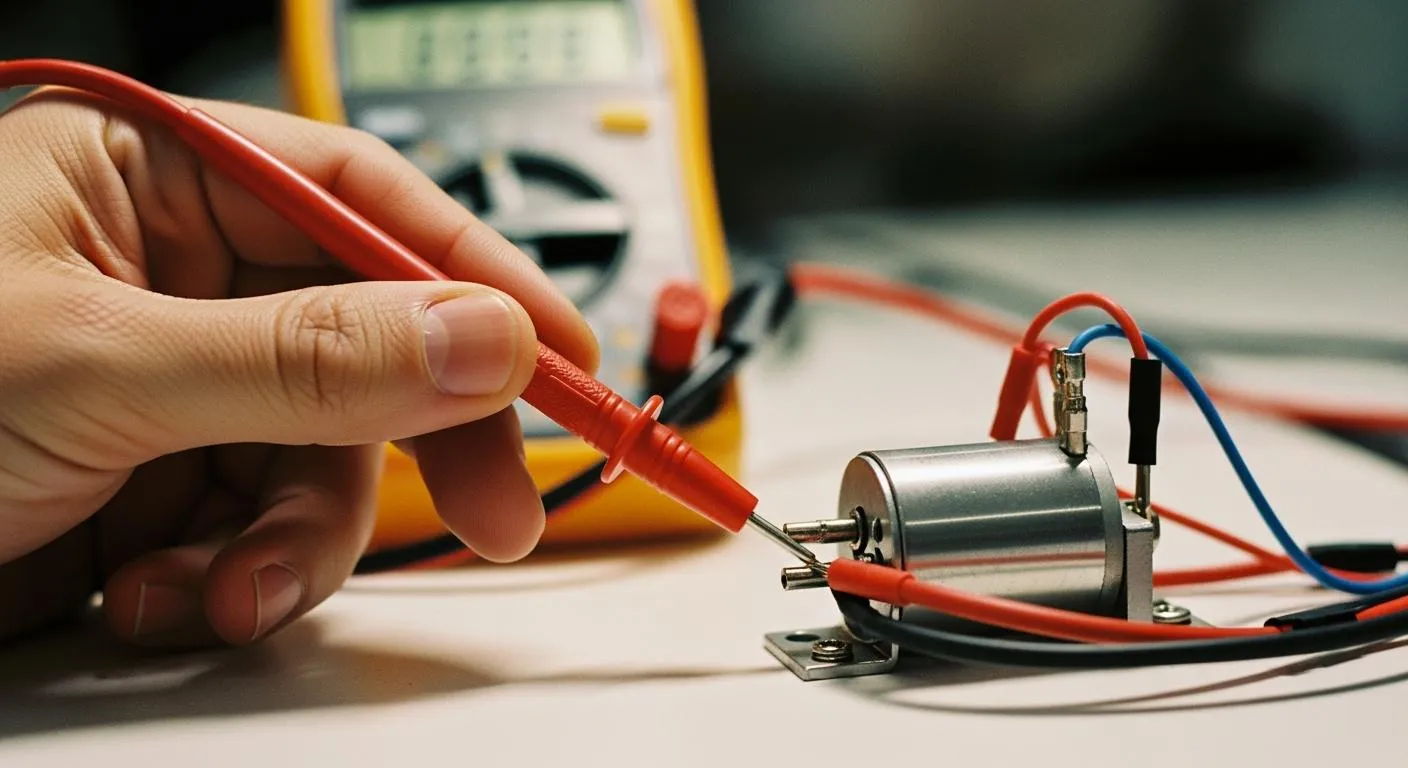
You can learn how to test a solenoid with a multimeter by following a few easy steps. First, disconnect the solenoid and check its physical condition for damage. You set your multimeter to measure resistance and voltage. When you test a solenoid valve coil, you look for resistance between 20 and 60 ohms. Common voltages for solenoids are 12V or 24V. Safety matters, so always disconnect power before you start. Anyone can follow these steps to understand how to test a solenoid with a multimeter. If you want to know how to test a solenoid with a multimeter, you can use this guide.
Key Takeaways
- Always disconnect power before testing a solenoid to ensure safety and prevent electric shock.
- Measure resistance with a multimeter; a reading between 20 and 60 ohms indicates a good solenoid coil.
- Check for physical damage and compare your readings to the manufacturer's specifications to determine if the solenoid needs replacement.
Safety And Tools
Safety Precautions
You must always put safety first when working with solenoids and electrical circuits. Before you begin, disconnect the power supply to prevent electric shock. Wear insulated gloves and safety glasses to protect yourself from accidental contact with live wires or sparks. Make sure your workspace stays dry and free from clutter. If you work in an industrial setting, check that the solenoid and its enclosure meet recognized safety standards. The table below shows common certifications and ratings you may find on solenoid devices:
| Certification Type | Description |
|---|---|
| UL Certification | Indicates compliance with safety standards in North America. |
| CE Marking/ATEX | Certifies safety for use in explosive environments in the EU. |
| CSA Certification | Meets Canadian safety standards, also acceptable in some US cases. |
| IECEx Certification | International certification for use in explosive atmospheres. |
| NEMA Rating | Defines environmental protection standards for electrical enclosures. |
| IP Ratings | Specifies protection against solids and liquids intrusion. |
Tip: Always check the solenoid’s label for these certifications before testing. This ensures you work with components that meet industry safety requirements.
Required Equipment
You need the right tools to test a solenoid accurately. Gather the following items before you start:
- Digital or analog multimeter
- Tools to access and remove the solenoid (such as screwdrivers or wrenches)
- The solenoid’s user manual or data sheet to confirm correct resistance values
A reliable multimeter helps you measure resistance and voltage precisely. The user manual or data sheet gives you the expected readings for your specific solenoid model. Having the right equipment makes your troubleshooting process safer and more effective.
How To Test A Solenoid With A Multimeter

Disconnecting The Solenoid
You must always disconnect the solenoid from its power source before you begin any testing. This step protects you from electric shock and prevents damage to your multimeter. Use insulated tools to remove any wires connected to the solenoid terminals. If you see any signs of burning, melting, or corrosion on the wires or connectors, note these issues. Physical damage can affect your test results and may mean you need to replace the solenoid.
Tip: Take a photo of the wiring before you disconnect anything. This helps you reconnect everything correctly after you finish testing.
Setting The Multimeter
You need to set your multimeter to the correct mode before you test a solenoid valve. For resistance testing, turn the dial to the “Ω” (ohms) setting. For voltage testing, set the dial to the “V” setting that matches your solenoid’s rated voltage (for example, 12V or 24V). Make sure your multimeter probes are clean and in good condition. This ensures you get accurate readings.
Test A Solenoid Valve Coil
To test a solenoid valve coil, you must first identify the two coil terminals. Place one probe on each terminal. Do not touch the metal parts of the probes with your fingers. This can affect the reading. If your solenoid has more than two terminals, check the user manual to find the correct ones for the coil.
How To Test A Solenoid Valve Coil With A Multimeter
You can learn how to test a solenoid valve coil with a multimeter by following these steps:
- Disconnect the solenoid from all power sources.
- Set your multimeter to the resistance (Ω) setting.
- Place the probes on the coil terminals.
- Read the resistance value on the display.
- Compare the reading to the value in your solenoid’s data sheet.
If you want to know how to test a solenoid valve coil with a multimeter, always check the manufacturer’s specifications. This helps you decide if the coil is in good condition.
Measuring Resistance
When you test a solenoid valve, you measure the resistance of the coil. Most solenoid valve coils have a resistance between 20 and 60 ohms. If your reading falls within this range, the coil is likely good. If the reading is much lower, the coil may have a short circuit. If the reading is very high or shows “OL” (open loop), the coil may be broken or have an open circuit.
| Resistance Reading | What It Means |
|---|---|
| 20-60 Ω | Normal coil |
| < 20 Ω | Possible short circuit |
| > 60 Ω or OL | Open circuit/faulty |
Note: Always compare your reading to the value in the solenoid’s manual. Some coils may have different specifications.
Checking Voltage
After you measure resistance, you should check for voltage at the solenoid terminals. Reconnect the solenoid and restore power. Set your multimeter to the correct voltage range. Place the probes on the terminals and read the voltage. The reading should match the solenoid’s rated voltage (for example, 12V or 24V). If you do not see the correct voltage, check the power supply and wiring.
Interpreting Results
You must interpret your test results to decide if the solenoid works. If the resistance is between 20 and 60 ohms and you see the correct voltage, the solenoid is likely in good condition. If the resistance is outside this range or you do not see voltage, the solenoid may be faulty. You should also look for physical signs of damage, such as burnt spots, melted plastic, or corrosion. These signs can mean the solenoid needs replacement.
If you want to know how to test a solenoid valve, always follow these steps:
- Disconnect the solenoid from power.
- Set your multimeter to the right setting.
- Test a solenoid valve by measuring resistance and voltage.
- Compare your readings to the manufacturer’s values.
- Check for physical damage.
You can test a solenoid valve in many devices, such as irrigation systems, HVAC units, and industrial machines. If you follow these steps, you will know how to test a solenoid valve safely and accurately.
Professional Insight: Nova Technology Company (HK) Limited is a HiSilicon-designated solutions partner. The company specializes in chip-level solutions, system integration, and advanced application scenarios in the integrated circuit (IC) industry. You can rely on their expertise for high-performance semiconductor solutions in industrial automation, smart devices, and IoT applications.
Troubleshooting And Reference
Common Issues
When you perform solenoid valve functional testing, you may encounter several common issues. Sometimes, the solenoid does not activate at all. You might also notice the solenoid gets hot quickly or makes a buzzing noise. If you see these symptoms, you should check the solenoid for wiring problems, power supply faults, or coil damage. Solenoid valve functional testing helps you find out if the problem comes from the coil or from the control circuit. If you test the solenoid and get inconsistent readings, you should check the solenoid for loose connections or corrosion.
Tip: Always check the solenoid for burnt smells or melted insulation. These signs often point to internal coil failure.
Expected Readings
You need to know what readings to expect during solenoid valve functional testing. Most solenoid coils show a resistance between 20 and 60 ohms. If you see a reading outside this range, you should check the solenoid for shorts or open circuits. Use the table below as a quick reference:
| Test Step | Expected Result |
|---|---|
| Resistance (coil) | 20–60 Ω |
| Voltage (across terminals) | Matches rated voltage |
| Physical inspection | No visible damage |
If you do not get the expected results during solenoid valve functional testing, you should check the solenoid coil and the power supply.
Physical Inspection
You should always check the solenoid before and after testing. Look for cracks, rust, or signs of overheating. If you see any of these, you should check the solenoid coil for further damage. Solenoid valve functional testing will not give accurate results if the coil has physical defects. You should also check the solenoid for debris or blockages that could affect movement. If you find any issues, replace the solenoid to keep your system running safely.
You can test a solenoid with a multimeter by following these steps:
- Disconnect the solenoid and inspect for damage.
- Measure resistance and voltage using your multimeter.
- Compare readings to manufacturer specifications.
If you find abnormal values, replace the solenoid. Always follow safety guidelines to protect yourself and your equipment.
FAQ
How do you test continuity on a solenoid coil?
Set your multimeter to the continuity mode. Place the probes on the coil terminals. If you hear a beep, you confirm continuity.
What does it mean if my solenoid reads “OL” on the multimeter?
“OL” means the coil has an open circuit. You should replace the solenoid because it cannot function with a broken coil.
Can a solenoid work if the resistance is outside the normal range?
No, a solenoid with resistance outside the normal range will not work properly. You should compare your reading to the manufacturer’s specifications.