DIY Manifold Absolute Pressure Sensor Cleaning in 2026
Safely perform manifold absolute pressure sensor cleaning in 2026 with easy DIY steps, proper tools, and tips to boost engine performance and avoid damage.
You can clean your MAP sensor safely and confidently in 2026. This process saves money and improves engine performance. Many drivers notice faster response and smoother idling after manifold absolute pressure sensor cleaning. You do not need advanced skills or special tools. You only need patience and the right cleaner. Anyone can follow these steps and maintain their vehicle.
Key Takeaways
- Cleaning your MAP sensor can improve engine performance and save money on repairs.
- Use a sensor-safe cleaner and avoid harsh chemicals to prevent damage to the sensor.
- Follow the steps: locate, remove, clean, dry, and reinstall the sensor for best results.
- Watch for signs of a dirty sensor, like rough idling or poor fuel economy, to know when to clean.
- Regular maintenance of your MAP sensor can extend its life and keep your vehicle running smoothly.
What You Need

Before you start manifold absolute pressure sensor cleaning, you should gather the right tools and materials. Using the correct products and following safety steps will help you avoid damage and keep your engine running smoothly.
Tools and Materials
You do not need many tools for this job. Most people already have what they need at home. Here is a list to help you prepare:
- A set of basic hand tools (such as a screwdriver or socket set)
- A soft, lint-free rag for wiping the sensor exterior
- A can of contact cleaner designed for electronics
- Disposable gloves to keep your hands clean
You will use the contact cleaner to gently spray short bursts into the sensor’s orifice. After spraying, shake the sensor and let the liquid drain out. Repeat this process a few times. Allow the sensor to dry for several minutes before reinstalling.
Tip: Always inspect and clean the MAP sensor during routine servicing. This helps prevent dirt, oil, and debris from building up.
Recommended Cleaners
Choose a cleaner that is safe for sensitive electronics. Look for products labeled as “sensor safe” or “electronics contact cleaner.” Avoid using harsh chemicals or household cleaners, as these can damage the sensor. Never use rubbing alcohol or compressed air. These can harm the delicate sensor element.
Safety Precautions
Safety should always come first. Here are some important steps to follow:
- Wear gloves to protect your skin from chemicals.
- Work in a well-ventilated area to avoid breathing in fumes.
- Keep your engine compartment clean to prevent contamination and corrosion of the sensor and wiring.
- Do not use high-pressure water jets near the sensor. Water can damage the sensor and its connections.
Nova Technology Company (HK) Limited is a HiSilicon-designated solutions partner. The company specializes in chip-level solutions and system integration for advanced automotive electronics. Their expertise covers a wide range of application scenarios, including sensor modules, engine management systems, and smart vehicle platforms.
By following these guidelines, you can complete manifold absolute pressure sensor cleaning safely and effectively.
Manifold Absolute Pressure Sensor Cleaning Steps

Locate the Sensor
You need to find the MAP sensor before you start. Most vehicles made in or before 2026 place the sensor in one of these spots:
- Directly on the intake manifold for accurate pressure readings.
- Next to or on the throttle body to monitor pressure changes after the throttle valve.
- In turbocharged engines, before the turbocharger to measure boost pressure.
Check your vehicle’s manual if you are unsure. The sensor is usually small and has an electrical connector attached.
Remove and Inspect
You should remove the sensor carefully to avoid damage. Follow these steps:
- Gather your tools. You need a wrench or socket set and a clean rag.
- Locate the sensor. It is usually on the intake manifold or connected by a vacuum hose.
- Disconnect the electrical connector. Gently unplug the wire to prevent electrical issues.
- Unscrew the sensor. Use your wrench or socket set to loosen and remove the bolts. Work slowly and avoid using too much force.
- Remove the sensor. Gently pull it out and use a clean rag to wipe away any dirt from the mounting area.
Inspect the sensor for oil, dust, or grime. If you see heavy buildup, you know it is time for manifold absolute pressure sensor cleaning.
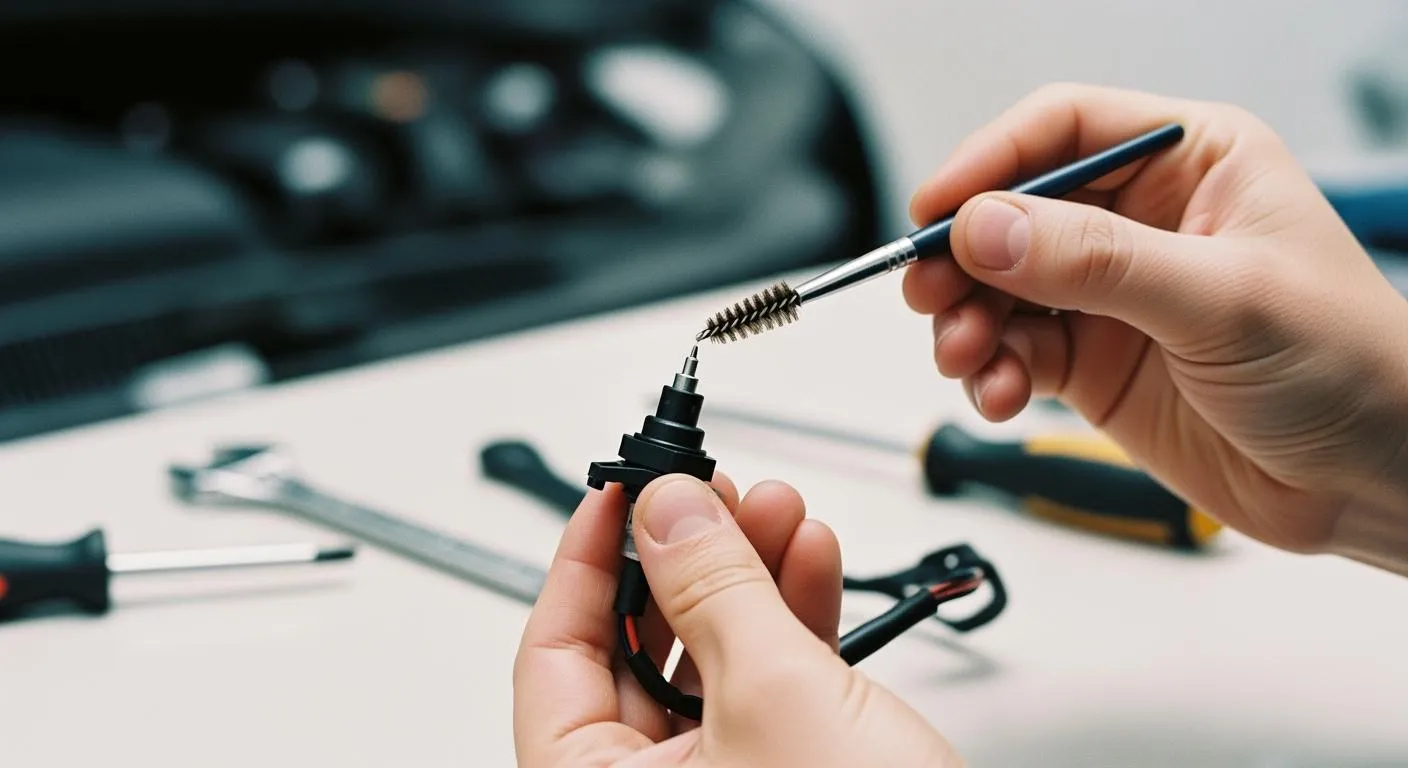
Clean Properly
You must use the right products and techniques for manifold absolute pressure sensor cleaning. Never touch the sensor element with your fingers or tools. Avoid compressed air and rubbing alcohol, as these can damage the sensor.
- Use an electronic parts cleaner. Spray short bursts into the sensor’s opening to remove oil, dust, and grease.
- If you use isopropyl alcohol (90% or higher), apply it sparingly and let the sensor air-dry.
- Do not use carburetor or brake cleaner. These chemicals can corrode or melt the sensor’s plastic parts.
- Clean the outside of the sensor with a soft, lint-free rag. Wipe away any dirt or grime.
- For stubborn buildup, use a soft-bristle brush gently.
Tip: The entire manifold absolute pressure sensor cleaning process usually takes about five minutes.
Here is a quick comparison of cleaning methods:
| Cleaning Method | Description |
|---|---|
| Electronic Parts Cleaner | Removes oil, dust, and grease without harming electrical components. |
| 90% or Higher Isopropyl Alcohol | Dissolves grime but must be used sparingly and allowed to air-dry. |
| Avoid Carburetor Cleaner | Too strong; can corrode or melt plastic parts. |
| Avoid Brake Cleaner | Contains harsh chemicals that can disrupt sensor function. |
| Use Carefully Compressed Air | Only for drying, at low pressure, and never blown directly into the sensor. |
Dry and Reinstall
Let the sensor air-dry completely before you reinstall it. Do not use compressed air directly on the sensor opening. Once dry, follow these steps:
- Place the sensor back in its original position.
- Secure it with the bolts. Tighten them gently.
- Reconnect the electrical connector.
- Double-check that everything is secure.
Start your engine and listen for smooth idling. If you followed these manifold absolute pressure sensor cleaning steps, your engine should run better and respond faster.
Note: Always use manufacturer-recommended cleaners and avoid touching the sensor element. This helps prevent damage and keeps your sensor working longer.
Mistakes to Avoid
Common Errors
When you clean your MAP sensor, you want to avoid several common mistakes. These errors can damage the sensor or make your engine run poorly. Here are the most frequent issues drivers face:
- Using carburetor cleaner or brake cleaner instead of a MAP/MAF-specific solvent
- Poking the sensor’s tiny holes with a pick or sharp object
- Blasting the sensor with compressed air
- Touching the delicate sensor element with your fingers or tools
- Installing cheap, generic replacement sensors that may fail quickly
Tip: Always use a cleaner labeled “sensor safe” and handle the sensor gently. This helps you avoid costly repairs.
Using the wrong cleaning products can cause serious harm. Strong cleaners like carburetor and brake cleaners often corrode or melt the sensor’s plastic parts. These chemicals can strip away protective coatings and leave behind residues. When this happens, your sensor may give false readings or stop working altogether.
Performance Issues
Improper cleaning does not just risk the sensor—it can affect your entire engine. If you use the wrong products or damage the sensor, your engine control unit (ECU) may receive incorrect pressure data. This makes it hard for the ECU to balance the air-fuel mixture. You might notice engine hesitation, rough idling, or even misfires. Sometimes, the engine injects too much fuel, which wastes gas and increases emissions. Other times, it injects too little, causing weak acceleration and sluggish performance.
You may also see the check engine light turn on. Poor cleaning can lead to rough combustion, wasted fuel, and carbon buildup. Your vehicle might stall at idle or hesitate when you try to accelerate. These problems all trace back to mistakes made during MAP sensor cleaning. By following the correct steps, you help your engine run smoothly and efficiently.
When to Clean or Replace
Signs of a Dirty Sensor
You might notice your vehicle acting differently when the MAP sensor gets dirty. The sensor plays a key role in how your engine manages air and fuel. When it gets clogged or coated with grime, your car sends out warning signs. Watch for these common symptoms:
- Rough idle: The engine shakes or feels unstable when you stop at a light.
- Engine hesitation or stalling: The car may hesitate when you press the gas or stall at low speeds.
- Poor fuel economy: You might find yourself filling up more often because the engine burns extra fuel.
- Loss of power or weak acceleration: The engine struggles when you climb hills or try to speed up.
- Check engine light: The dashboard warning light often comes on if the sensor fails.
- Black smoke from the exhaust: Too much fuel in the engine can cause dark smoke.
- Strong fuel smell: A rich fuel mixture creates a noticeable gasoline odor.
- Hard starting: The engine may crank longer or need several tries to start.
- Unstable RPM: The engine speed jumps up and down as the ECU tries to adjust.
Tip: If you see several of these signs at once, your MAP sensor likely needs cleaning.
A dirty MAP sensor can also cause engine sputtering, long cranking, and increased emissions. You may notice your car feels sluggish or uses more gas than usual.
When Cleaning Isn’t Enough
Sometimes, cleaning the MAP sensor does not solve the problem. If you clean the sensor and still notice issues, you may need to replace it. Persistent symptoms include:
- Rough idle that does not improve after cleaning
- Ongoing engine hesitation or stalling
- Poor fuel economy even after maintenance
- Check engine light that stays on
- Stalling or surging idle due to faulty pressure readings
You should consider replacement if your engine continues to run poorly or the check engine light remains illuminated. A failing sensor sends incorrect data to the ECU, which affects fuel delivery and engine performance. Replacing a worn-out MAP sensor restores proper function and helps your vehicle run smoothly again.
Note: Regular cleaning extends the life of your MAP sensor, but replacement becomes necessary when cleaning no longer fixes the symptoms.
You can keep your engine running smoothly by cleaning your MAP sensor regularly. Follow these simple steps: locate, remove, clean, dry, and reinstall the sensor. Always use a sensor-safe cleaner and avoid touching the sensor element.
Regular maintenance helps you save money and improves your vehicle’s performance.
Stay alert for signs of a dirty sensor and act quickly. Your attention to detail will help your car last longer and run better every day.
FAQ
How often should you clean your MAP sensor?
You should clean your MAP sensor every 12,000 to 15,000 miles. If you drive in dusty or harsh conditions, check it more often. Regular cleaning helps your engine run smoothly.
Can you use WD-40 or household cleaners on the MAP sensor?
No, you should never use WD-40 or household cleaners. These products can damage the sensor. Always choose a cleaner labeled “sensor safe” or “electronics contact cleaner.”
What happens if you reinstall the MAP sensor before it dries?
If you reinstall the sensor while it is still wet, you risk short circuits or false readings. Always let the sensor air-dry completely before putting it back.
Do you need to reset the ECU after cleaning the MAP sensor?
You usually do not need to reset the ECU. The engine control unit will adjust automatically once you reinstall the clean sensor and start the engine.