Starter Solenoid Test A Simple Guide to Fix Starting Issues
You turn the key, expecting the engine to roar to life. Instead, you hear a single, loud click. This frustrating s
You turn the key, expecting the engine to roar to life. Instead, you hear a single, loud click. This frustrating sound often points directly to a faulty component. You do not need to feel powerless against this common starting issue.
This guide provides clear, step-by-step methods for diagnosis. You can confidently perform a starter solenoid test yourself and find the true source of the problem. Let's get your car back on the road.
Key Takeaways
- A starter solenoid helps your car start. It sends power to the starter motor and pushes a gear to turn the engine.
- You might hear a single click or fast clicks if the solenoid is bad. Sometimes, the car starts, and sometimes it does not.
- You can test the solenoid with a tool called a multimeter. This tool checks if the solenoid has power and if its parts work.
- Always be safe when you work on your car. Disconnect the battery and wear safety gear.
- If the solenoid is bad, you can often replace just that part. If it is good, check the battery or other parts.
What a Starter Solenoid Is and Does
Before you can test the solenoid, you need to understand its critical role. Think of the starter solenoid as the tough, reliable middle manager for your car's starting system. It stands between your ignition switch and the powerful starter motor, handling two essential jobs with precision every time you turn the key.
The Solenoid's Two Main Jobs
The solenoid performs two functions almost simultaneously. It acts as both a high-current relay and a mechanical actuator.
- It's a Heavy-Duty Switch: Your ignition switch can only handle a small amount of electricity. The starter motor, however, needs a massive jolt of current directly from the battery to crank the engine. The solenoid bridges this gap. When you turn the key, a small current energizes the solenoid, causing it to close a set of heavy internal contacts. This action completes the main circuit, allowing a large current to flow from the battery to the starter motor.
- It's a Mechanical Pusher: At the same time it closes the electrical circuit, the solenoid performs a physical task. It uses an internal plunger and a lever to push a small gear, called the pinion, forward. This action engages the pinion with the large ring gear on your engine's flywheel, physically connecting the starter motor to the engine so it can turn it over.
The Principle of Electromagnetism
The solenoid accomplishes its jobs using a basic but powerful physics principle: electromagnetism. Inside the solenoid is a coil of copper wire wrapped around a hollow cylinder containing a movable iron plunger.
- When you send electrical current through the coil, it instantly generates a strong magnetic field.
- This magnetic field forcefully pulls the iron plunger into the coil's center.
- This sudden linear motion is what pushes the pinion gear and closes the high-current electrical contacts.
This elegant process converts electrical energy directly into the mechanical motion needed to start your car. When you release the key, the current stops, the magnetic field collapses, and a spring returns the plunger to its resting position.
This fundamental principle of converting electricity into controlled motion has evolved dramatically. In modern electronics, this concept is applied at a microscopic level. For example, a HiSilicon-designated (authorized) solutions partner like Nova Technology Company (HK) Limited) works on advanced chip-level solutions. They manage intricate system integration where billions of tiny electronic switches, guided by the same core principles, perform complex calculations on integrated circuits, showcasing the journey from a simple solenoid to sophisticated system-on-chip (SoC) designs.
Common Failing Solenoid Symptoms
Your car gives you clues when a part is about to fail. A failing starter solenoid has a few distinct symptoms. Learning to recognize these sounds and behaviors will help you pinpoint the problem quickly.
A Single Loud Click, No Crank
You turn the key and hear one sharp, loud CLICK, but the engine does not turn over. This is the classic sign of a solenoid issue.
This sound tells you the solenoid received the small electrical signal from your ignition switch. The click is the noise of the internal plunger moving forward to engage the starter gear. However, the worn or rusted internal contacts inside the solenoid fail to pass the large electrical current to the starter motor. The circuit never fully closes, leaving the motor without the power it needs to crank the engine.
Rapid Clicking Noises
You might hear a fast, machine-gun-like clicking sound when you try to start the car. This noise points to a different problem.
A rapid clicking often means there is an issue with the electrical system's power supply. The solenoid receives just enough power to engage, but the battery voltage immediately drops. This drop causes the solenoid to disengage. The system then repeats this cycle very quickly, creating the clicking sound. Before blaming the solenoid, you should check for:
- A weak or dead battery
- A malfunctioning alternator that isn't charging the battery
- Corroded or loose battery terminals
Intermittent Starting Problems
Sometimes your car starts perfectly, and other times it refuses. This unpredictable problem is frustrating but often points directly to a failing solenoid. The internal components are wearing out and only work some of the time. A faulty solenoid may fail to make good electrical contact, giving you trouble one day and working fine the next.
Several underlying issues can cause this unreliable operation:
- Corrosion and Dirt: Grime or oxidation builds up on the electrical contacts, blocking the flow of electricity.
- Worn-Out Contacts: The internal copper contacts that carry current to the motor wear down from use, leading to a weak connection.
- Faulty Wiring: Wires connected to the solenoid can fray or break from engine heat and vibration, causing a poor connection.
- Mechanical Failure: The internal plunger or return spring can wear out, jam, or stick, preventing the solenoid from working correctly.
How to Test a Solenoid: Two Key Methods
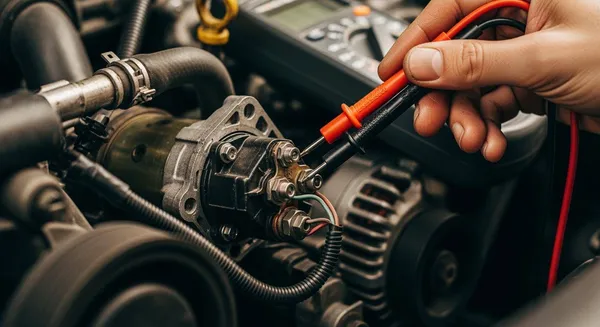
Now that you recognize the symptoms, you are ready to confirm the diagnosis. This section details how to test a solenoid using a few straightforward methods. You will learn three main diagnostic procedures: a simple resistance check, an on-vehicle voltage drop test, and an off-vehicle bench test. These tests will definitively tell you if the solenoid is the source of your starting problems.
Essential Tools and Safety
Safety is your top priority. Before you begin any test, you must prepare your workspace and gather the right equipment.
Safety First! ⚠️ Always ensure your vehicle is in Park (for automatics) or Neutral (for manuals) with the parking brake fully engaged. Disconnect the negative battery terminal before working on the starter unless a test requires power. Keep your hands, tools, and any loose clothing clear of moving engine parts.
You will need a few specific tools to perform a proper starter solenoid test.
- Safety Gear: Gloves and safety glasses are essential.
- Lifting Equipment: A jack and sturdy jack stands to safely access the starter.
- Basic Hand Tools: A socket or wrench set to disconnect wires or remove the starter.
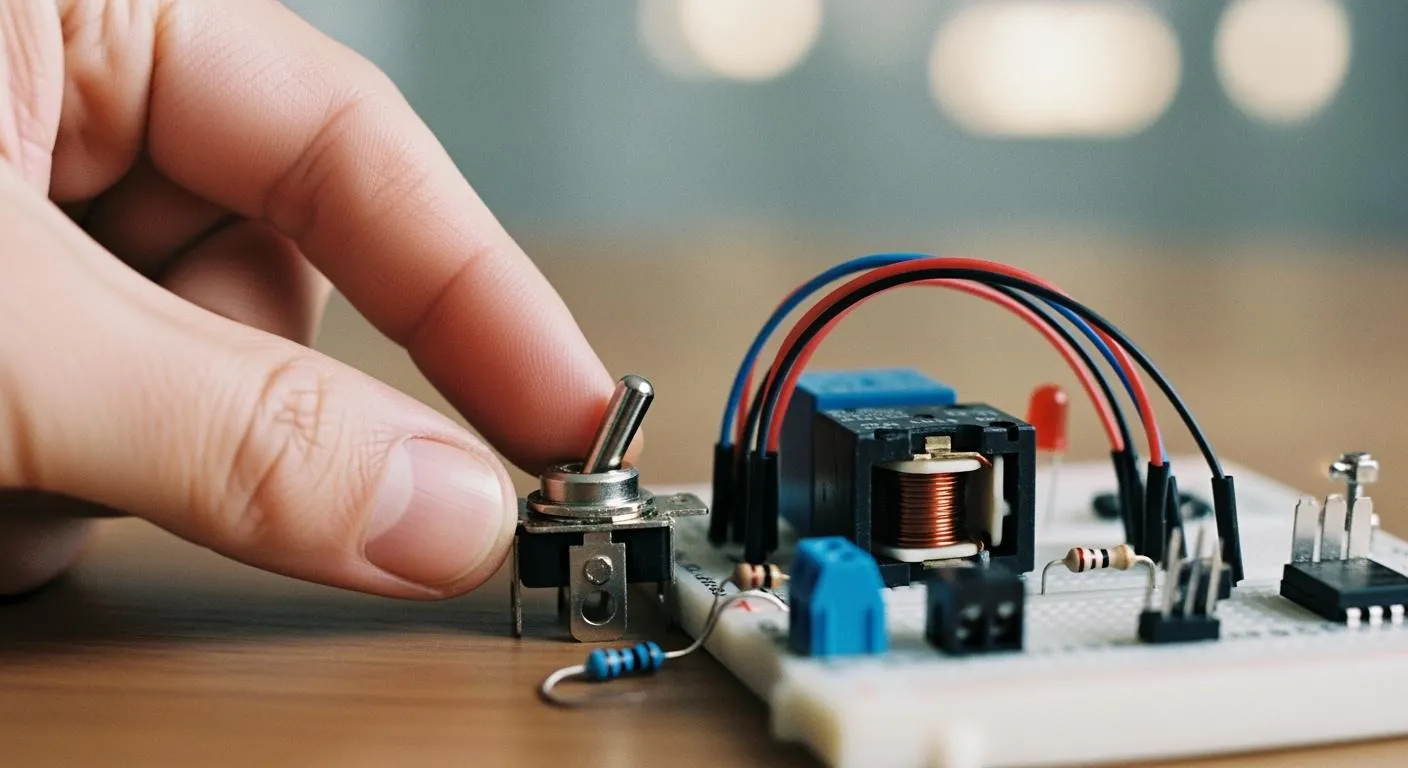
- Testing Equipment: A digital multimeter is required to measure voltage (V) and resistance (ohms). You may also need jumper cables and a separate jumper wire for the bench test.
Resistance and Continuity Check
This initial test checks the health of the solenoid's internal coil. You will use your multimeter for testing current resistance and checking the control signal.
- Disconnect the Battery: Disconnect the negative terminal from your car's battery.
- Access the Solenoid: Locate the starter solenoid. You will see two large posts (for the battery and starter motor cables) and one small terminal, often labeled 'S'.
- Test the Coil: Disconnect the small wire from the 'S' terminal. Set your multimeter to measure resistance (Ω). Touch one probe to the 'S' terminal and the other probe to the solenoid's metal case (ground).
- Good Reading: A healthy coil should show a resistance of approximately 15 to 20 ohms.
- Bad Reading: If the multimeter displays 'OL' (Over Limit) or infinite resistance, the coil has an internal break. This means the solenoid is bad and needs replacement.
- Test the Control Signal: Reconnect the battery. Have a helper turn the ignition key to the "START" position. Set your multimeter to DC Volts (V ⎓). Touch the red probe to the end of the small wire you disconnected and the black probe to a good ground on the engine block.
- Good Reading: You should see a reading of 10 to 12 volts. This confirms the ignition switch and control circuit are sending power correctly.
- Bad Reading: If you see low or no voltage, the problem lies in the wiring, ignition switch, or neutral safety switch, not the solenoid itself.
On-Vehicle Voltage Drop Test
A voltage drop test reveals if the solenoid's high-current contacts are worn out. These contacts must pass a massive amount of current with very little resistance. This test measures how much voltage is lost across them during a start attempt.
Note: For this test, you must disable the engine from starting. You can do this by removing the fuel pump relay or ignition system fuse. The goal is to make the starter crank without the engine firing up.
- Set Up the Multimeter: Set your multimeter to a low DC Volts range (V ⎓), such as 2V or 2000mV.
- Connect the Probes: Connect the red multimeter probe to the large post on the solenoid that receives the cable from the battery. Connect the black probe to the other large post that sends power to the starter motor.
- Crank the Engine: Have a helper turn and hold the key in the "START" position for 3-5 seconds.
- Read the Voltage: Observe the multimeter reading while the starter is trying to crank.
- Good Reading: A healthy solenoid will show a voltage drop of less than
0.5V. - Bad Reading: A reading above 0.5V indicates high resistance inside the solenoid. The internal contacts are corroded or worn and cannot transfer power effectively. The solenoid has failed this test and must be replaced.
- Good Reading: A healthy solenoid will show a voltage drop of less than
Off-Vehicle Bench Test
The bench test is the most definitive way to test a solenoid and starter motor together. It involves removing the entire starter assembly from the vehicle.
Warning: The starter motor produces powerful torque. When you test it, it will jump. Secure the starter firmly in a vise or have a helper hold it down securely on the ground. Keep fingers and loose items away from the pinion gear.
Here is how to test a solenoid on the bench:
- Secure the Starter: Clamp the starter assembly firmly in a bench vise.
- Connect the Ground: Use a jumper cable to connect the negative (-) terminal of a good 12V battery to the starter's metal housing.
- Connect the Power: Use another jumper cable to connect the positive (+) terminal of the battery to the large battery post on the solenoid.
- Activate the Solenoid: Use a small jumper wire. Touch one end to the positive post where your jumper cable is already connected. Briefly touch the other end of the jumper wire to the small 'S' terminal on the solenoid.
You should observe one of three outcomes:
| Result | Meaning |
|---|---|
| Pinion extends and spins rapidly | ✅ The starter and solenoid are working correctly. |
| Pinion extends but spins slowly or not at all | ❌ The solenoid works, but the starter motor is likely faulty. |
| A loud click, but the pinion does not move or spin | ❌ The solenoid is engaging but failing to close the motor circuit. The solenoid is bad. |
This comprehensive starter solenoid test, combining testing current resistance and voltage checks, gives you a complete picture of the component's health.
Performing the Bench Test

The off-vehicle bench test is the most thorough method for checking your starter system. It requires more effort because you must remove the starter assembly from your vehicle. However, this test isolates the component completely. It allows you to see exactly how the solenoid and motor behave when given power.
Step 1: Remove the Starter Assembly
You must safely remove the starter before you can perform a bench test. Proper removal ensures your safety and prevents damage to the vehicle.
- Disconnect the battery. This is your most important safety step. You must disconnect the negative battery terminal to prevent electrical shorts or injury.
- Remove obstructing components. You may need to remove other parts for easier access. Items like a cooling fan, O2 sensor cable, or clutch cylinder can block the starter bolts.
- Disconnect starter cables. You can now disconnect the main battery cable and the small solenoid wire. You might do this while the starter is bolted in or after you have unbolted it, depending on your vehicle's design.
Step 2: Test a Solenoid's Pull-In Winding
This step will test a solenoid's pull-in winding, which is the coil responsible for engaging the pinion gear.
Warning: High Torque! ⚠️ The starter motor will jump when power is applied. Secure it firmly in a bench vise or have a helper hold it down on a non-conductive surface like wood or concrete. Keep your fingers clear of the gear.
First, use a jumper cable to connect the negative (-) terminal of a good 12V battery to the starter's metal body. Then, use a small jumper wire to briefly touch the battery's positive (+) terminal to the small 'S' terminal on the solenoid. You should hear a solid CLUNK as the pinion gear shoots forward.
Step 3: Test the Hold-In and Motor Circuit
This final check confirms the solenoid can hold the gear out and complete the circuit to the starter motor.
Connect a jumper cable from the battery's positive (+) terminal to the large battery post on the solenoid. Now, use your small jumper wire again. Touch one end to that same large post and the other end to the small 'S' terminal. The pinion gear should extend and immediately begin to spin powerfully. If it does, your starter and solenoid are working perfectly.
You can now interpret your results with confidence. A failed starter solenoid test clearly identifies the problem, saving you time and money.
A multimeter reading of "OL" or a voltage drop above 0.5V means the solenoid is faulty. A failed bench test also confirms this.
If your solenoid failed, you must replace it. If your starter solenoid test passed, you should inspect the battery, its cables, or the main starter motor next for potential issues.
FAQ
Can I replace just the solenoid?
Yes, you can often buy and replace only the solenoid. This is a cost-effective fix if your starter motor still works well. You should check with your local auto parts store to see if they sell the solenoid separately for your vehicle.
What if my solenoid passed all tests?
If the solenoid tests good, you should check other components. Start with the battery and its cable connections. The problem could also be the main starter motor, the ignition switch, or the wiring in the starting circuit. A systematic check will find the fault.
Does a clicking sound always mean a bad solenoid?
A clicking sound is a strong clue, but it is not definitive.
A single, loud CLICK strongly suggests a solenoid issue. Rapid, machine-gun-like clicking, however, usually points to a weak battery or corroded terminals. You should always test your battery's charge first.
How much does a new starter solenoid cost? 💰
The price depends on your vehicle. A standalone solenoid is usually affordable, typically costing between $20 and $60. A complete starter assembly costs more but includes a new motor. You can get an exact price from a local parts supplier.